How to Print Multiple PowerPoint Slides on One Page (Handouts)
Learn how to print multiple PowerPoint slides on one page to create useful handouts. Save paper for exams, lessons, or personal notes with these easy print settings.
Do you need to print your PowerPoint presentation slides for study, a lesson, or to save paper? Creating handouts with multiple slides on a single page is an incredibly efficient way to review content, take notes, and conserve resources. This guide will walk you through the simple steps to print multiple PowerPoint slides on one page, covering popular versions like PowerPoint 2016, 2019, and Microsoft 365. You'll learn how to customize your PowerPoint print settings to produce perfect PowerPoint handouts every time.
Open Your PowerPoint Presentation
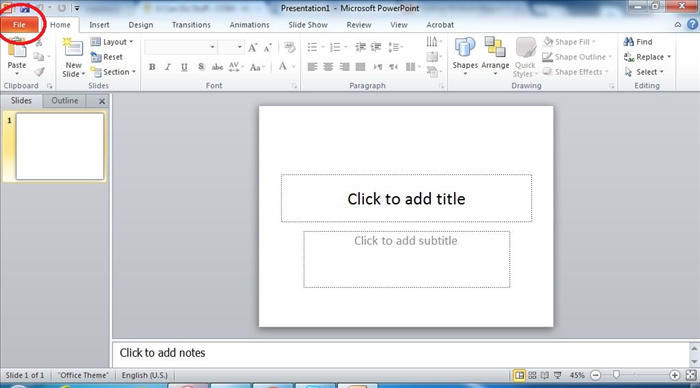
Before you can print multiple slides per page, you need to open the specific PowerPoint file you wish to convert into handouts. Ensure all your slides are finalized, proofread, and ready for printing to avoid re-printing.
Access the Print Menu
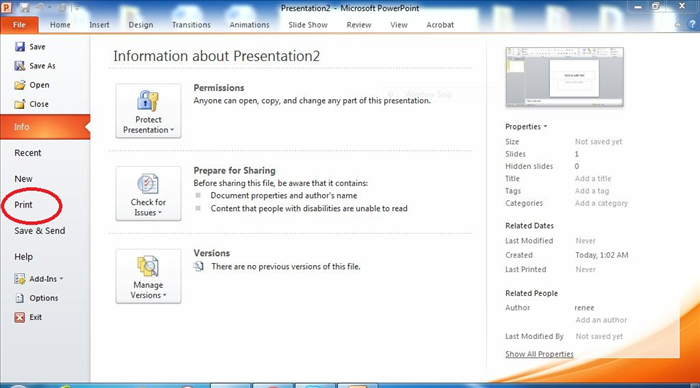
Once your presentation is open, navigate to the print options. This is the gateway to configuring your PowerPoint presentation print setup.
1. Click on the 'File' tab in the top-left corner of your PowerPoint window. This will open the Backstage view.
2. From the sidebar menu on the left, select 'Print'. Alternatively, you can use the universal keyboard shortcut: Ctrl+P (on Windows) or Cmd+P (on Mac).
Choose the Handouts Print Layout
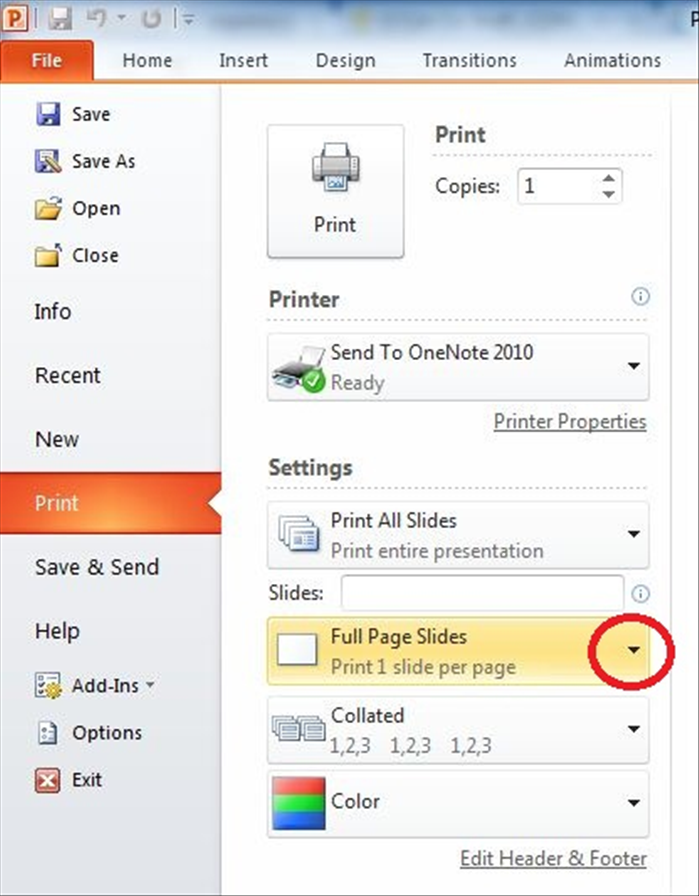
In the Print dialog box, you'll see various print settings and a print preview area. To create PowerPoint handouts, you need to change the default 'Full Page Slides' setting.
1. Under the 'Settings' section, locate the dropdown menu that currently says 'Full Page Slides' (or similar, depending on your PowerPoint version).
2. Click this dropdown. A list of printing options will appear. Look for the 'Print Layout' or 'Handouts' section. Select 'Handouts' from the available options. This is a crucial step for customizing PowerPoint print layout.
When deciding on the number of slides per page, consider your purpose. For detailed study or notes, 3 slides per page with lines offers ample space. For quick review, broad overviews, or to save paper PowerPoint printing, 6 or 9 slides per page might be more suitable. Always check the print preview to ensure readability.
Select Number of Slides Per Page
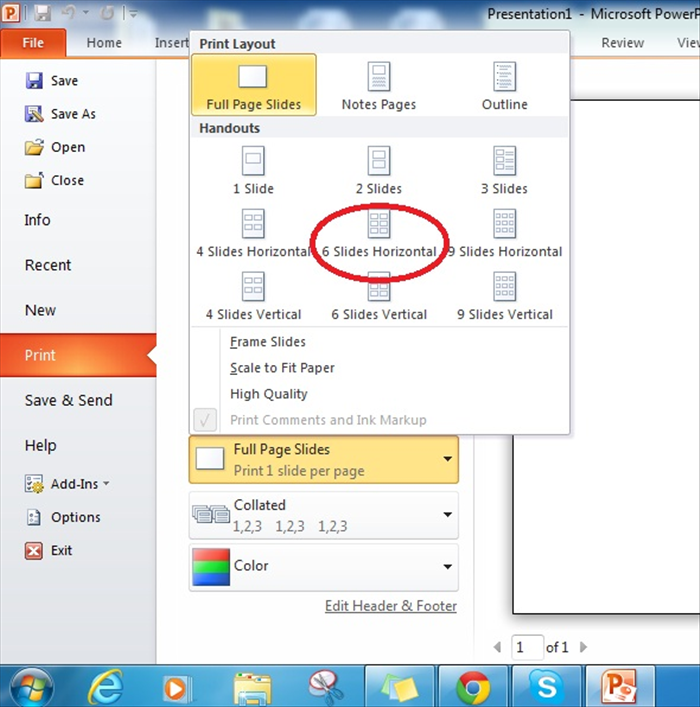
After selecting 'Handouts', a new set of options will appear within the dropdown, allowing you to specify how many slides will appear on each page. This is where you configure to print 6 PowerPoint slides on one page or any other desired quantity.
1. From the 'Handouts' dropdown menu (which will now show options like '1 Slide', '2 Slides', etc.), choose your desired number of slides per page. Common choices include 2, 3, 4, 6, or 9 slides.
2. If you select '3 Slides', PowerPoint automatically adds lines next to each slide image, making it an ideal format for PowerPoint study handouts where note-taking is essential.
Configure Additional Print Settings
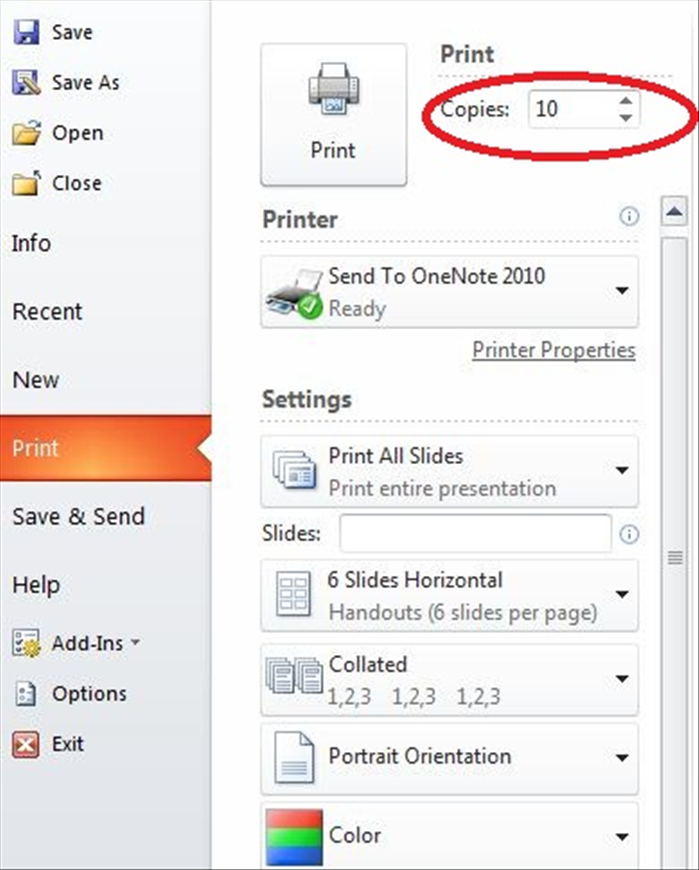
Beyond the slide layout, you can fine-tune other print preferences to suit your needs, helping you to print PowerPoint slides to save paper or enhance readability.
- Orientation: Choose 'Portrait' (vertical) or 'Landscape' (horizontal) for your printed page. The optimal choice often depends on the aspect ratio of your slides and the number of slides per page.
- Color: Select 'Color', 'Grayscale', or 'Pure Black and White' based on your printer's capabilities and your preference. Grayscale or pure black and white settings can significantly save paper PowerPoint printing costs by using less ink.
- Header/Footer: If you wish to add or remove page numbers, dates, or custom text to your handouts, click on 'Edit Header & Footer' options to adjust these before printing.
Always use the print preview feature located on the right side of the Print dialog box to review your handouts before clicking 'Print'. This step is critical to help you catch any layout errors, unwanted settings, or misalignments, preventing wasted paper and ink.
Print Your Handouts
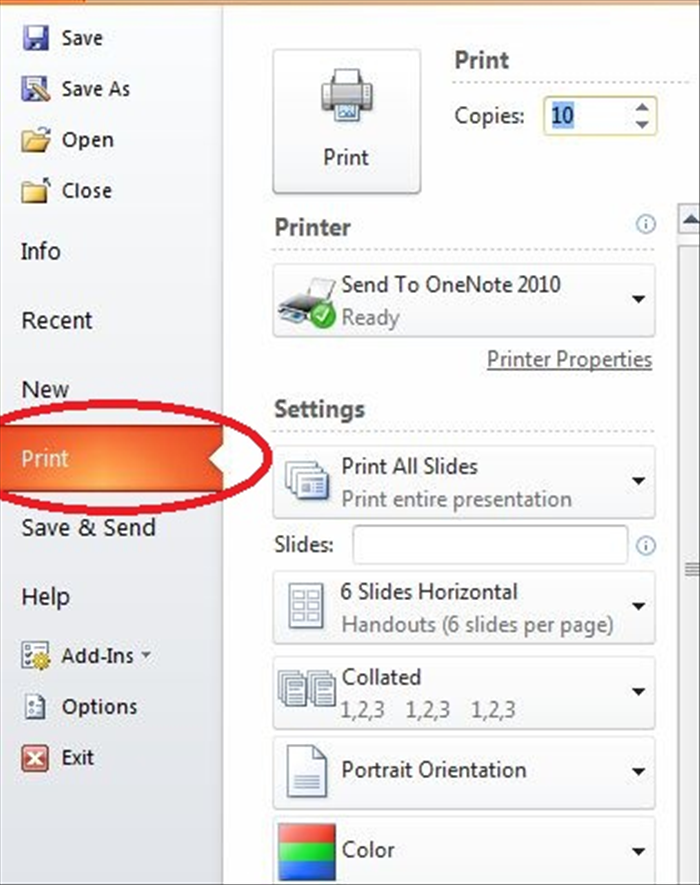
With all your settings configured, you're ready to generate your customized PowerPoint lesson handouts or study guides.
1. Carefully review the print preview one last time to ensure everything looks exactly as expected.
2. Select your desired printer from the 'Printer' dropdown menu at the top of the dialog.
3. Specify the number of copies you need.
4. Click the 'Print' button to send your document to the printer.
Troubleshooting Common Printing Issues
Encountering problems when trying to print your handouts? Here are some quick fixes for typical printing issues:
- Nothing Prints: First, check if your printer is connected, powered on, and has enough paper and ink/toner. Restarting both your computer and printer can often resolve connectivity glitches.
- Poor Quality: If prints are blurry, colors are off, or images appear pixelated, check your printer's quality settings (usually accessible via 'Printer Properties' in the Print dialog). Ensure you haven't accidentally selected 'Draft' quality. Clean print heads if necessary.
- Layout Problems: Double-check your 'Handouts' and 'Orientation' settings. Sometimes, slight adjustments to the slide number or page orientation can resolve alignment issues.
- Software Glitches: Ensure your PowerPoint software (2016, 2019, Microsoft 365) and printer drivers are up to date. Outdated software can cause unexpected printing behavior.
By following these comprehensive steps, you can easily print multiple PowerPoint slides on one page, creating effective and paper-saving handouts for any purpose. Whether it's for an important exam, a detailed lesson, or simply organizing your personal notes, mastering these PowerPoint print settings will make your life much easier and more organized!