How to Print Recipes in MS Word: Free & Easy Template Guide
Learn how to easily print your favorite recipes using free Microsoft Word templates. Customize and print beautiful recipe cards in minutes!
Do you love to cook but struggle to keep your recipes organized? Printing your favorite recipes on custom cards or sheets can make meal prep and kitchen organization a breeze. Microsoft Word offers a wealth of free templates that make creating printable recipe cards simple and fun. This guide will walk you through how to print recipes in MS Word, from finding the perfect template to customizing and printing your culinary masterpieces. Say goodbye to messy printouts and hello to beautifully organized recipe collections!
Step 1: Open Microsoft Word and Find a Free Recipe Template
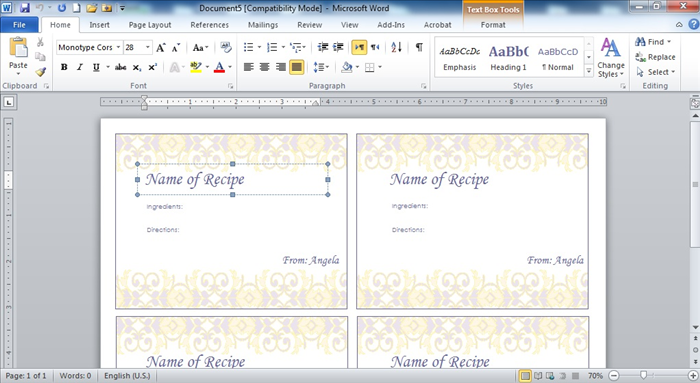
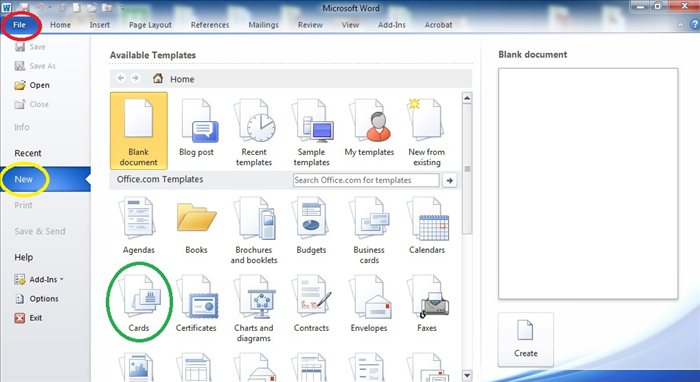
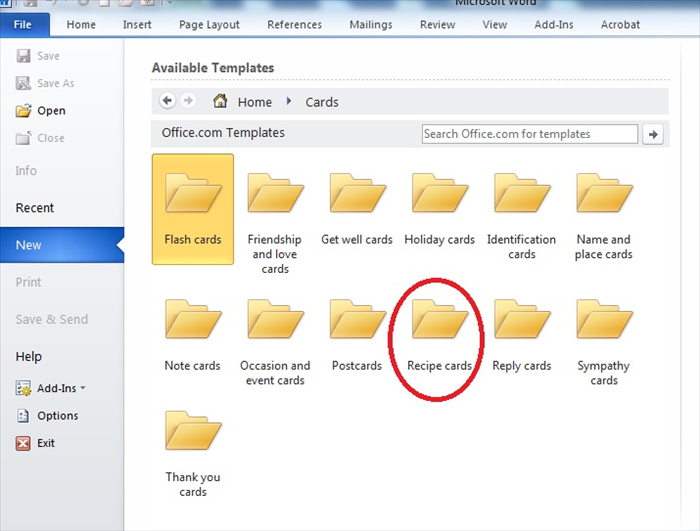
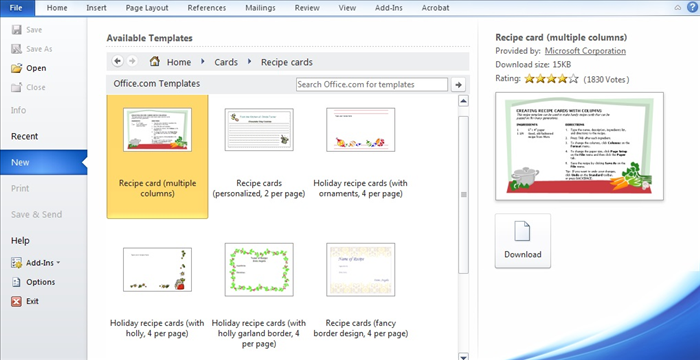
Start by opening Microsoft Word on your computer. Once the application launches, don't just open a blank document. Instead, look for template options. Click on 'File' > 'New' in the menu. In the search bar that appears, type 'recipe' or 'recipe card' and press Enter. Word will display a variety of free recipe template Word options. Browse through the available designs, looking for a Microsoft Word recipe template that suits your style – whether you prefer a minimalist look or something more decorative. If you're looking to create printable recipe cards in Word, specifically search for 'recipe card' templates.
If you don't see a wide selection, ensure your internet connection is active, as Word often pulls templates from its online library.
Step 2: Choose and Customize Your Recipe Template
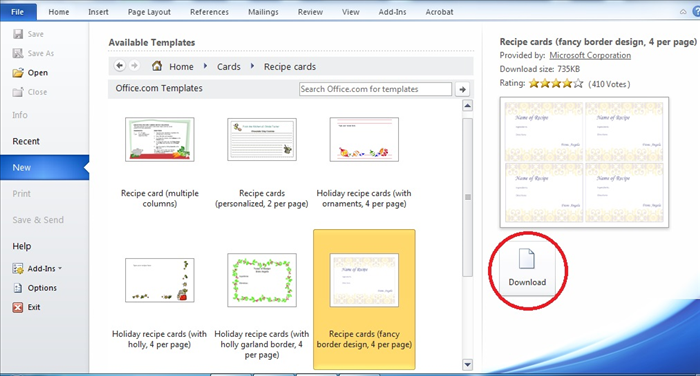
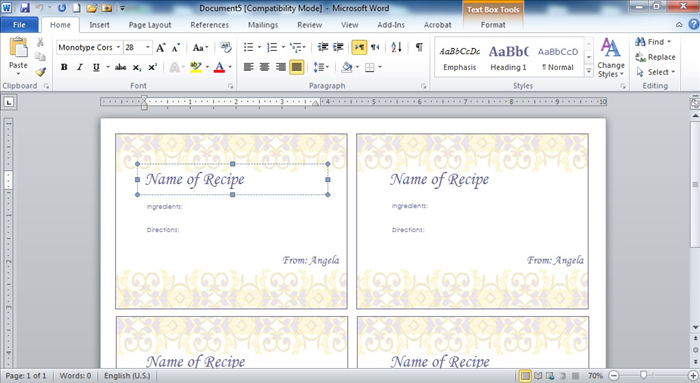
Once you've found a suitable Word recipe card template or full-page recipe layout, click on it and then click 'Create' or 'Download'. Word will open the template as a new document. Now comes the fun part: customizing! These are often editable recipe template Word files. You can change fonts, colors, and even rearrange sections to design recipe cards Word style. Click on text boxes to modify headings like 'Recipe Title', 'Ingredients', and 'Instructions'. Experiment with different styles to make it truly your own. For example, you might want to adjust the font size for readability or change the background color.
Save a blank, customized version of your chosen template immediately. This way, you can reuse your personalized recipe template for printing many times without starting from scratch each time.
Step 3: Input Your Recipe Data
With your template open and customized, it's time to add your actual recipes. Simply click on the placeholder text within the template (e.g., 'Your Recipe Title Here', '1 cup flour') and type or paste your recipe details. Be precise with ingredients and clear with instructions. For instance, if you're adding our popular <a href="/guide/5616">Crispy Baked Chicken Thighs</a>, make sure all measurements and baking times are correct. Fill in every section the template provides, like prep time, cook time, servings, and any special notes. This step is crucial for making your print recipes MS Word project a success.
Step 4: Review and Format for Printing
Before you hit the print button, take a moment to review your work. Check for any typos, grammatical errors, or formatting inconsistencies. Ensure all text is legible and fits within the designated areas, especially if you plan to print multiple recipes on one page Word. You might need to adjust font sizes or spacing. Use Word's 'Print Preview' function (File > Print) to see exactly how your recipe will look on paper. This is also a good opportunity to consider if you want to use standard paper or thicker card stock for a more durable finish for your Word recipe card template.
Always use print preview to avoid wasting paper and ink on misaligned or poorly formatted prints.
Step 5: Print Your Recipe Cards or Sheets
Once you're satisfied with the preview, it's time to print recipe cards Word. Go to 'File' > 'Print'. Select your desired printer from the dropdown menu. You can specify the number of copies, and if your template supports it, choose to print multiple recipes on one page Word by adjusting the page layout settings (e.g., '2 pages per sheet' or '4 pages per sheet' if your template is designed for smaller cards). If you're using card stock, make sure your printer can handle the thicker paper, and load it correctly. Click 'Print' and watch your custom recipes come to life!
For smaller recipe cards, you might need to manually arrange multiple cards on a single Word page before printing to maximize paper usage. Look for specific 'how to print recipe cards Word' tutorials if your template is complex.
Step 6: Organize Your Printed Recipes (Optional)
Now that you have your beautifully printed recipes, the final step is to organize them. Consider a dedicated recipe binder with clear plastic sleeves, a decorative recipe box, or even laminating individual cards for extra durability. This ensures your recipes are protected from spills and easy to access whenever you need them. An organized recipe collection makes cooking more enjoyable and efficient, whether you're using a best free recipe template for Word or one you designed yourself.
Printing recipes with Microsoft Word is an easy way to print recipes in Microsoft Word and a fantastic way to keep your kitchen organized and your favorite dishes at your fingertips. With these steps, you can easily create, customize, and print a stunning collection of recipes. Happy cooking!