How to make your own ecard with MS Paint
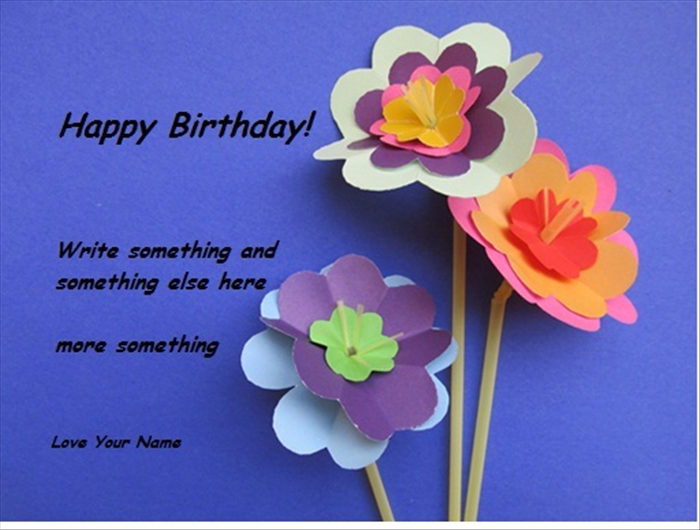
This guide will show you how easy it is to make your own e-card with Paint and a tip on how to reduce the size of a high resolution photo.
Medium 12,847 views
What You'll Need
- e-card
- ecard
- ecard with Paint
- ecard with MSPaint
Steps
- 1
Step 1
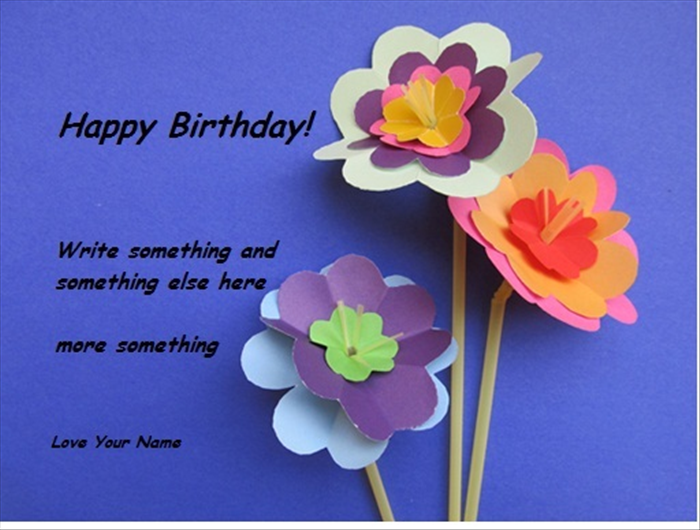 It is very easy to make an e-card with Microsoft Paint
 - 2
Step 2
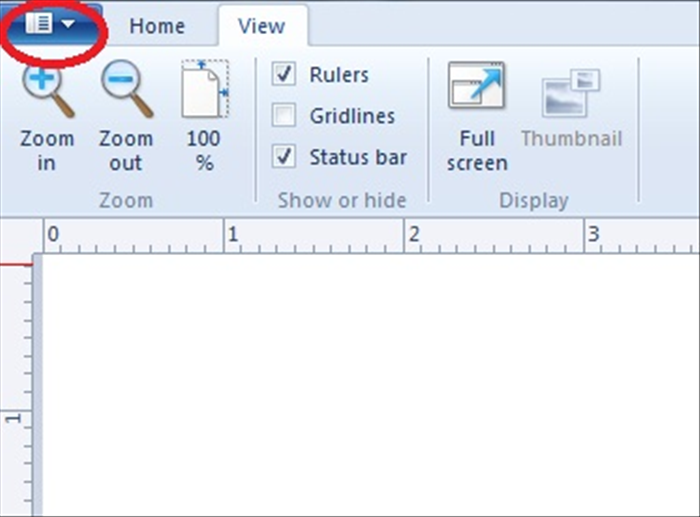 Open the Paint program. Click on the arrow (circled in red in the picture)
 -
- 3
Step 3
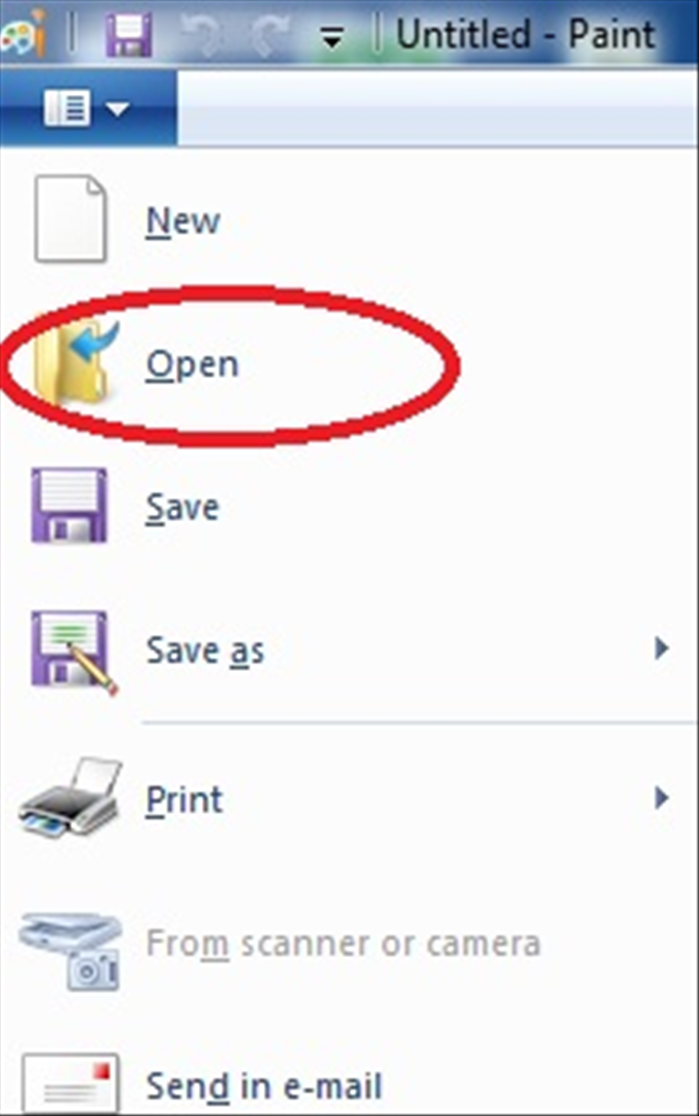 A menu will come down. Click on open
 - 4
Step 4
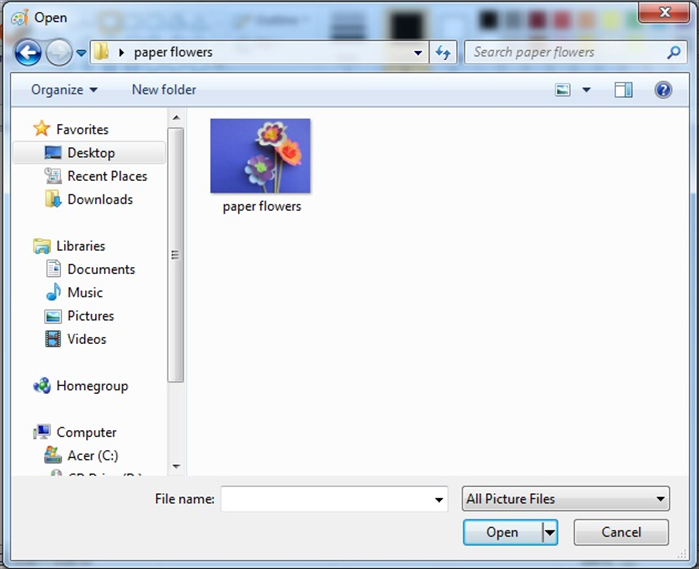 Click on the picture you want on your card. *It can be a picture of your family, dog, flowers or anything you like. Click on the open button at the bottom right. **** Very large files will not work well. To get around this problem go to step12
 - 5
Step 5
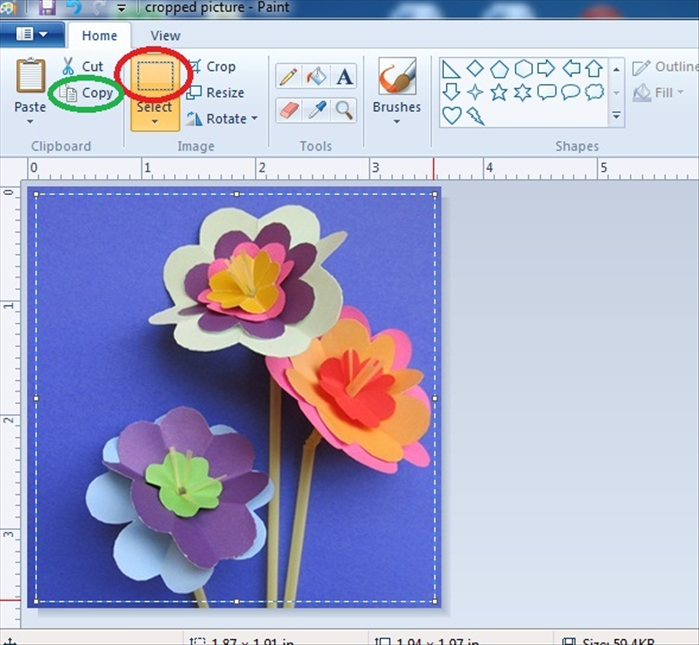 Click on the select icon (circled in red in the picture) Click on the top left of the area you want to be in your e-card. Drag the dashed line to the right corner and down to the bottom of the area you want. Then click on the copy icon (circled in green in the picture)
 - 6
Step 6
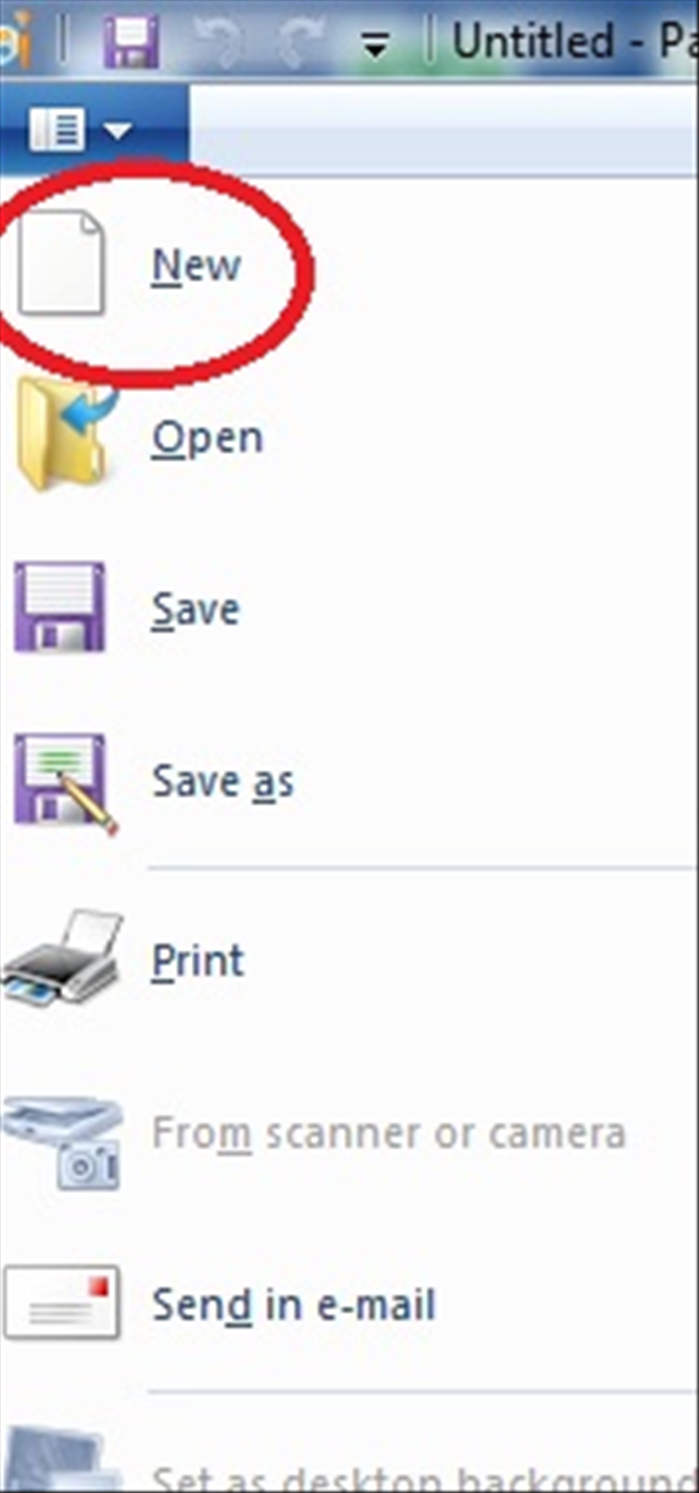 Click on the down arrow Then click on new A new window will open and you will be asked if you want to save the changes. Click on the no button
 - 7
Step 7
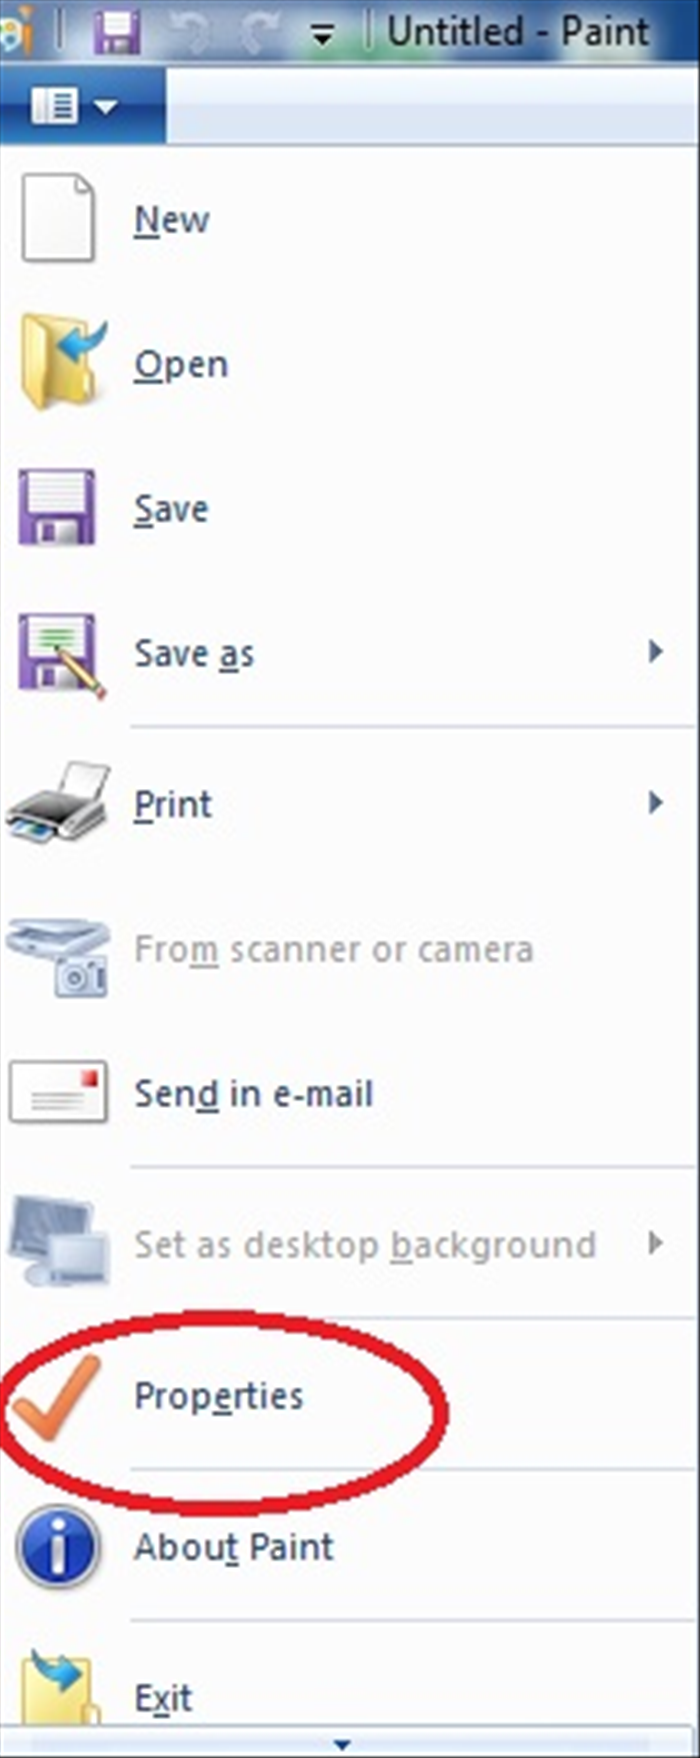 Click on the down arrow again Then click on Properties
 - 8
Step 8
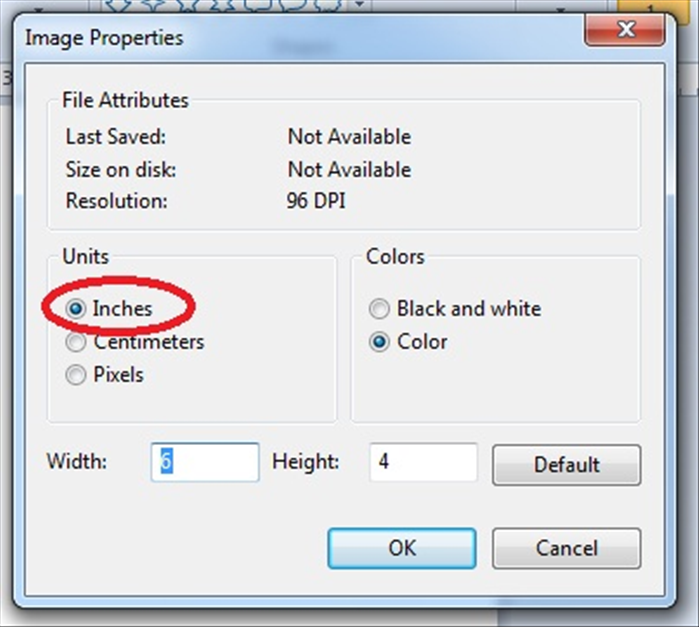 Click on inches (circled in red in the picture) Next to “Width:” type 6 Next to “Height” type 4 Then click on the “OK” button *This is a suggested size for your e-card. You can make it a little bigger or smaller.
 - 9
Step 9
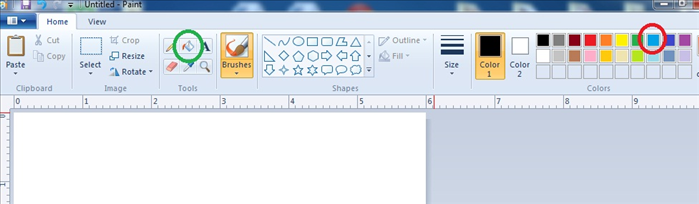 You can leave the background of the card white. If you want to change the background color: Click on a color on the top right. *In this guide light blue was selected (circled in red in the picture) Click in the bucket icon (circled in green in the picture) Then click inside the white area. The background color will change to whatever color you chose.
 - 10
Step 10
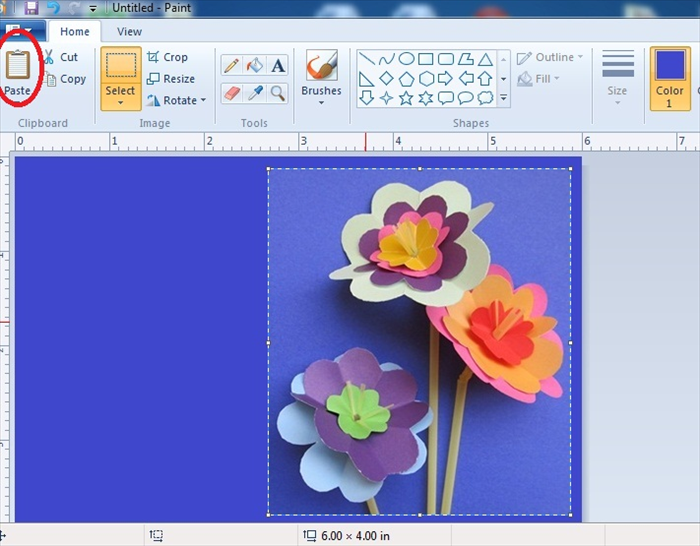 Click on paste. (circled in red in the picture) The picture you copied will appear on the card. Drag the corners of the picture if you want to change the size or move it anywhere on the card.
 - 11
Step 11
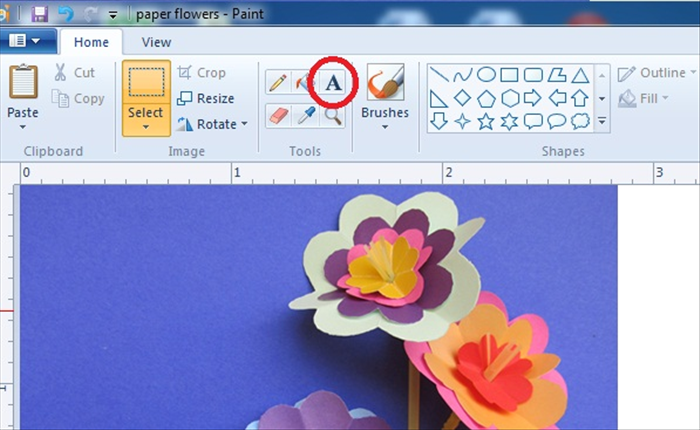 Click on the text icon (circled in red in the picture)
 - 12
Step 12
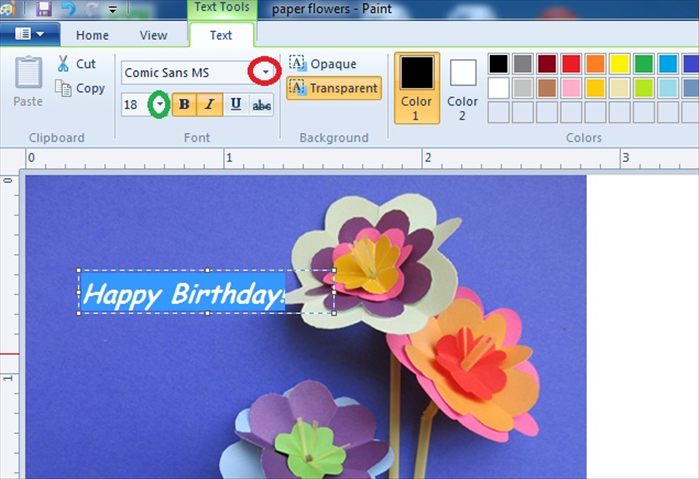 Click where you want your text to be on the card. A text box will appear. If you want to change the look of the letters: Click on the arrow (circled in red in the picture). A menu will come down with fonts to choose from. Click on the font you like. Then click the arrow (circled in green on the picture) to choose the size letters you want. Click on one of the the color squares to change the font color. Type in the greeting *You can move it around by dragging the sides of the text box When you are finished click on the white area outside of the card
 - 13
Step 13
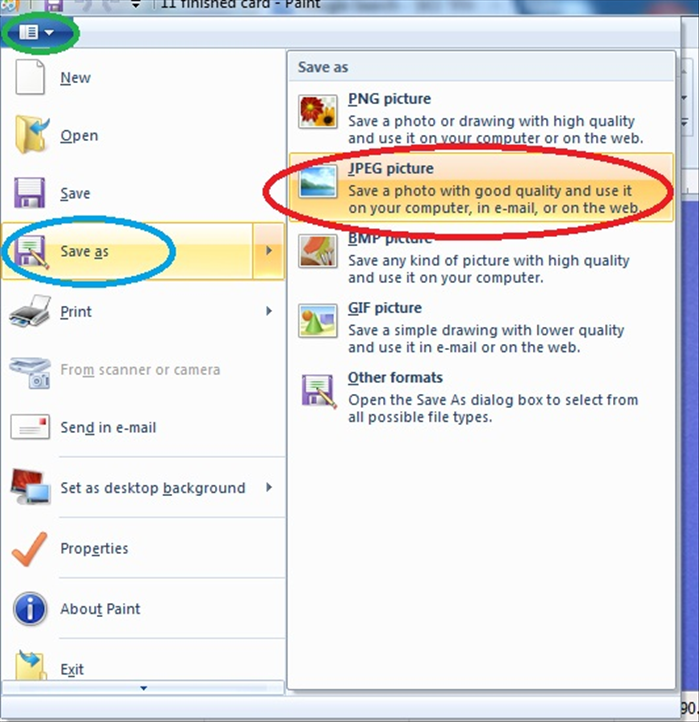 You can add more text by repeating step 11 and clicking somewhere else on the card. When you have finished making your ecard click on the arrow (circled in green in the picture) Then click on “Save as:”( circled in blue in the picture) And then “JPEG” (circled in red in the picture) A new window will open. Choose where you want to save the ecard.
 - 14
Step 14
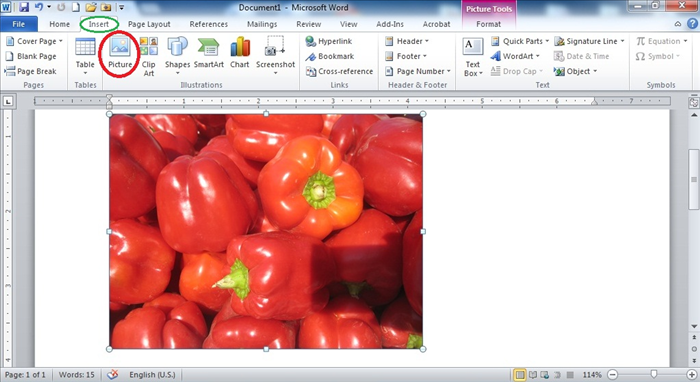 Large, high resolution, photos can be used for other purposes in MSPaint. It is best to insert photos into an e-card that have a small file size and it is easiest to reduced the picture with another program. For someone who doesn't use a more advanced graphics program, it is possible to reduce the picture in Word. Just open a new document in word. Click on "Insert" (circled in green on the picture) Then click on "Picture" (circled in red on the picture) Choose the picture that you want to reduce in size On the word document, click on the picture and drag the corner of the picture to make it smaller Then click on the PrintScreen key on you keyboard.(it is usally on the upper right side of the keyboard written in abbreviation Click "Paste" in the Paint program and crop to only the area you want to keep for your card. (shown in Step 5) Save the picture as shown in step 13 and begin at Step 2
 - 15
Step 15
 Send an email to someone with the picture you just saved inserted or as an attachment.