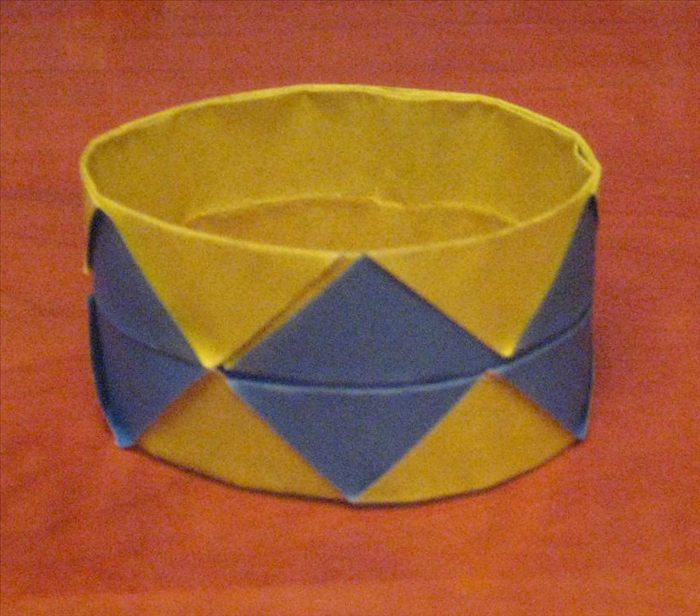
How to make an origami bracelet. Origami for children
This guide will show you how to fold an origami bracelet. It can also be used as a napkin ring. Children like to make this model.
Easy 15,341 views
What You'll Need
- origami bracelet
- paper bracelet
- origami napkin ring
- paper napkin ring
- easy origami
- paper folding
Steps
- 1
Step 1
 Materials: 1 square sheet of paper that has a different color on each side.
 - 2
Step 2
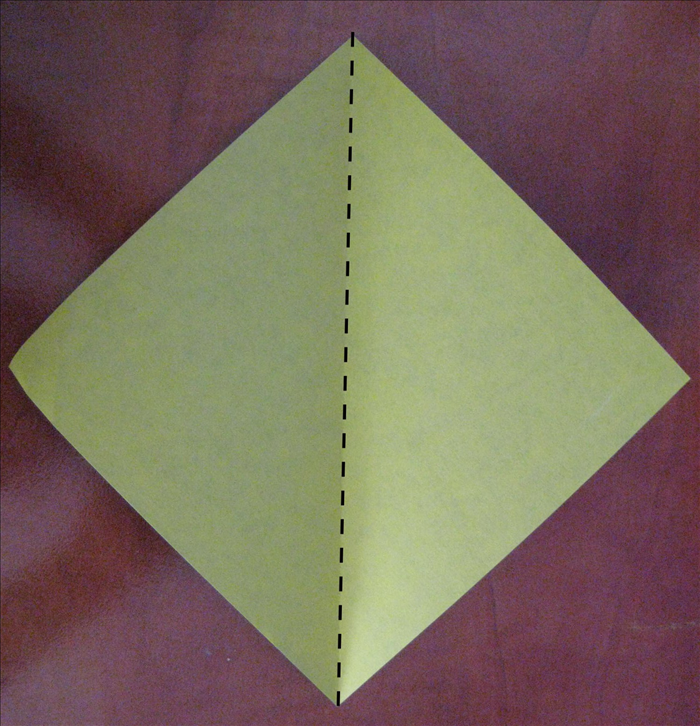 Place the paper so that the points are at the top, bottom and sides. Fold it in half vertically. Unfold
 -
- 3
Step 3
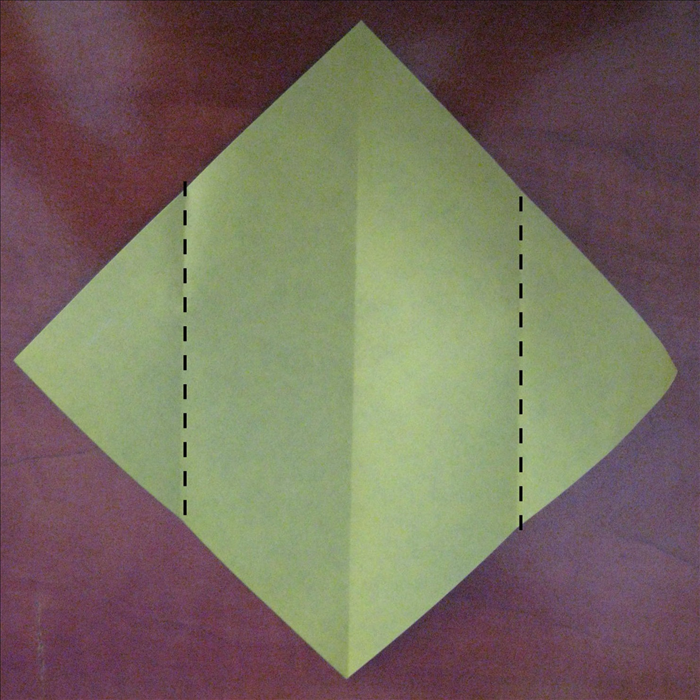 Fold the 2 side points to the center crease you just made.
 - 4
Step 4
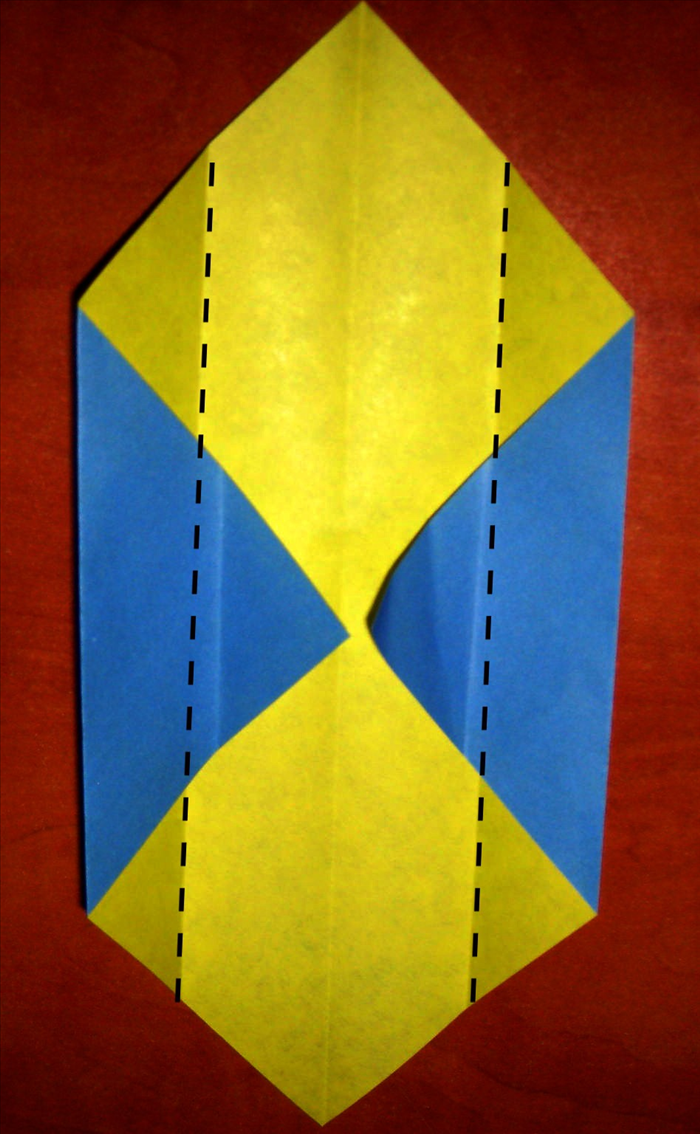 Fold the 2 sides to align with the center crease.
 - 5
Step 5
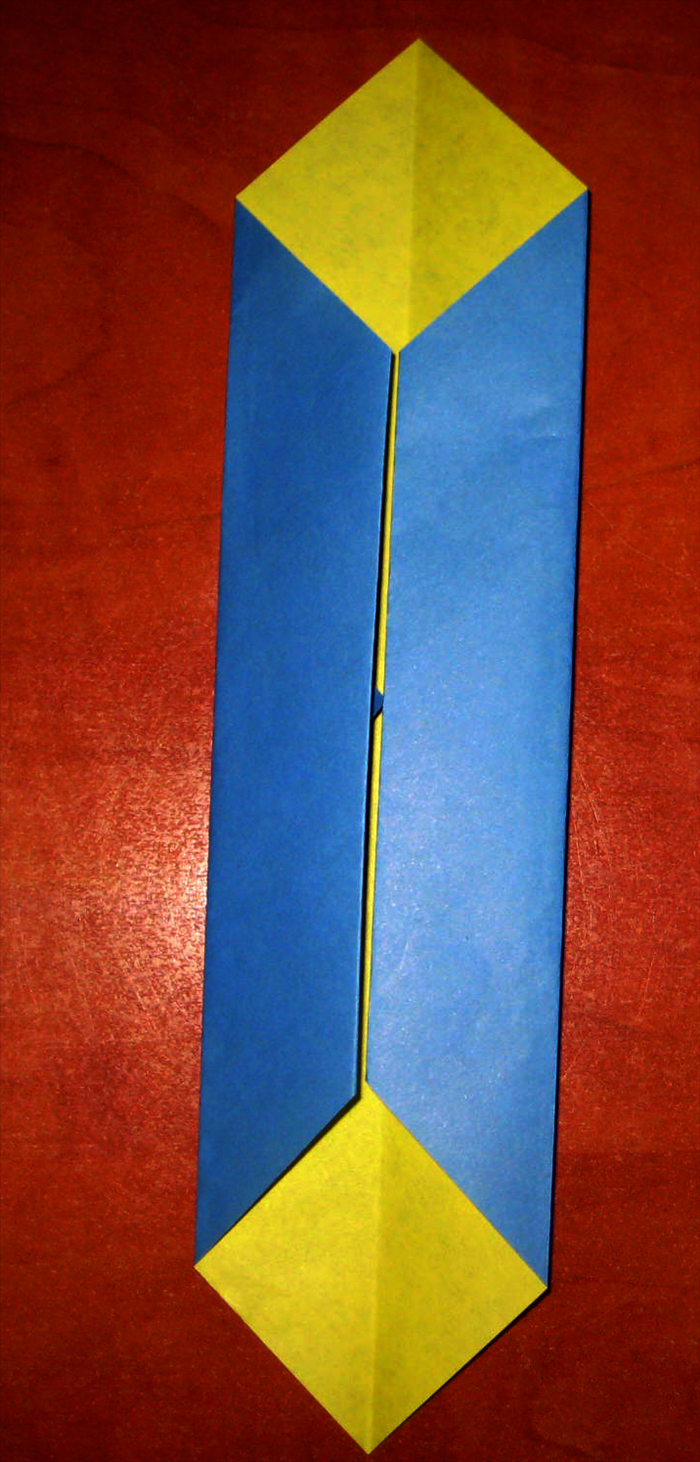 Result
 - 6
Step 6
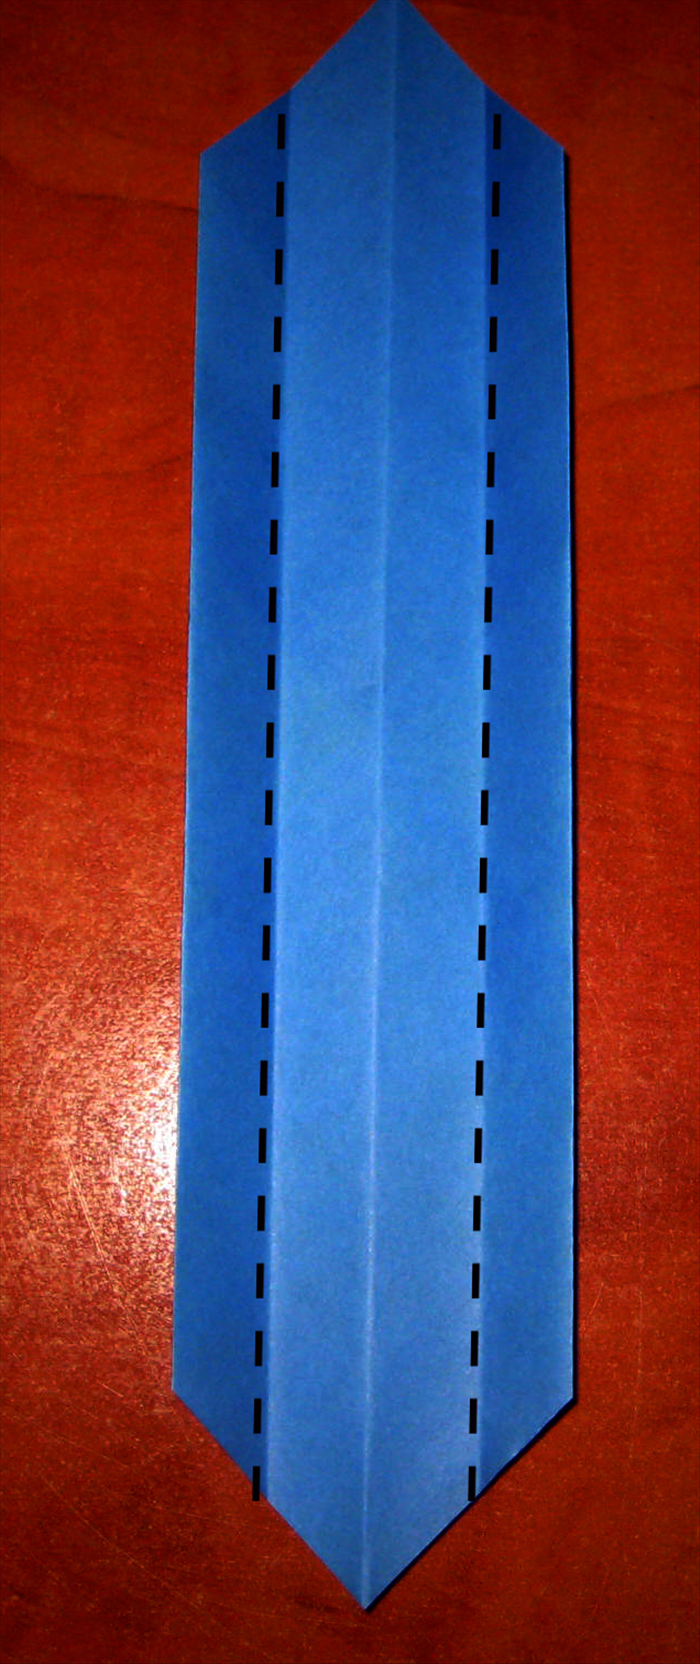 Flip the paper to the back side. Fold the 2 sides to align with the center crease.
 - 7
Step 7
 Result
 - 8
Step 8
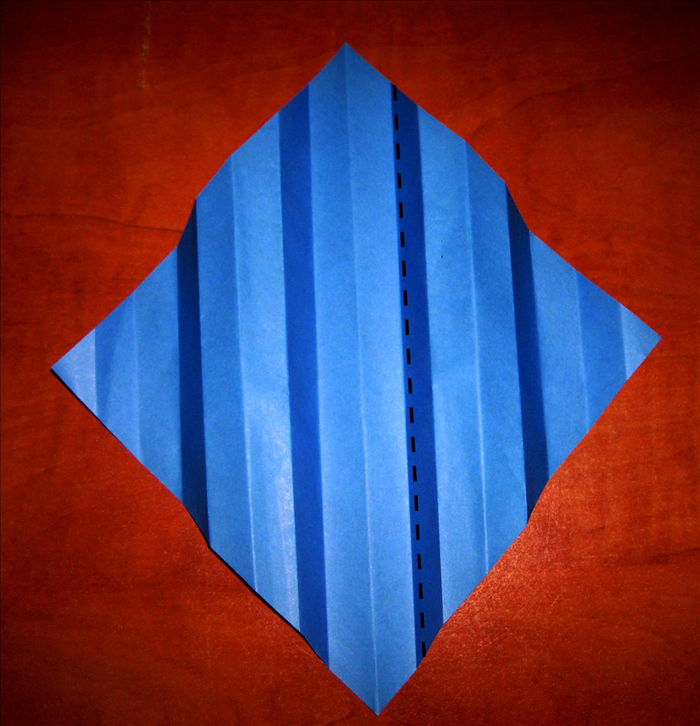 Unfold all the folds. The color facing down will be the outside triangles of the finished bracelet. Bring the right point to the second crease from the left point.
 - 9
Step 9
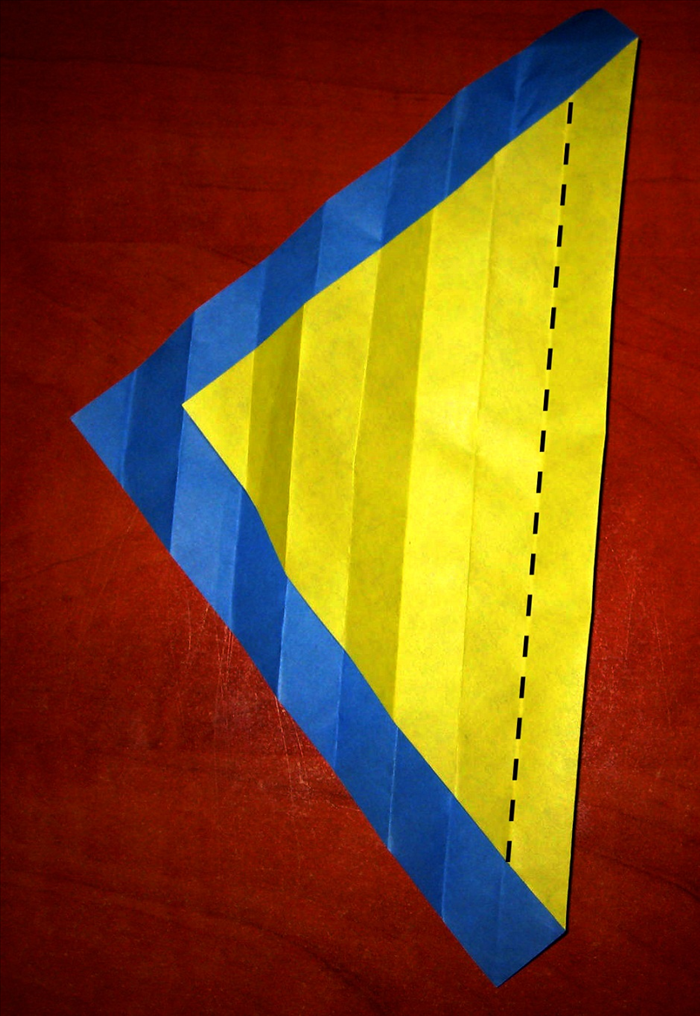 Fold the top layer to the right along the first crease on the right side.
 - 10
Step 10
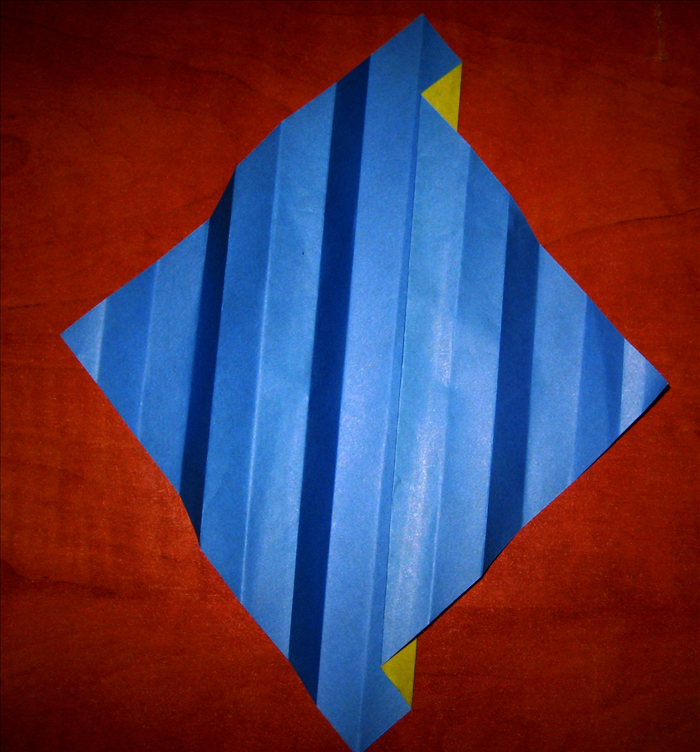 Result. Now we will do the opposite side the same way, just opposite. Fold the left point to the second crease on the right side. Fold it back again to the left along the first crease to the left of the center.
 - 11
Step 11
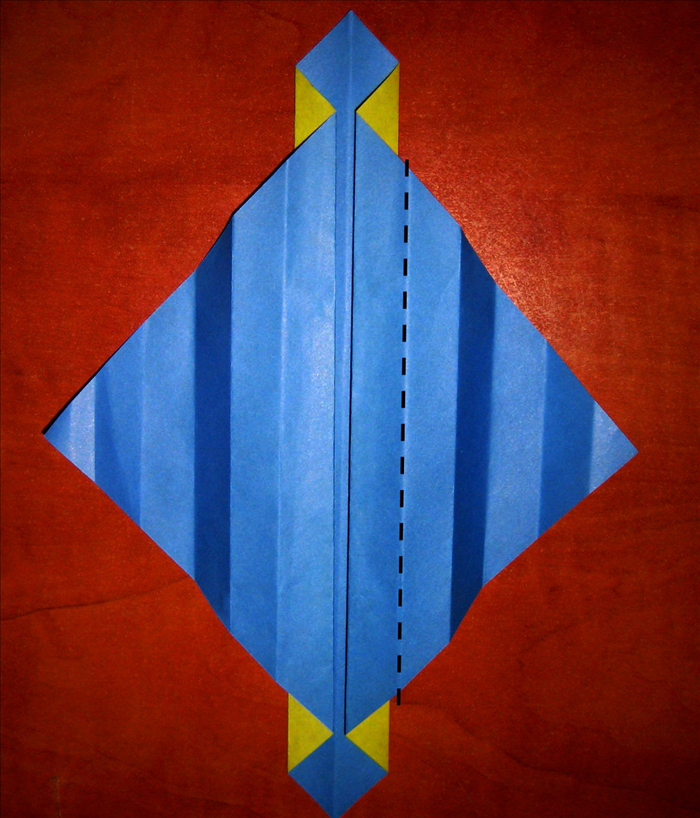 Result Fold the right side to the left along the first crease to the right of the center
 - 12
Step 12
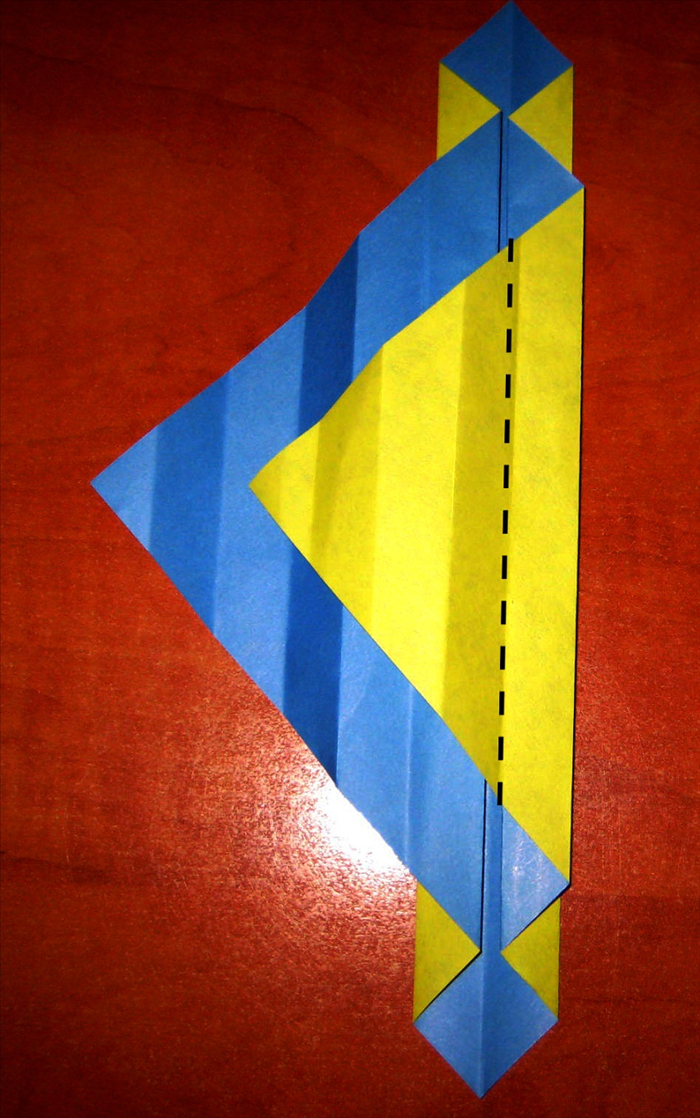 Fold it back again to the right along the crease that aligns with the center.
 - 13
Step 13
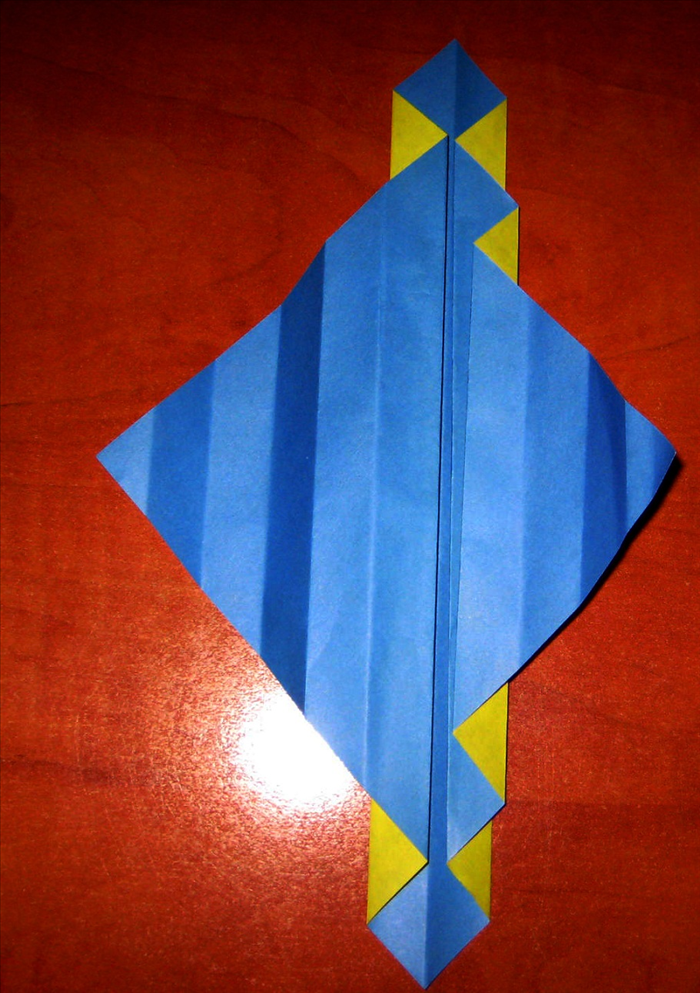 Result Repeat with the left side doing the opposite.
 - 14
Step 14
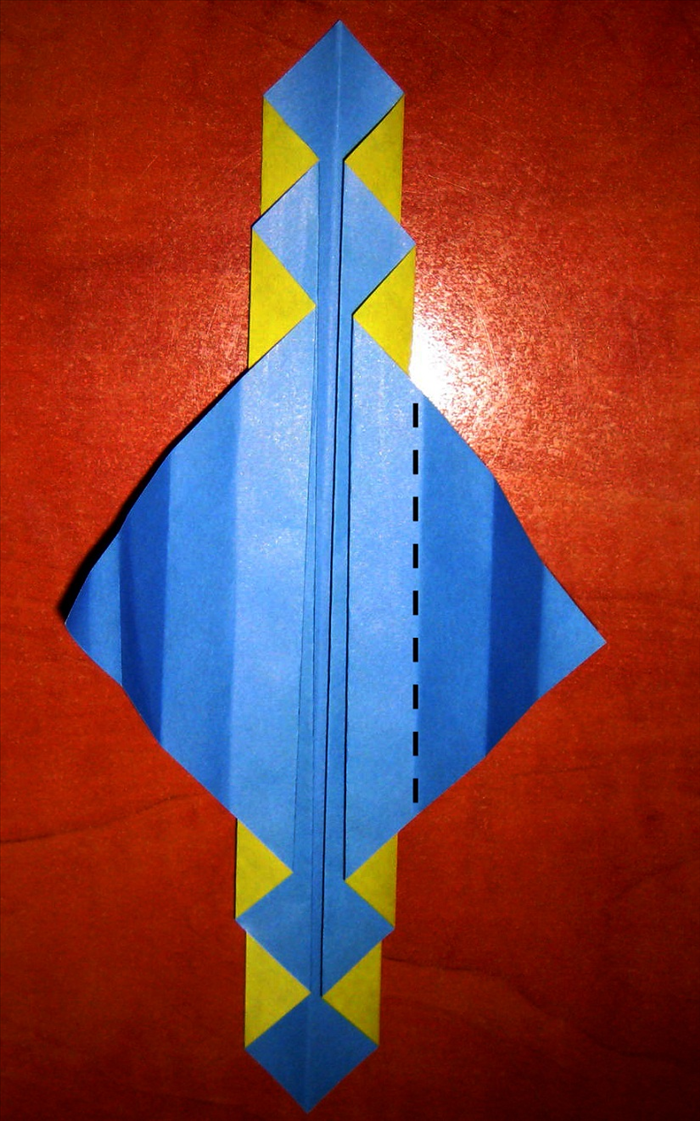 Fold the right side along the first crease to the right of the center
 - 15
Step 15
 Fold it back again along the crease that is over the center crease. Repeat in the opposite direction for the left side.
 - 16
Step 16
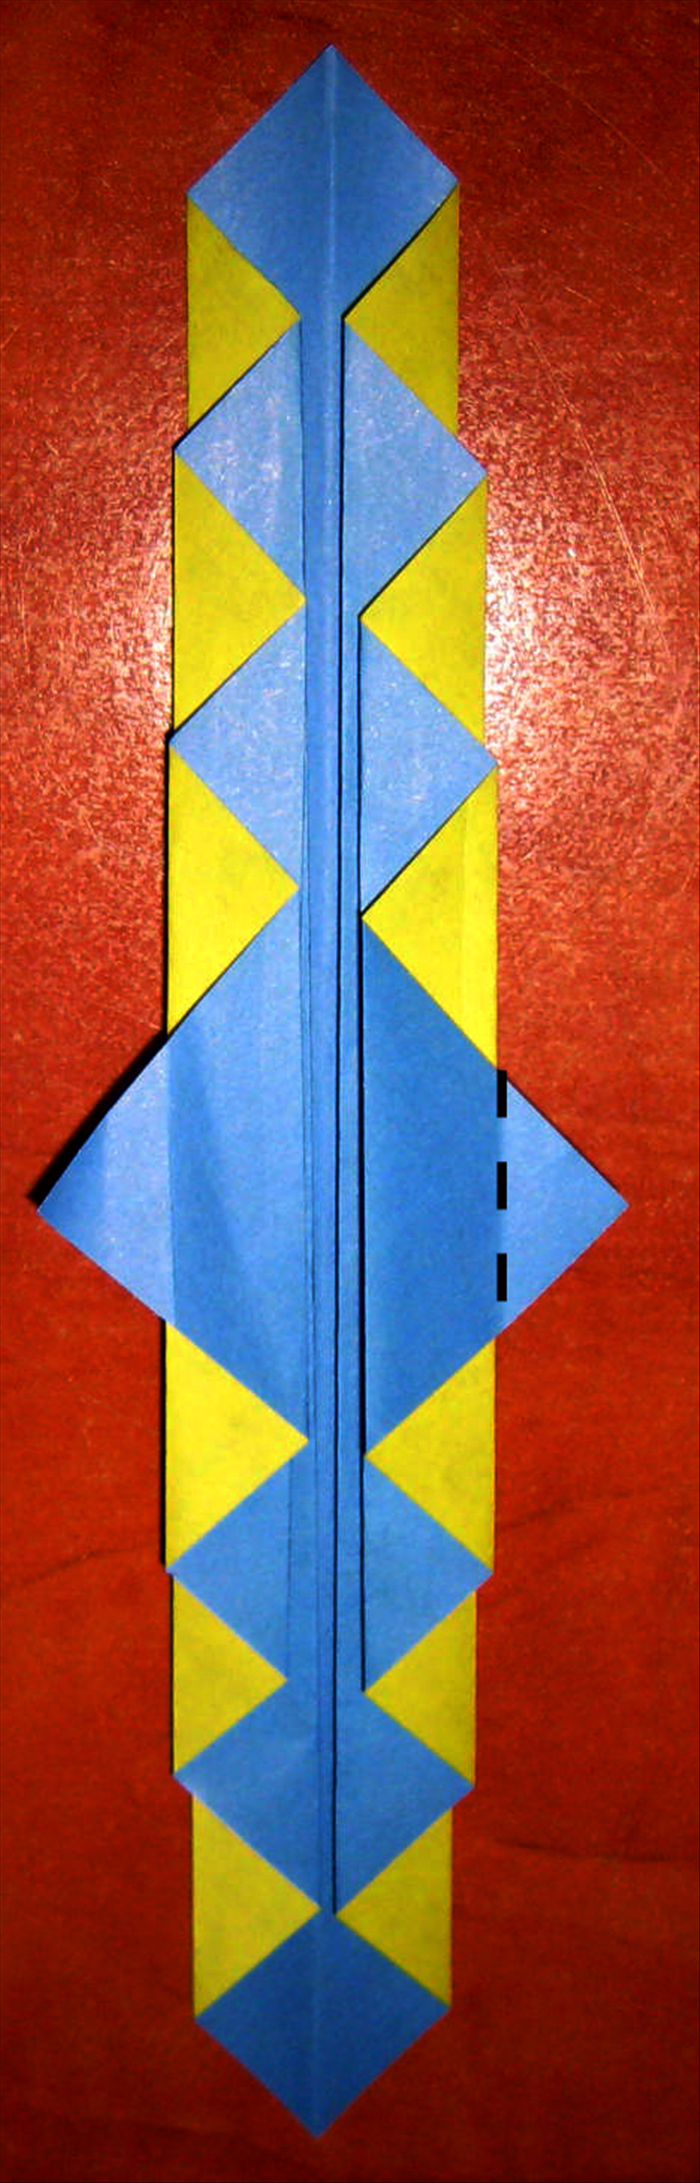 Fold the right point to the center along the crease. Repeat for the left side.
 - 17
Step 17
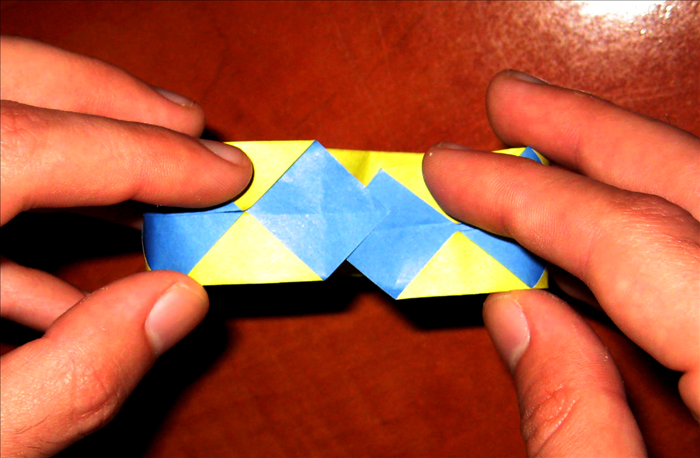 Bring one end around to the other and slip the point between the layers. Slide it in until it is aligned with the design underneath.
 - 18
Step 18
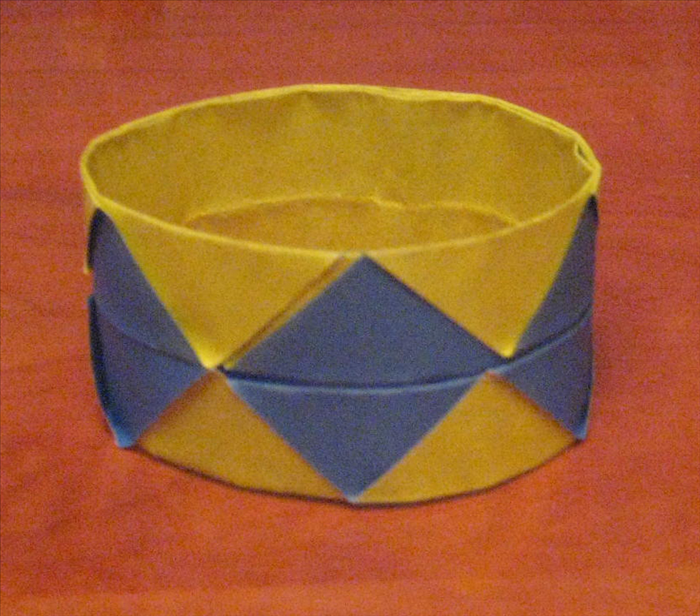 Your origami bracelet is ready to wear!