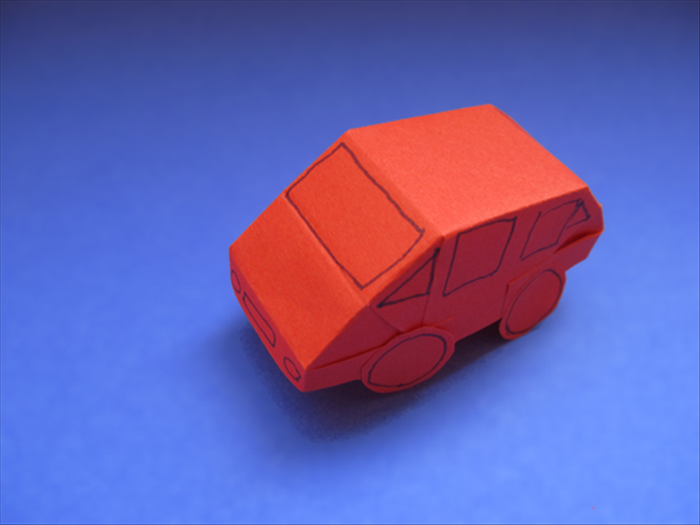
How to make paper cars from a square piece of paper
Have fun making and playing with these cute paper cars!
What You'll Need
- paper car
- paper crafts
- children's crafts
- paper toys
Steps
- 1
Step 1
Materials:
1 square piece of paper
Scissors
Paper glue
Pen
- 2
Step 2
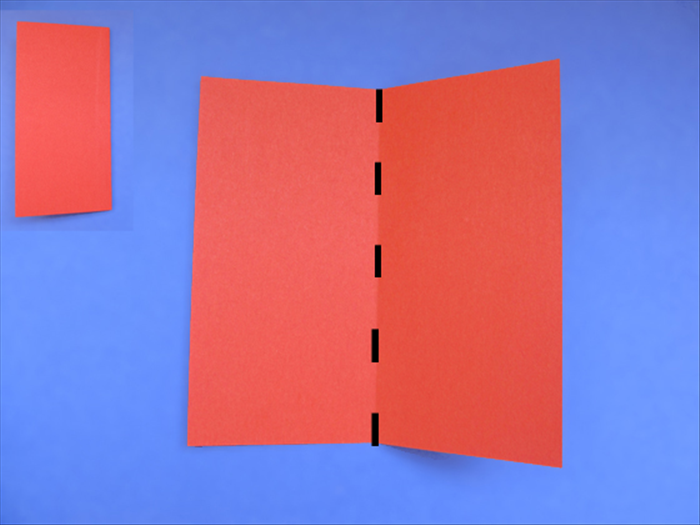
Fold the paper in half
Unfold
-
- 3
Step 3
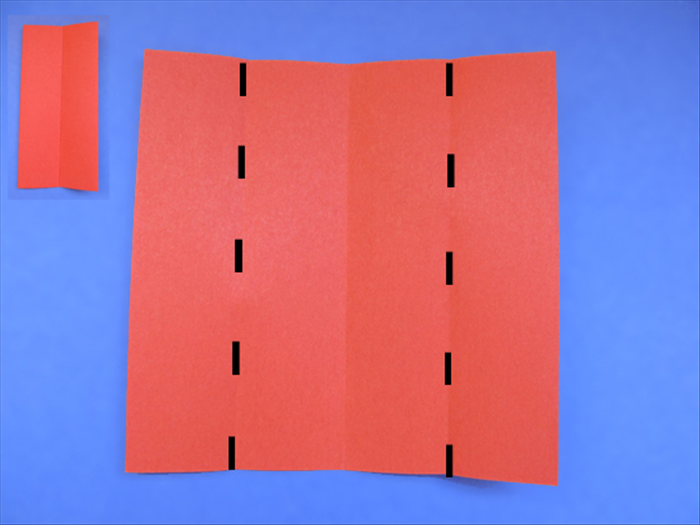
Bring the sides to the center crease
Unfold
- 4
Step 4
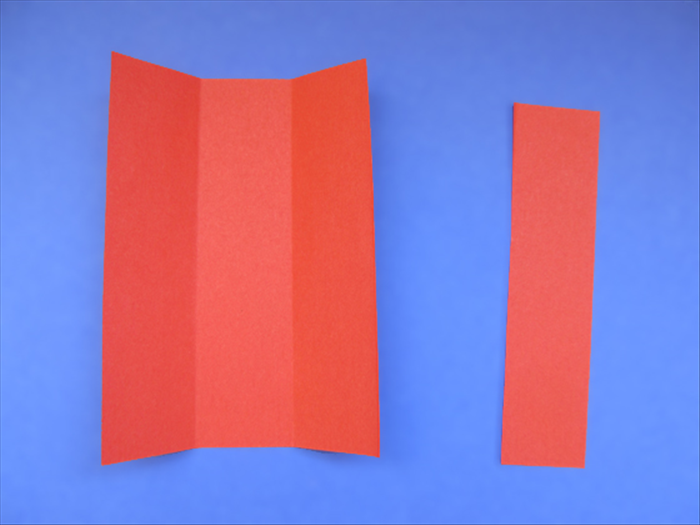
Your paper will be divided into 4 quarters.
Use the crease line to cut off 1 quarter.
- 5
Step 5
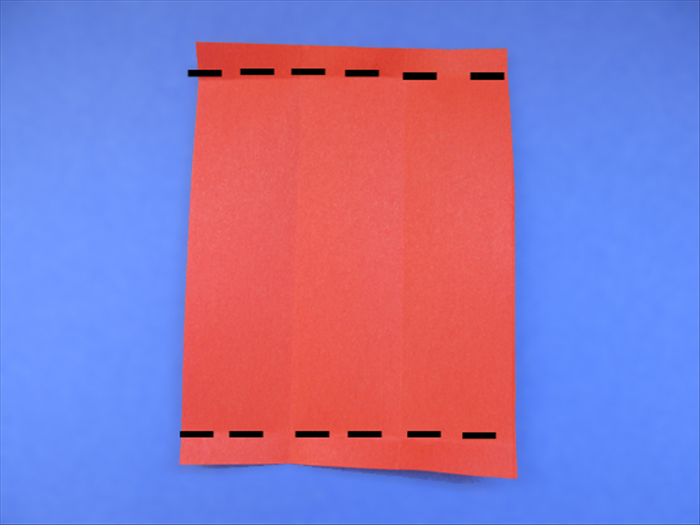
Make a small fold at the top and bottom.
- 6
Step 6
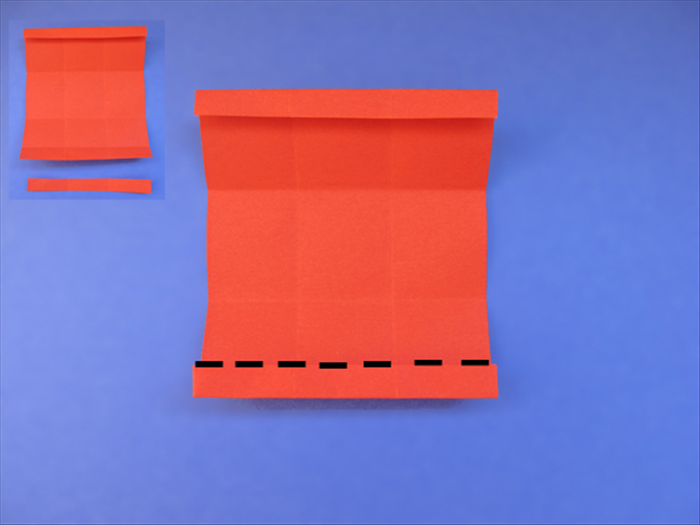
Fold the bottom one more time over the edge of the flap.
Unfold
You will have 2 creases at the bottom.
Cut off along the crease closest to the bottom.
Fold the remaining bottom crease up.
- 7
Step 7
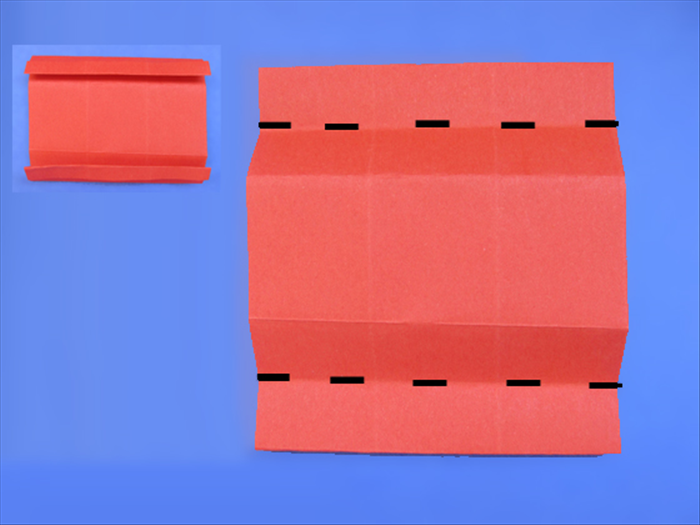
Flip the paper over to the back side.
Fold the top and bottom edge to the nearest crease.
- 8
Step 8
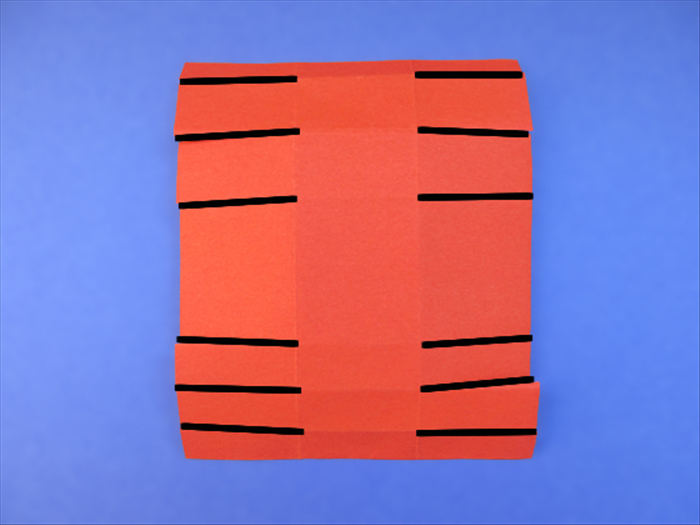
Unfold all the folds
The paper is divided in thirds.
Cut slits along the creases of the side thirds.
- 9
Step 9
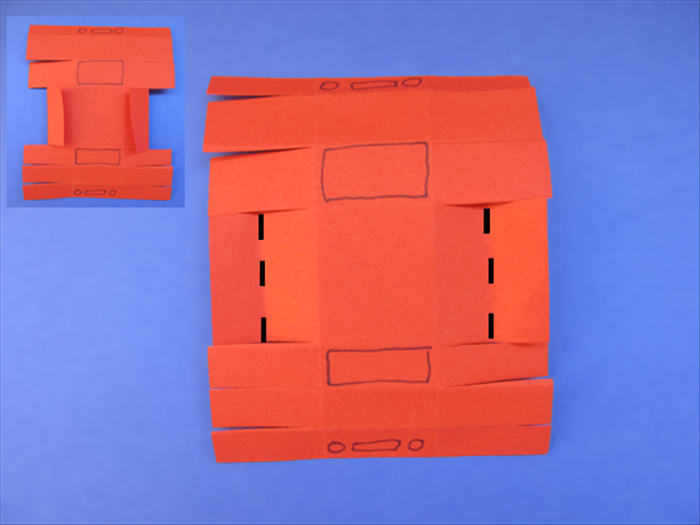
Draw the windows, headlights and license plates as shown in the picture.
Fold the edges at the middle to the crease.
Unfold
- 10
Step 10
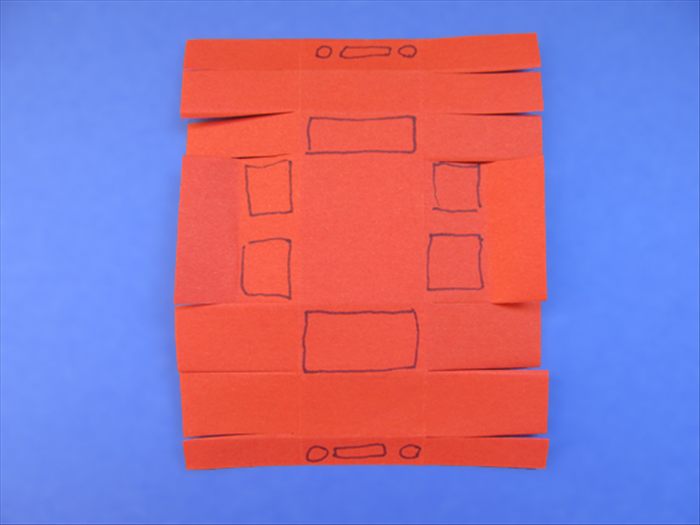
Draw the side windows - as shown in the picture.
- 11
Step 11
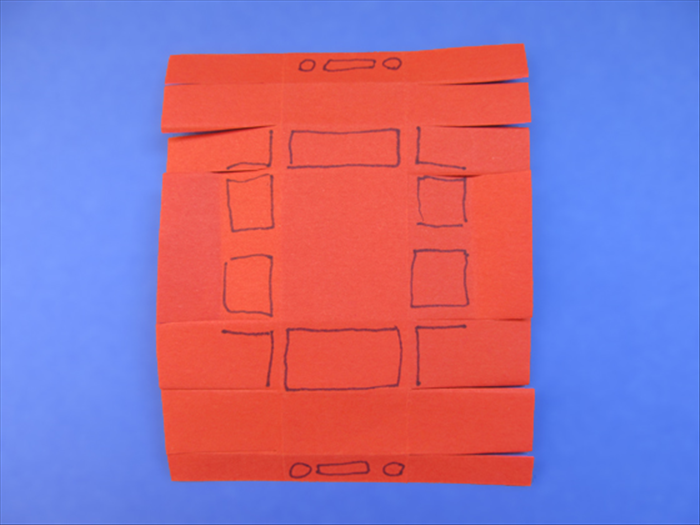
Use the windows as a guide for where to draw L shapes - as shown in the picture.
- 12
Step 12
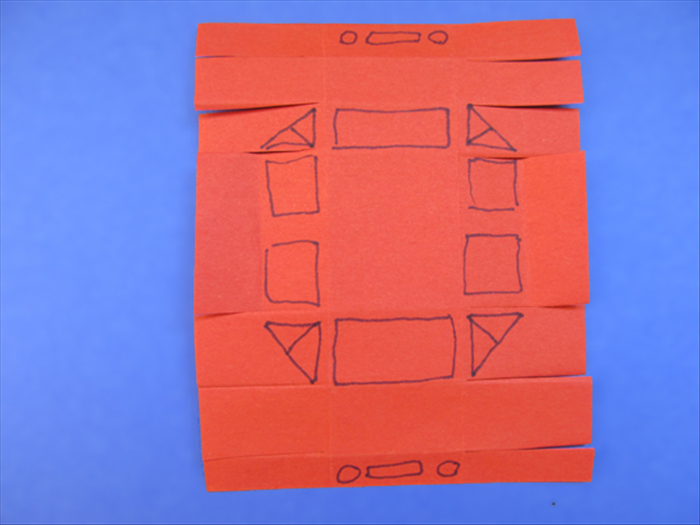
Connect the ends of the L shapes to make a triangle.
Make a line to divide the triangles in half.
- 13
Step 13
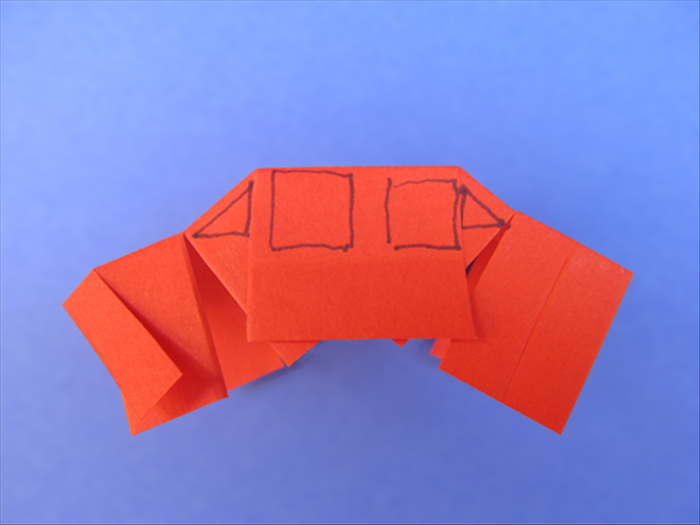
Fold the paper along the creases.
Align the edges of the side windows to the middle lines of the triangles.
Glue them in place.
Repeat this step on the back side.
*Repeat all the following steps on the back side.
- 14
Step 14
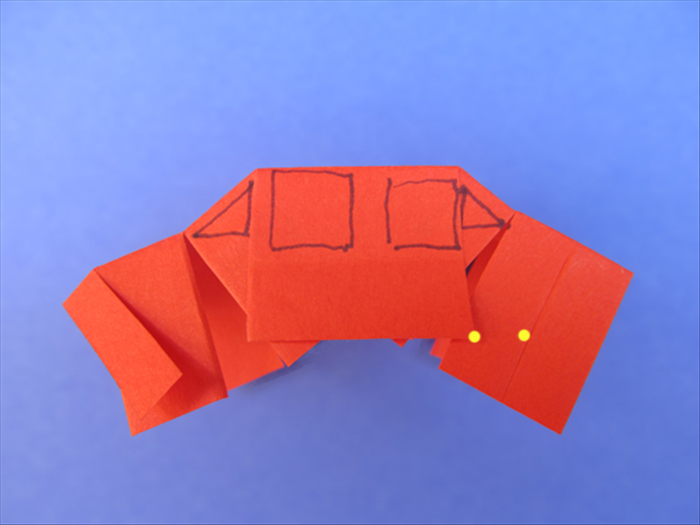
The edge that you cut in step 6 is shorter.
Glue the bottom tip of the door to the right edge of the next slit of the shorter side.
- 15
Step 15
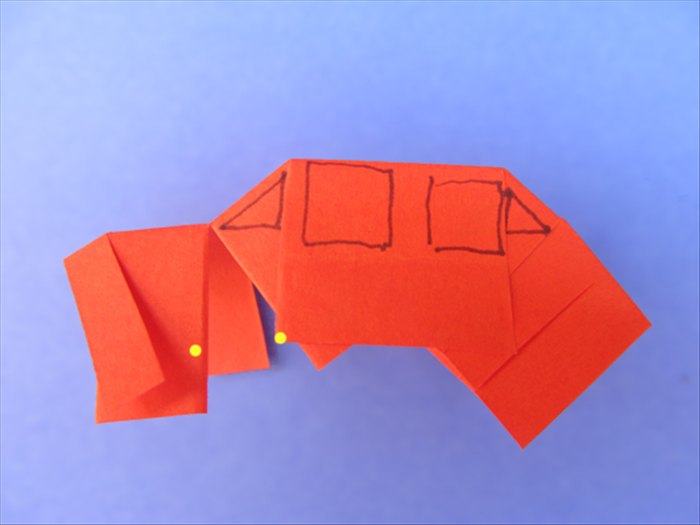
Align the slits on the long side and glue them in place with the tip of the door.
- 16
Step 16
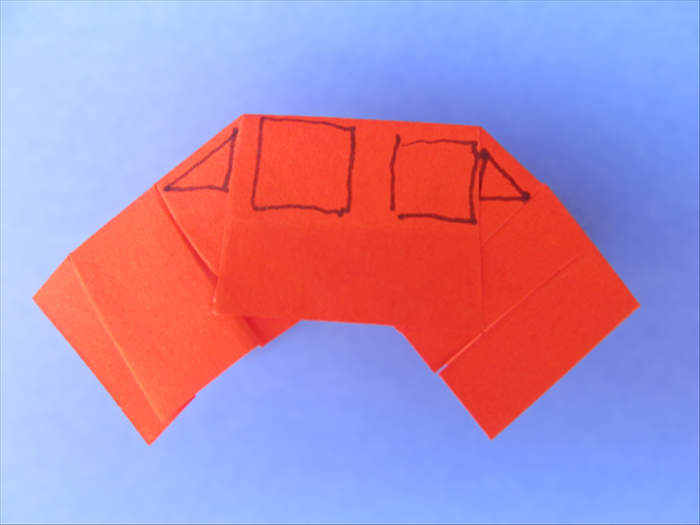
Result
- 17
Step 17
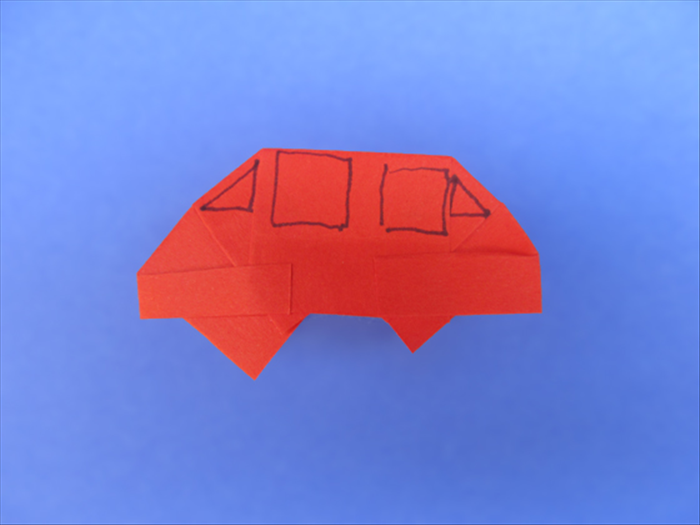
Bring the side slits up so they are horizontal.
Glue them in place.
- 18
Step 18
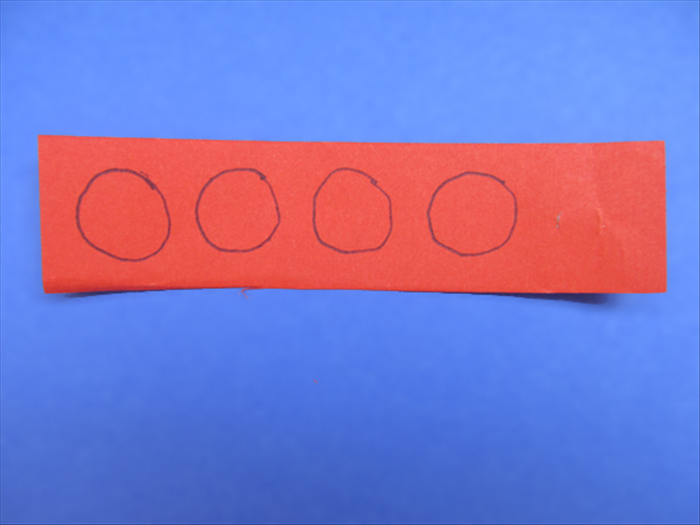
Use the quart paper you cut off to draw 4 circles for the wheels.
Cut them out.
- 19
Step 19
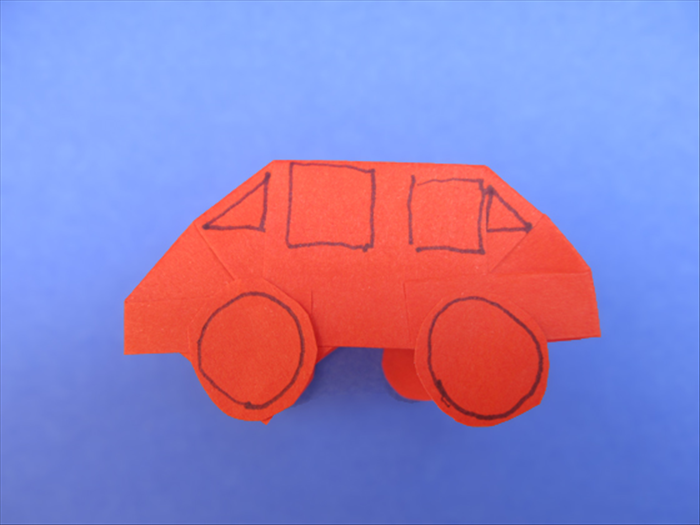
Glue the wheels to the sides and cover the points sticking out at the bottom.
Try to keep them aligned.
- 20
Step 20
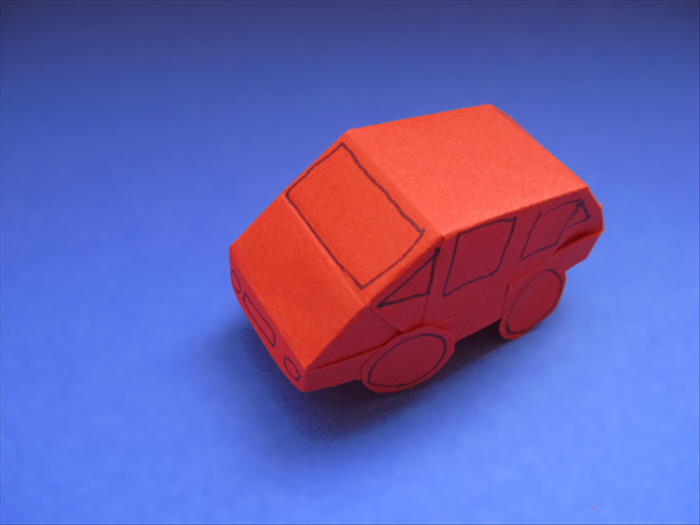
Your paper car is finished. Have fun!