How to make your own calendar template with Inkscape
You can use Inkscape to create a calendar template and then have fun personalizing it.
What You'll Need
- inkscape
- calendar
- month
- days of week
- gridlines
Steps
- 1
Step 1
1
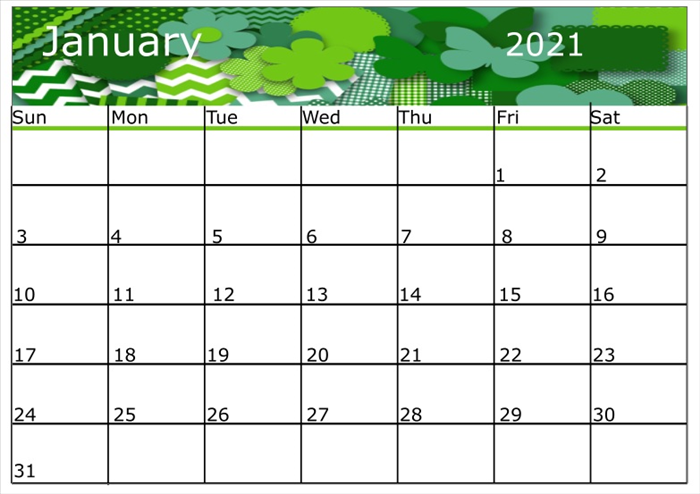
This is an example of a calender template. You can use any text and artwork of any size, style or color.
- 2
Step 2
2.
Open Inkscape
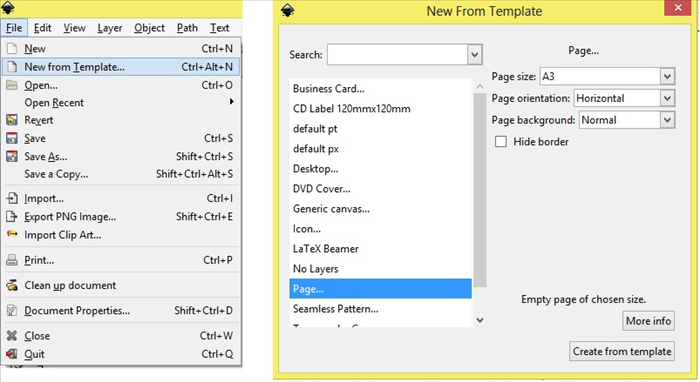
Click on File - New from Template - Page -
Select page size - Horizontal - Create from Template
-
- 3
Step 3
3.
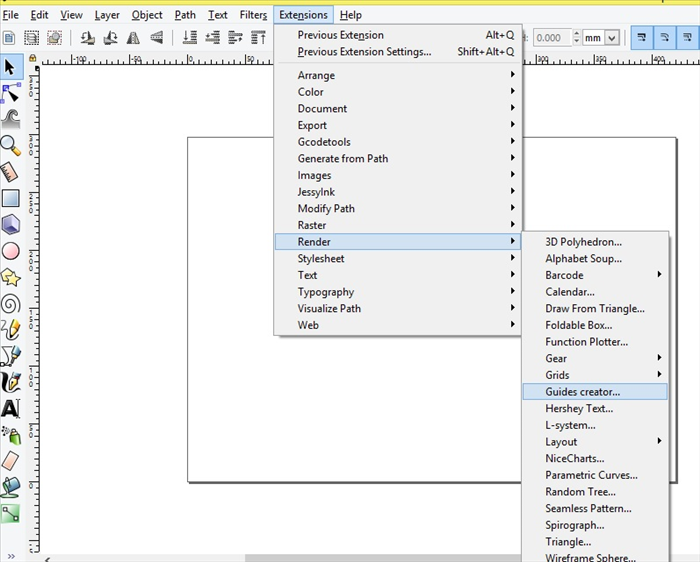
Click on Extensions - Render - Guides creator
- 4
Step 4
4.
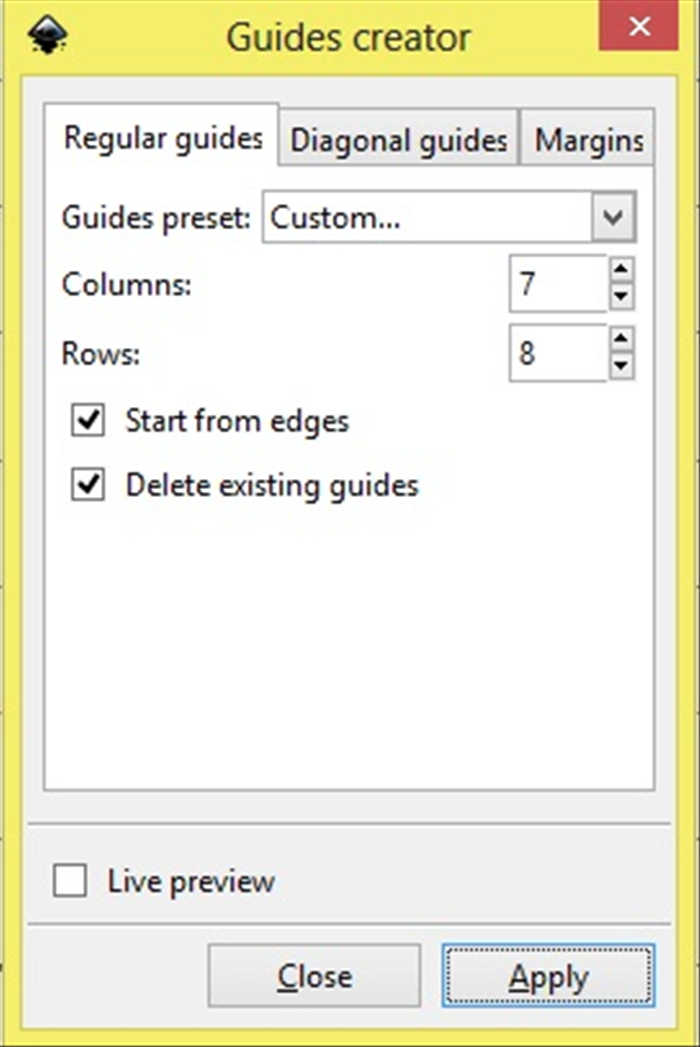
Change Columns to 7
Change Rows to 8
Click Apply
- 5
Step 5
5.
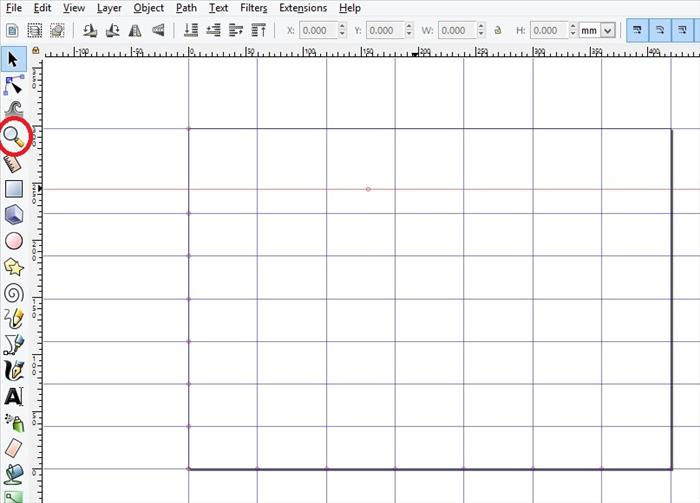
*The first row is for the month with the year and the second row for the days of the week.
Drag the second guideline about 1/2 of the way down.
- 6
Step 6
6.
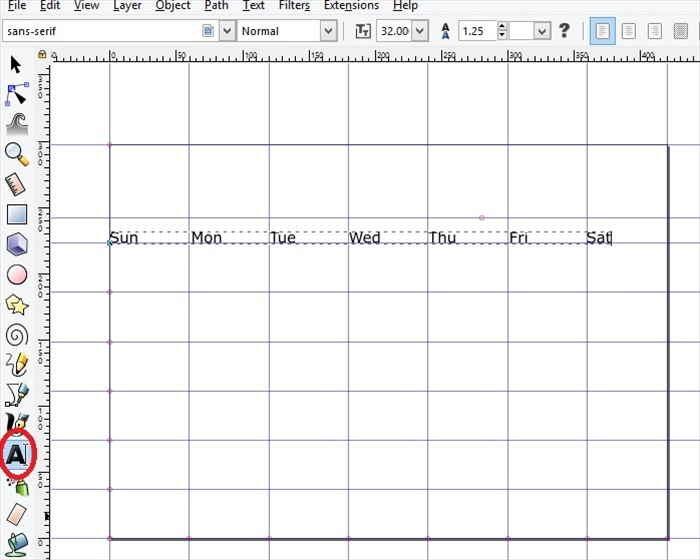
You can easily fill in the days of the week all at one time.
Click the Text icon. Do not type just yet. Select the font and change the size to 32.
Click on the bottom left on the guideline. The text will snap to the grid.
Write the word Sun. *Do not click anywhere else just yet - Press the space bar as many times needed until you get to the next colunm line. Write the word Mon. Press the space bar until you get to the next column line. Write the word Tue
Repeat until you have typed all the days of the week
- 7
Step 7
7.
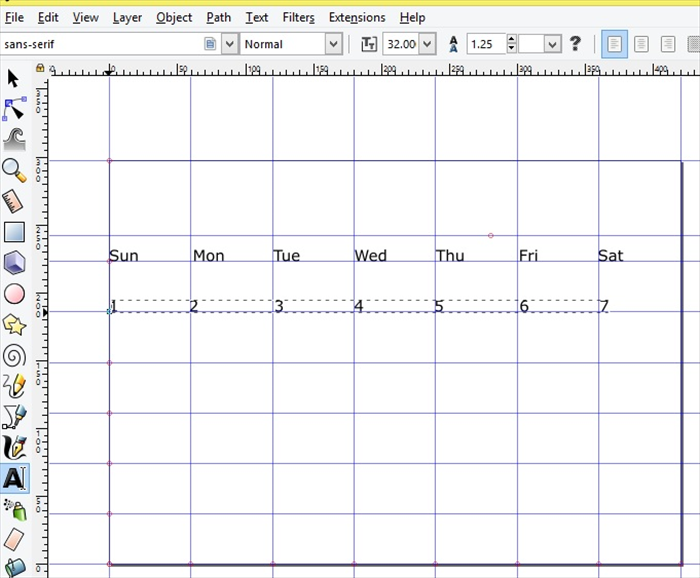
Click on the Text icon.
Go to the next row. Click on the bottom left on the guideline. The text will snap to the grid.
Do not type just yet, Change the font size to 32.
Type the number 1 Press the space bar as many times needed until you get to the next column line.
Type the number 2 Press the space bar as many times needed until you get to the next column line.
Type the number 3
Repeat until you have typed 1 to 7
- 8
Step 8
8
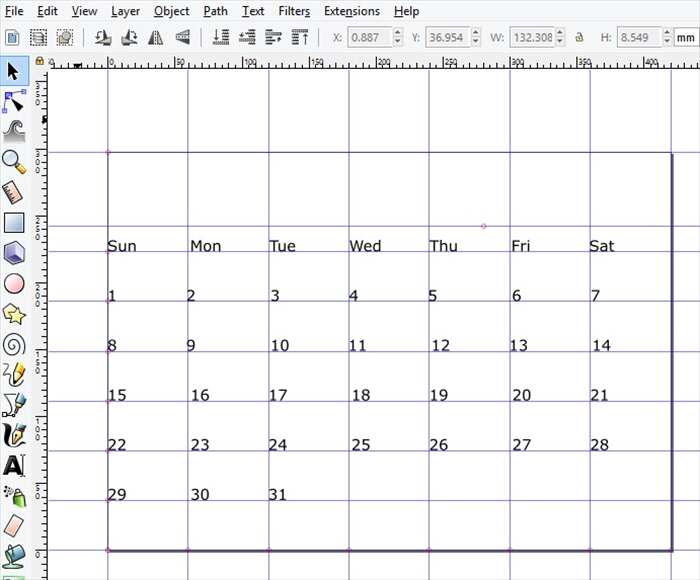
Click on the select icon when you have finished 1 to 7
Click on the text icon.
Click the first column of the next row.
Type the numbers 8 to 14 with the spaces in between as you did for 1 to 7.
Repeat until you have gotten to number 31
- 9
Step 9
9.
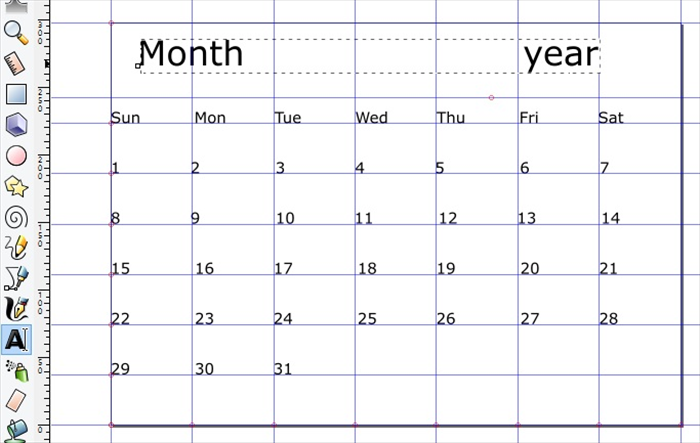
Click on the text icon.
Type Month press the space bar until you have gotten to the spot for the year and type the word year.
.
- 10
Step 10
10
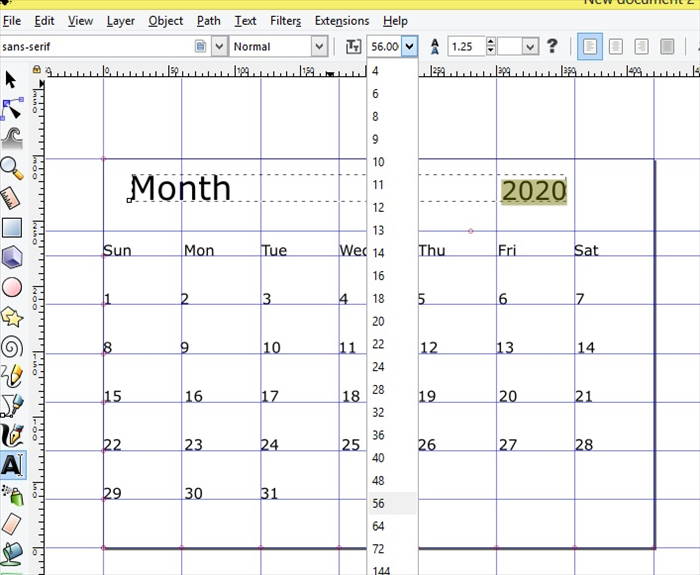
You can make any changes you want to the text.
Just select the text and then click on the text icon and make changes to any letter or numbers you want.
***This template was for 2020 you can change the year to 2021 or any other year.
- 11
Step 11
11
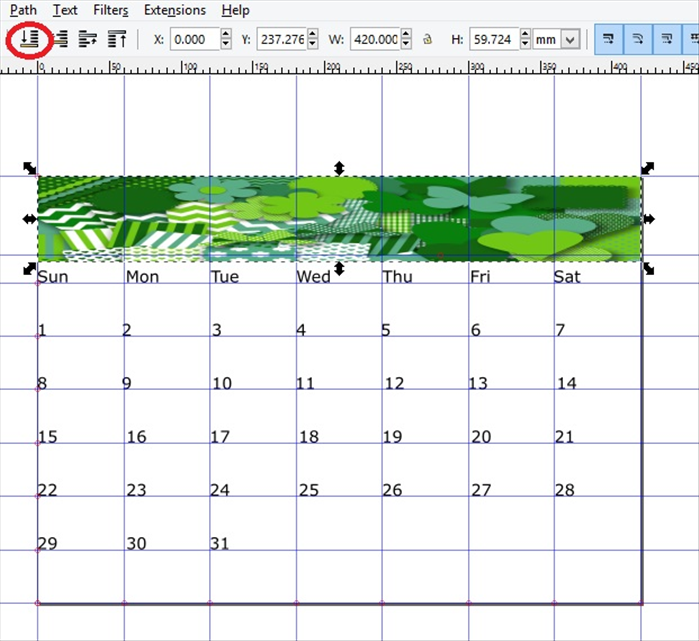
You can add a picture or any artwork you create.
In this case a picture was stretched to fit all the columns and slightly above the days of the week
Click on the lower to bottom icon, circled in red, so you can see the month and year.
- 12
Step 12
12.
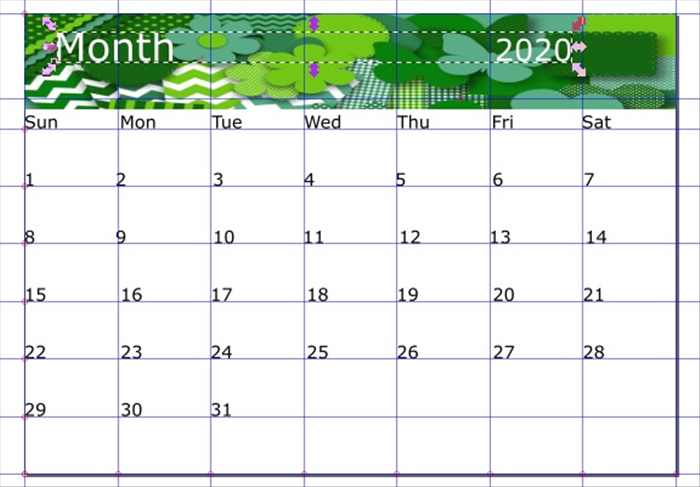
Here the month and year were selected and changed to white.
- 13
Step 13
13
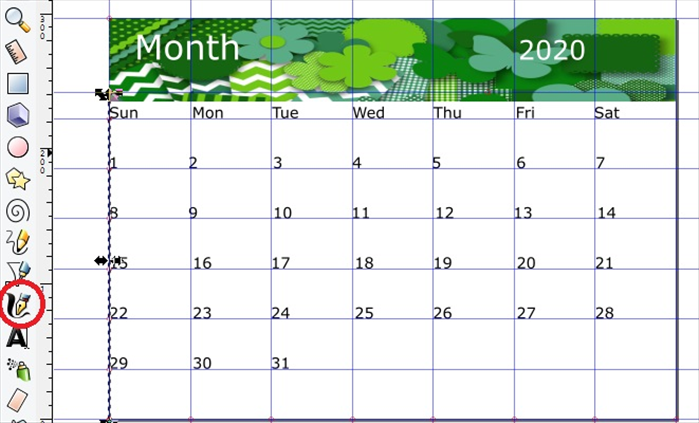
Click on the Bezier icon
Drag a line from the bottom of the picture until it snaps to the grid at the bottom of the page.
- 14
Step 14
14.
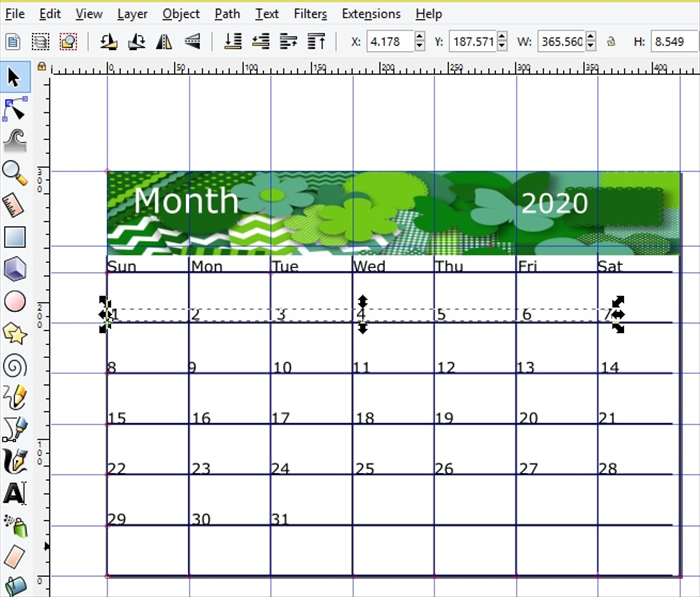
Select the line.
Ctrl and D to copy it. Move the copy to the next column.
Repeat for all the columns including the side of the page.
Repeat for the row lines.
If you need to move the numbers select the line and lower it to the bottom.
Select the numbers and use the arrow keys on your keyboard to move them slightly.
- 15
Step 15
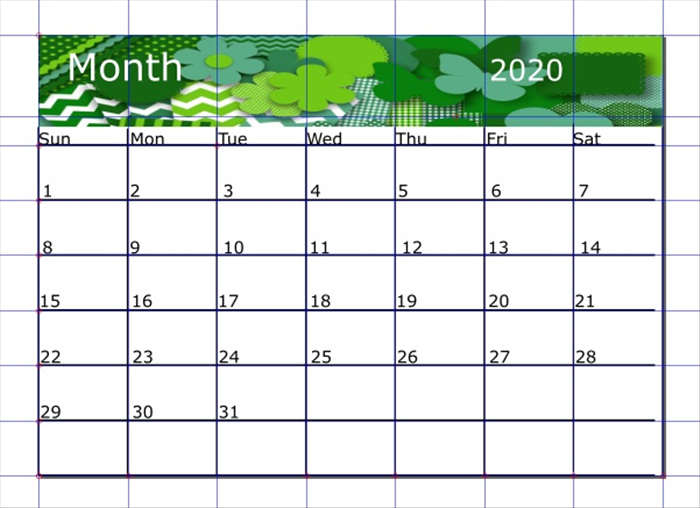
15.
Your calendar template is ready.
- 16
Step 16
16.
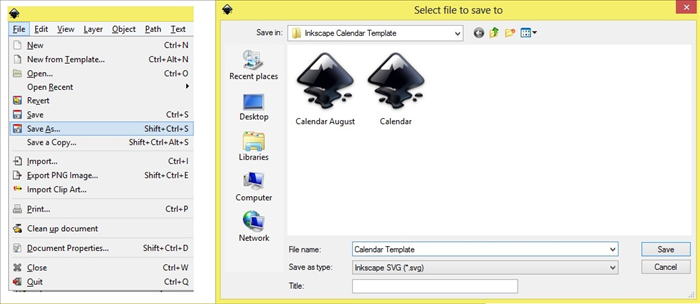
Click on File - Save as.
Save it as a SVG file.
- 17
Step 17
17.
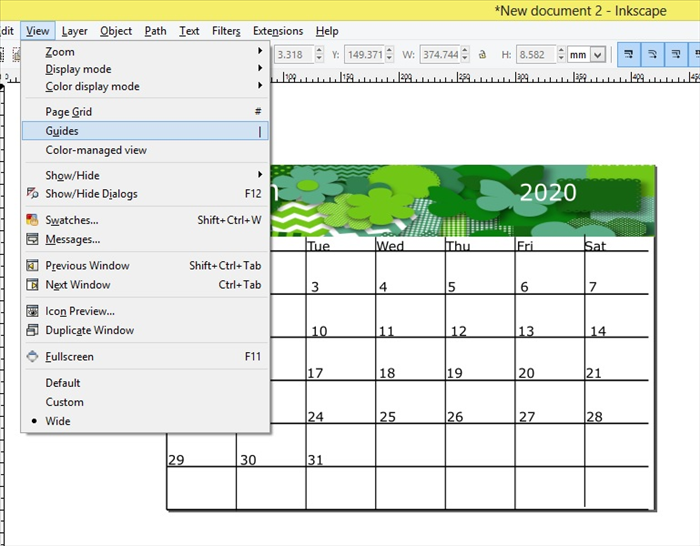
* To see how it looks without the guidelines click on View - Guides
To see the guides again click on View - Guides again.
- 18
Step 18
18.
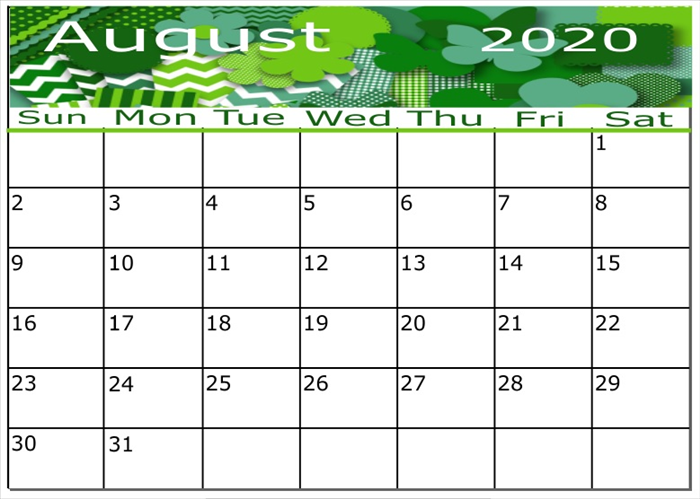
Now you can open your template and make changes for each month.
Save each month as a separate file.
* Hint if you want to see on what day the first day of the month starts, On Windows you can click on the date on the bottom right hand on your computer screen and the month will appear. If you click on the arrows you can see the next month. Enjoy making your calendars!