How to make a functional desktop picture - wallpaper
Dividing your decktop into sections and placing your folders into them will make it easier to spot what you are looking for. This guide will show you a simple and easy way to do it with MS paint.
What You'll Need
- desktop wallpaper
- desktop picture
- organize
- paint
- windows
Steps
- 1
Step 1
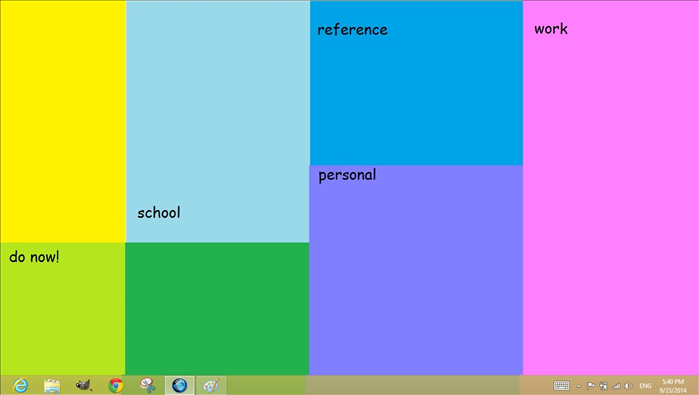
You can do this with MS Paint or any other graphics program you may have.
- 2
Step 2
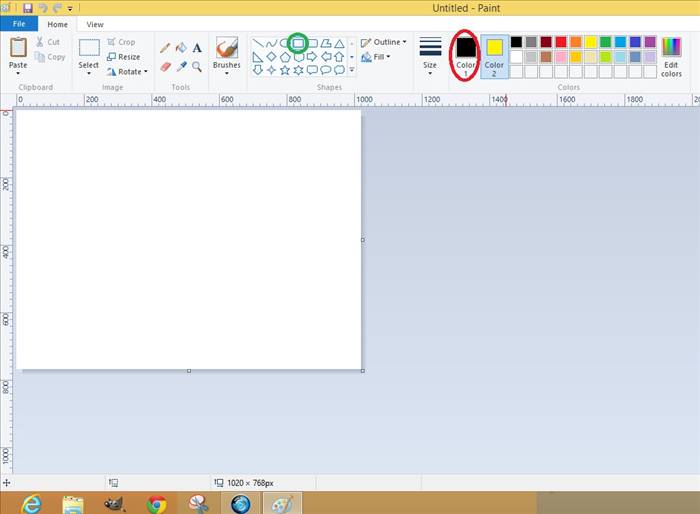
Open your paint program.
Click on color 1 - circled in red.
Where it says "Colors" click on a color from one of the colored boxes.
Click on the square in Shapes" - circled in green
-
- 3
Step 3
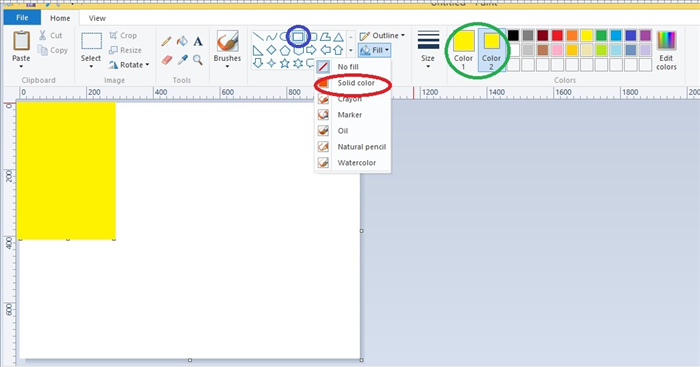
Click on "Color 2". Click on the same color in the "Colors" boxes.- circled in green
Click on "Fill" and then "Solid color" - circled in Red
Now you can make your desktop picture that is divided with colored rectangular sections.
Click at the top left side of the blank white picture and drag a rectangle to the size you want.
- 4
Step 4
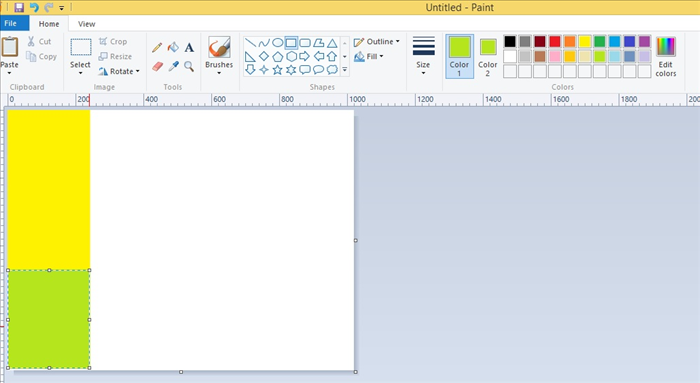
Click on "Color 1" and "Color 2 " and change them to another color.
Draw the second rectangle.
Repeat with as many rectangles as you want.
- 5
Step 5
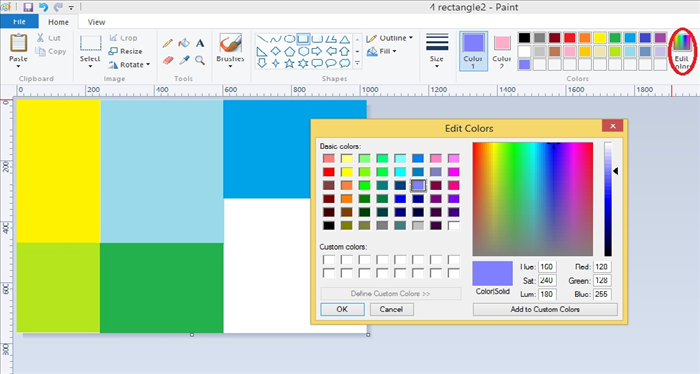
If you don't like the colors in the "Colors" boxes you can get more colors by clicking on "Edit colors" - circled in red.
Click on the color you like and click on "OK".
- 6
Step 6
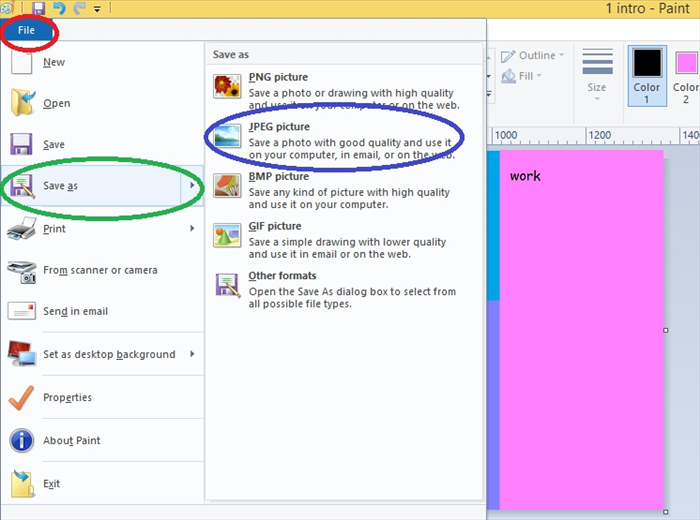
When you are happy with your rectangles save the picture so you can have a copy to adjust if needed.
Click on file - circled in red.
Click on "Save as" - circled in green
Click on "JPEG picture" - circled in Blue
- 7
Step 7

If you want to write something on the rectangles click on the "A" circled in red.
- 8
Step 8
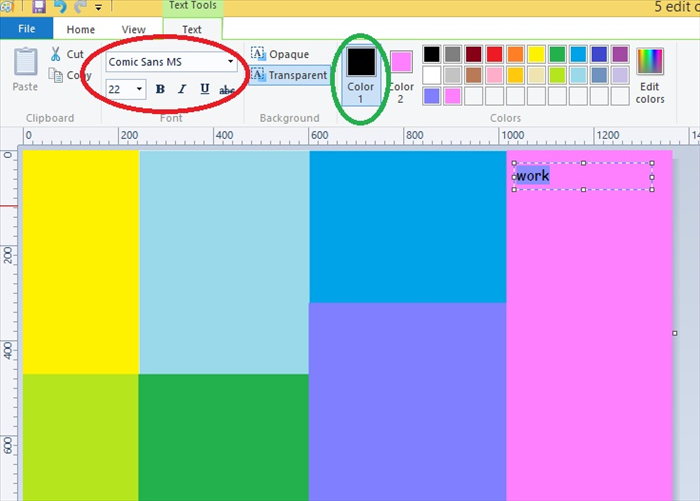
Click on a spot that you want to type on.
Choose the font you want. - circled in red.
Click on "Color 1" and choose from the "Colors" boxes for the font color.
Type the name of the section. Click elsewhere on the picture when you have finished the name. Then click again on another rectangle to write something else.
- 9
Step 9
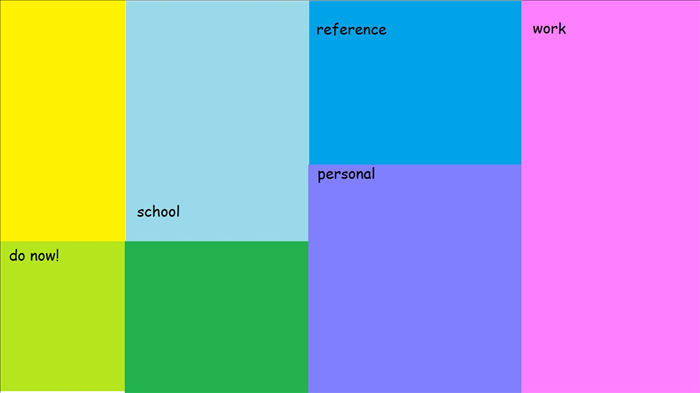
When you are finished writing the section names save the file with a new name
- 10
Step 10
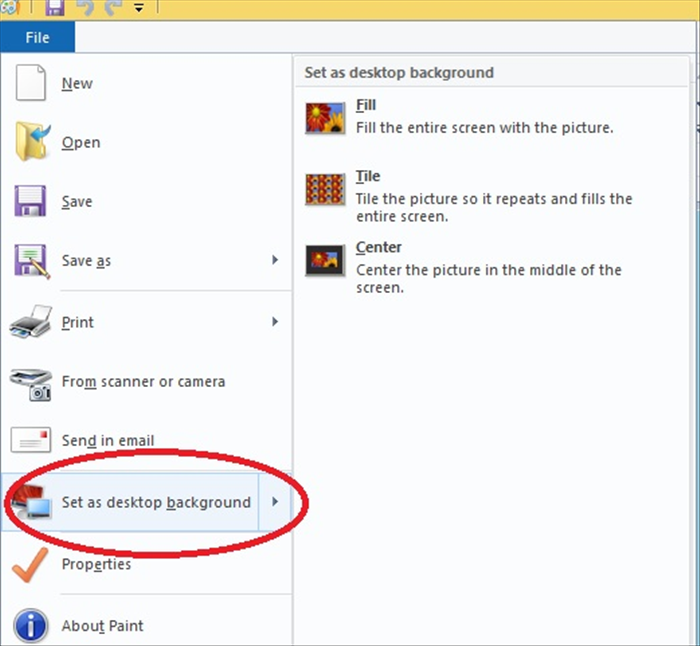
Now make it the desktop picture.
Click on "File"
Click on "Set as desktop background" - circled in Red.
- 11
Step 11
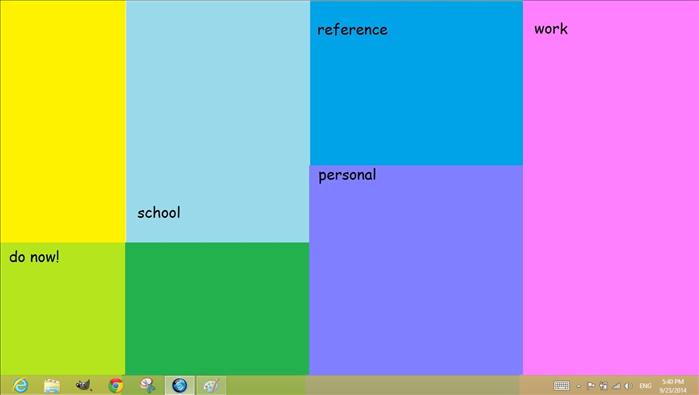
Go to your desktop to see what it looks like.
If you want to change the rectangles or text, open the first picture you saved without the text and make the changes.
Saved the changed picture and then set it as desktop background.
- 12
Step 12
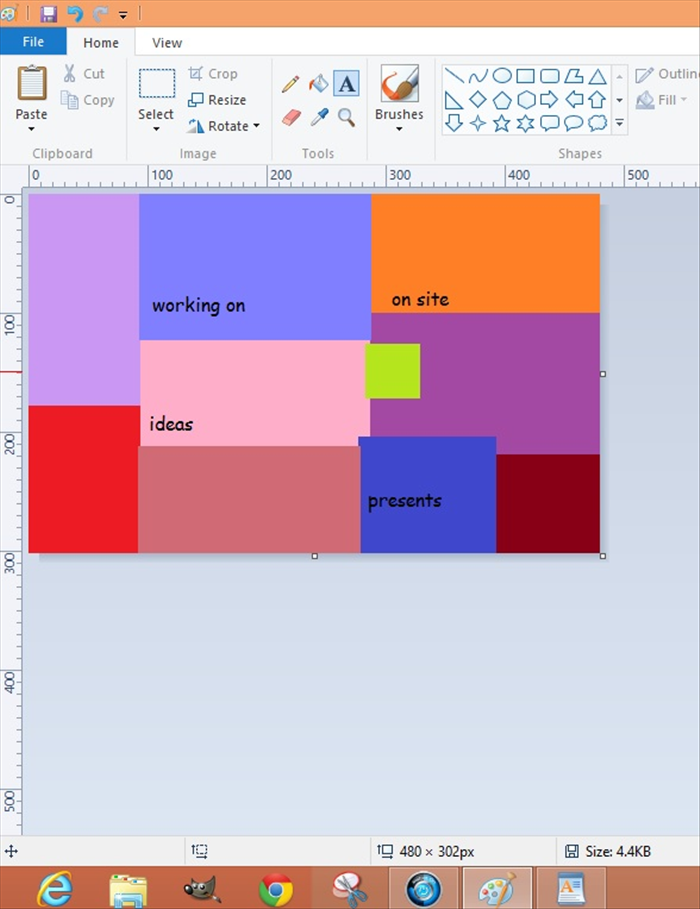
* The color of the toolbar and window frames will automatically change to match the majority of colors in the picture. If you don't like it then you have to change the colors of the rectangles.
The previous picture has a greenish tool bar.
Here the tool bar is a redish tan color.