How to make a puzzle using Inkscape
Make a unique puzzle from a photo or your art work using squares and ovals in Inkscape.
What You'll Need
- puzzle
- puzzle pieces
- inkscape
- union
- group
- lower selection
- import
Tips
The picture used in this guide was taken from openclipart.org
Steps
- 1
Step 1
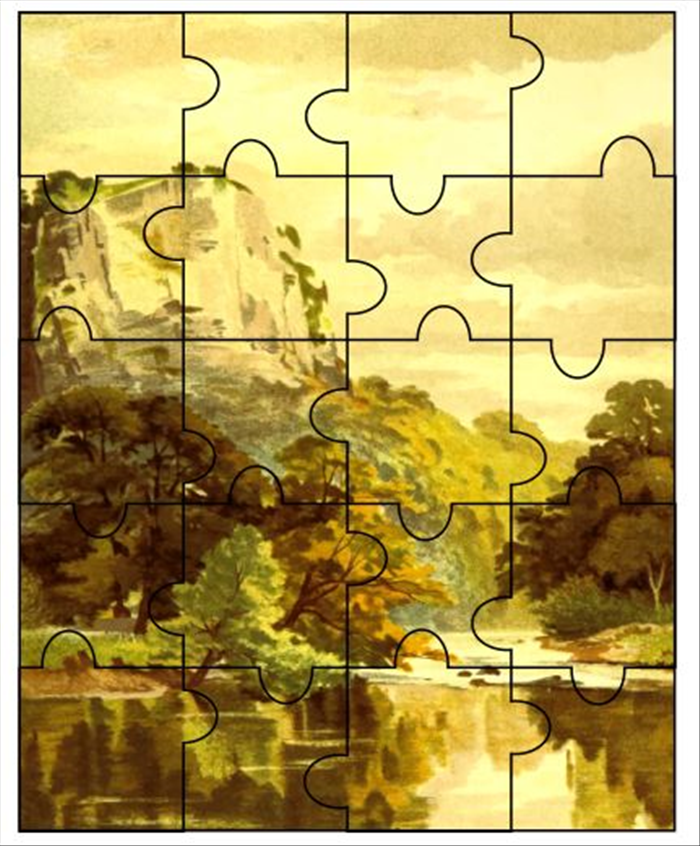
This guide will show you how to combine squares and ovals to create puzzle pieces.
It is a general guide for rows of 4 puzzle pieces. You can change the number of columns and rows and the measurements of the squares and ovals.
*The shortcut keys used here are for the Windows version of Inkscape. If you have a different version, with different shortcut keys, use them instead.
- 2
Step 2
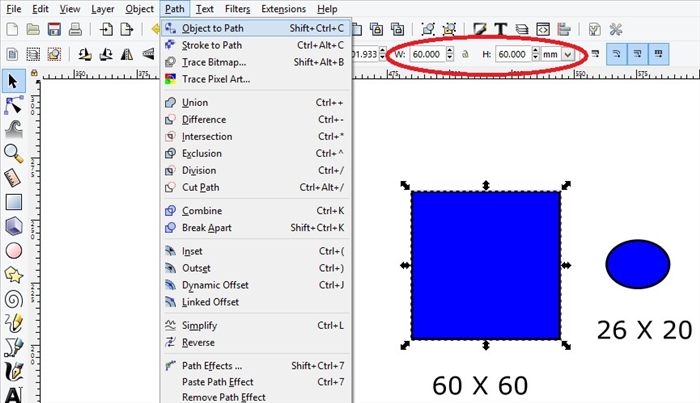
Create a rectangle using the rectangle tool. Change the width and height to 60, circled in red. Click on Path - Object to Path.
Create an oval using the circle tool. Change the width and height to 26 X 20. Click on Path - Object to Path.
-
- 3
Step 3
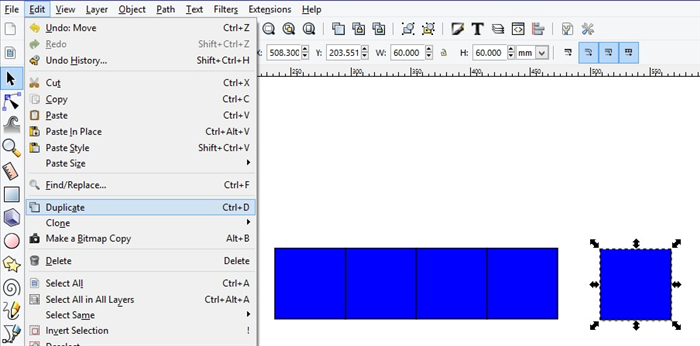
Select the square. Click on Edit - Duplicate or use the shortcut ctrl and d on your keyboard.
Duplicate it 4 times. Align the 4 squares in a row.
- 4
Step 4
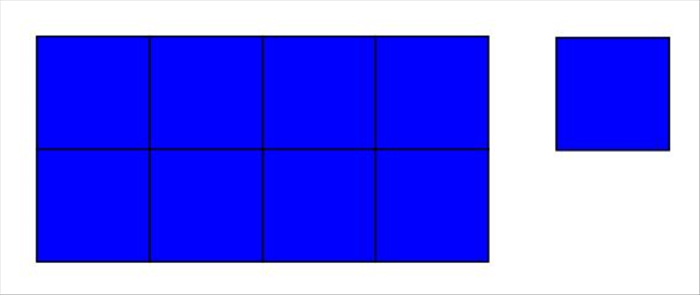
Duplicate again to make 2 rows.
- 5
Step 5
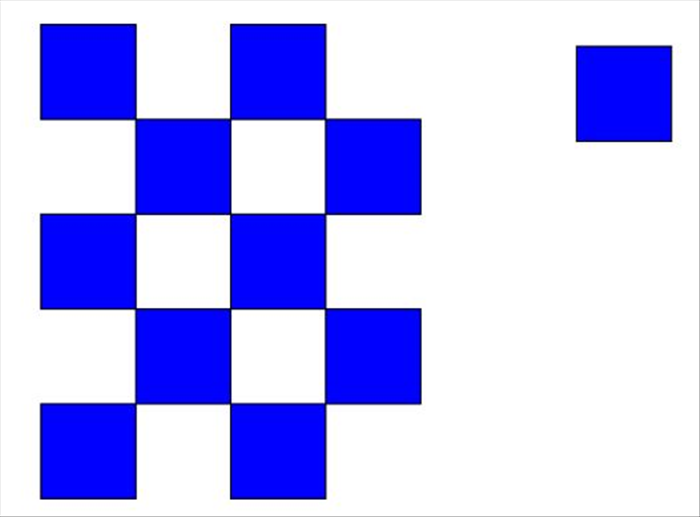
Move and duplicate squares to make a checkerboard pattern of 5 rows.
*If the picture you will be using for the puzzle is square, make the pattern 4 rows.
- 6
Step 6
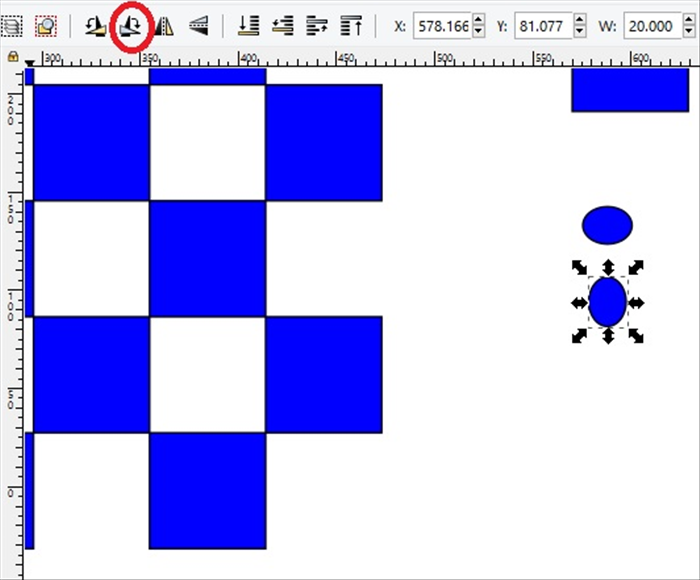
Duplicate the oval. Move the duplicate below it and click on Rotate 90 degrees, circled in red.
Select the top oval. Click on Ctrl and D 15 times to make 15 duplicates.
Select the other oval and also make 15 duplicates.
- 7
Step 7
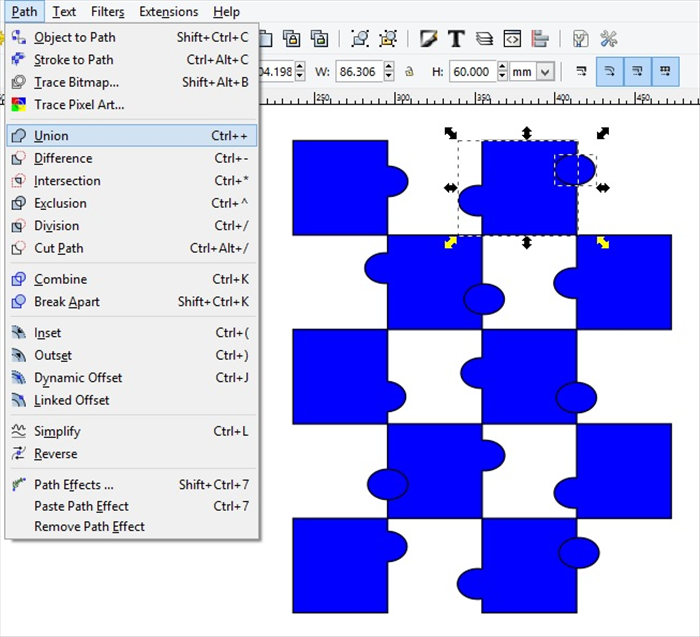
Select and drag the top ovals half way on the sides of the blue squares.
The outer edges of the square rows will be part of the rectangle frame. Do not put ovals on them.
*You can press the arrow on your keyboard to help move them to the halfway point using the middle selection arrows at top and bottom as a guide.
- 8
Step 8
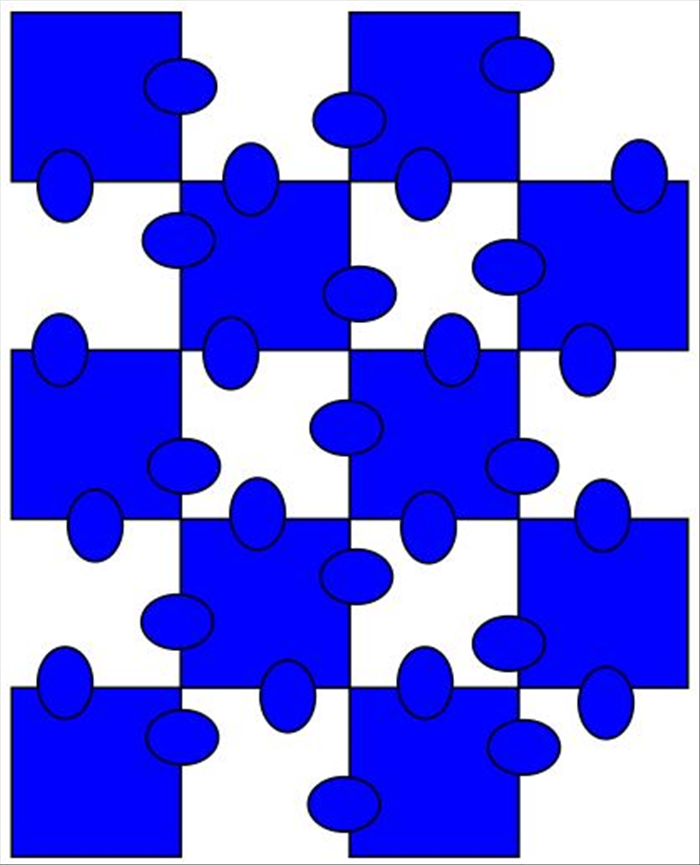
Drag duplicates of the rotated oval to the top and bottoms of the squares.
The outer edges of the square rows will be part of the rectangle frame. Do not put ovals on them.
- 9
Step 9
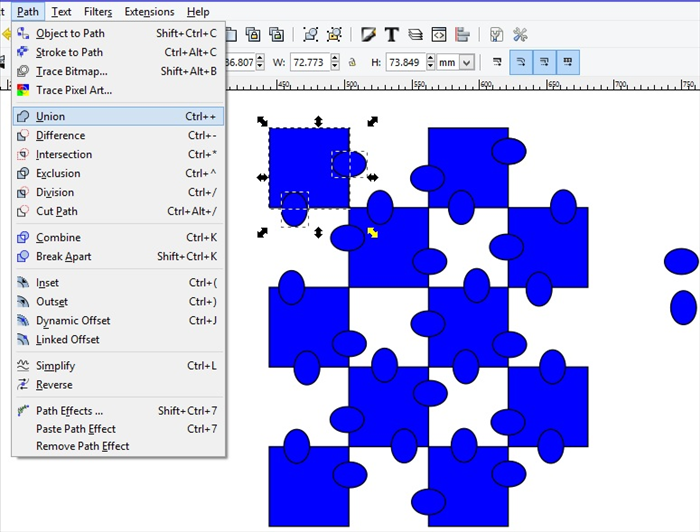
Select one square and while pressing shift select all the ovals on that square. Click on Path - Union ....or the shortcut key Ctrl and the plus sign+ on your keyboard.
Repeat for all the squares.
- 10
Step 10
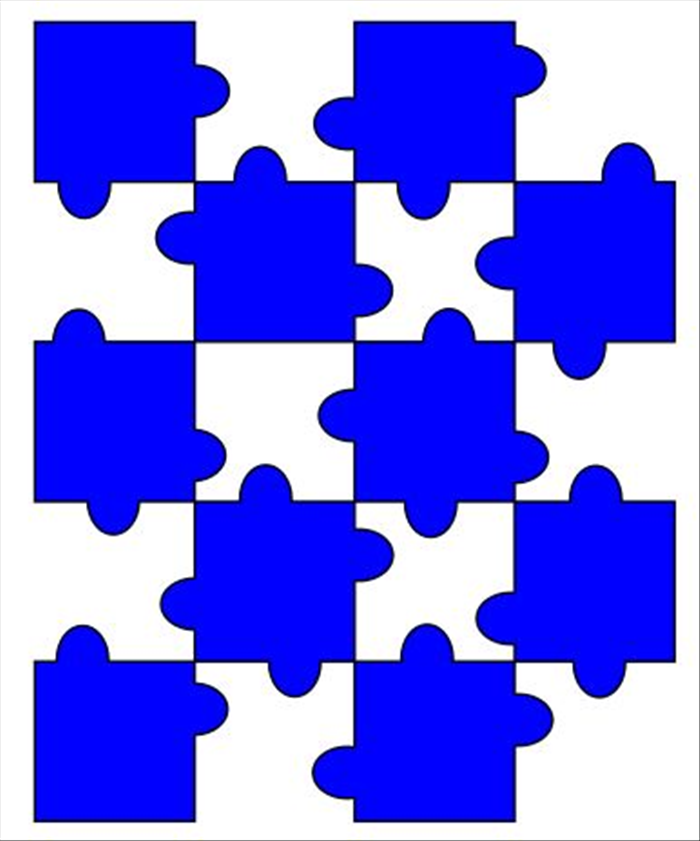
Result
- 11
Step 11
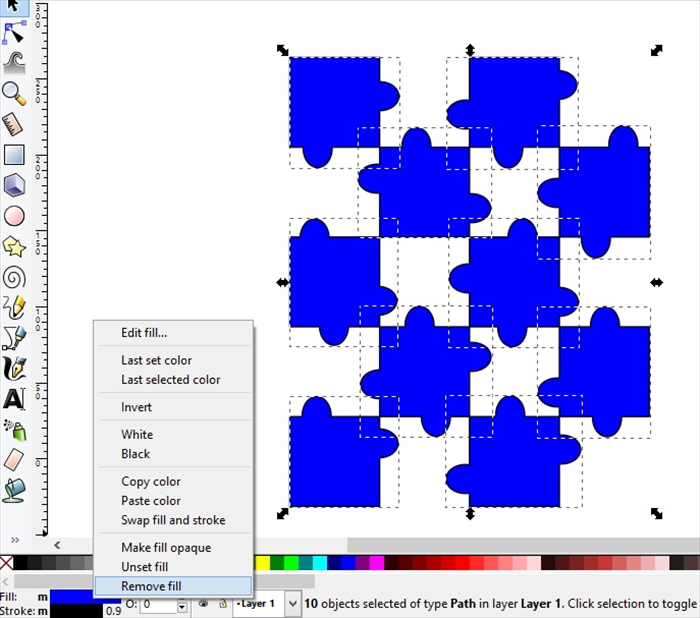
Select all the squares. Right click on the fill color and then click on remove fill.
- 12
Step 12
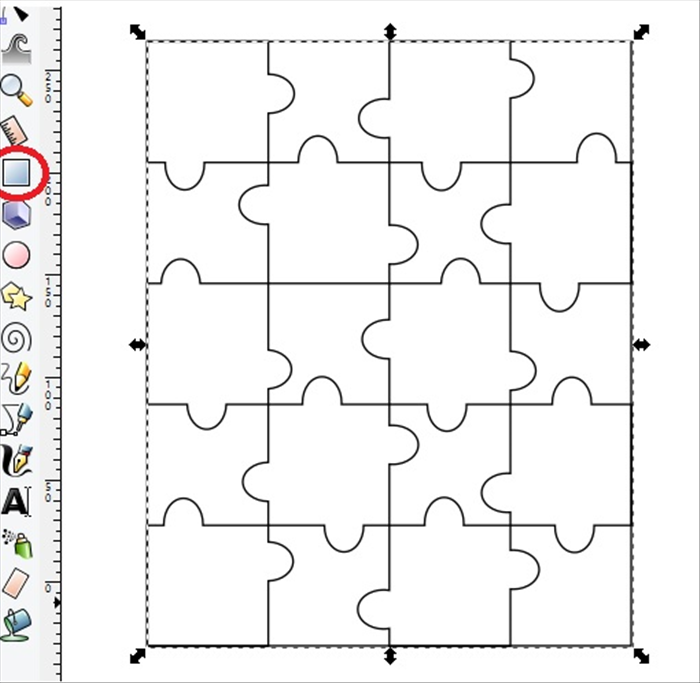
Click on the draw rectangle tool and drag a rectangle the size of the puzzle squares.
- 13
Step 13
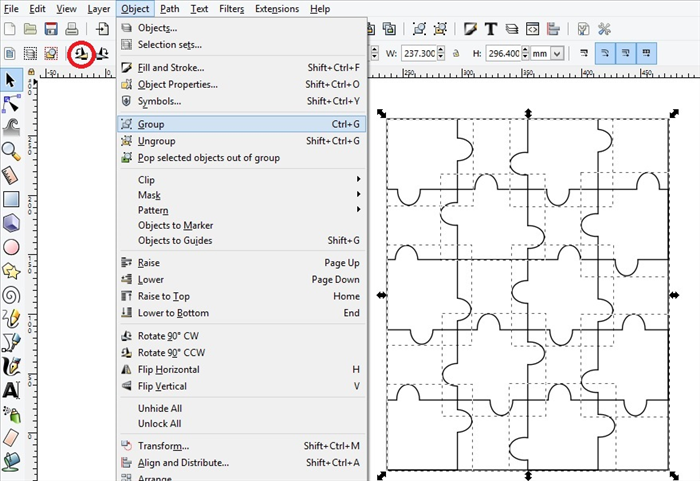
Drag the selection box over all the squares. Click Object- Group.
*This setup is for portrait paper. If your picture is on landscape paper click on the rotate 90 degrees icon, circled in red.
- 14
Step 14
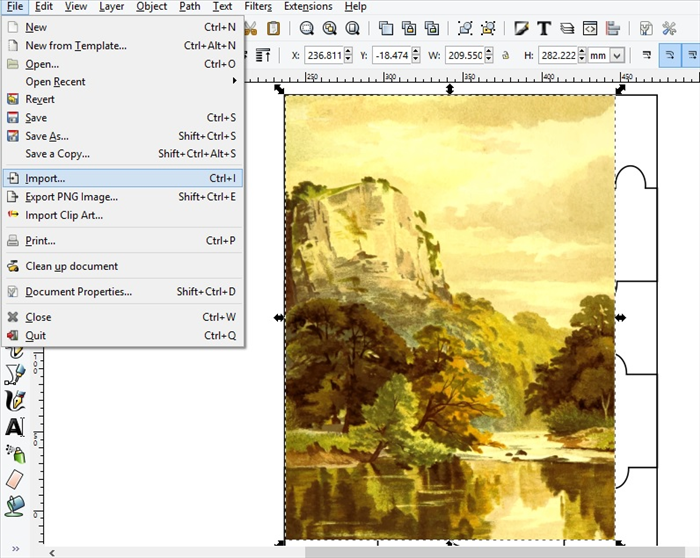
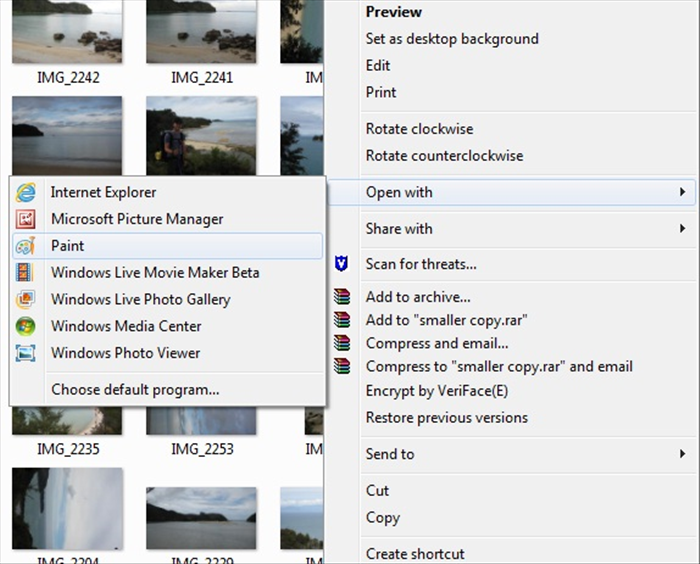
Click File - Import A new menu will open.
Find the picture you want to use. Click on it and click Open.
- 15
Step 15
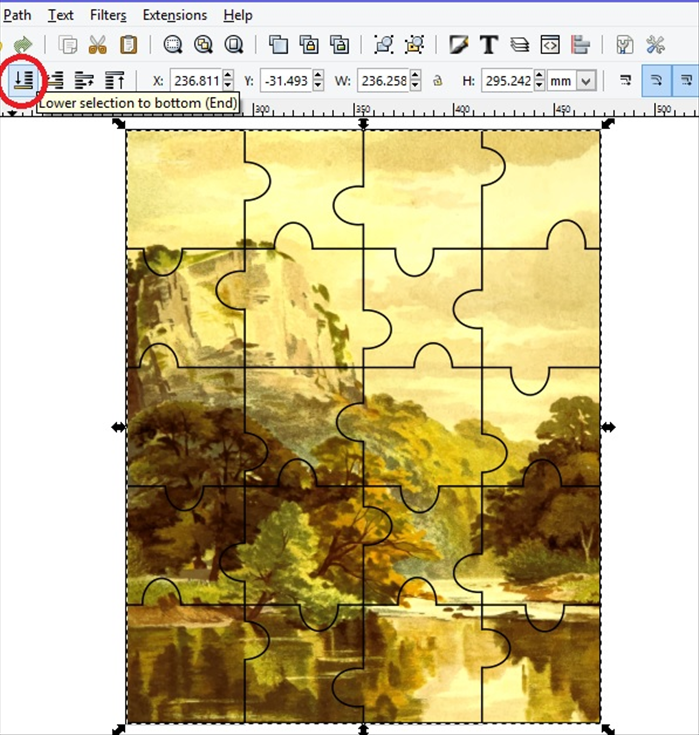
Click on the picture to select it. Click on - Lower selection to bottom, circled in red.
Drag the sides of the puzzle to fit the height and width of the picture .
- 16
Step 16
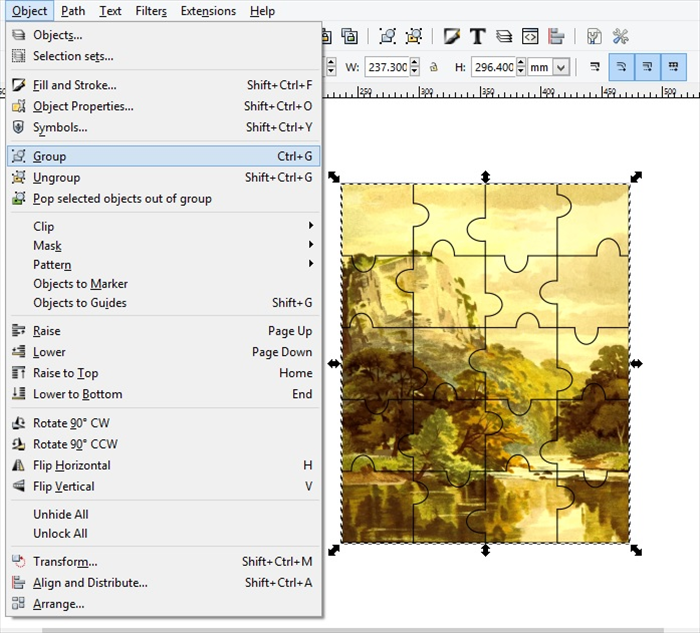
Drag the selection box around the picture. It will select both the picture and the puzzle outline.
Click Object - Group.
- 17
Step 17
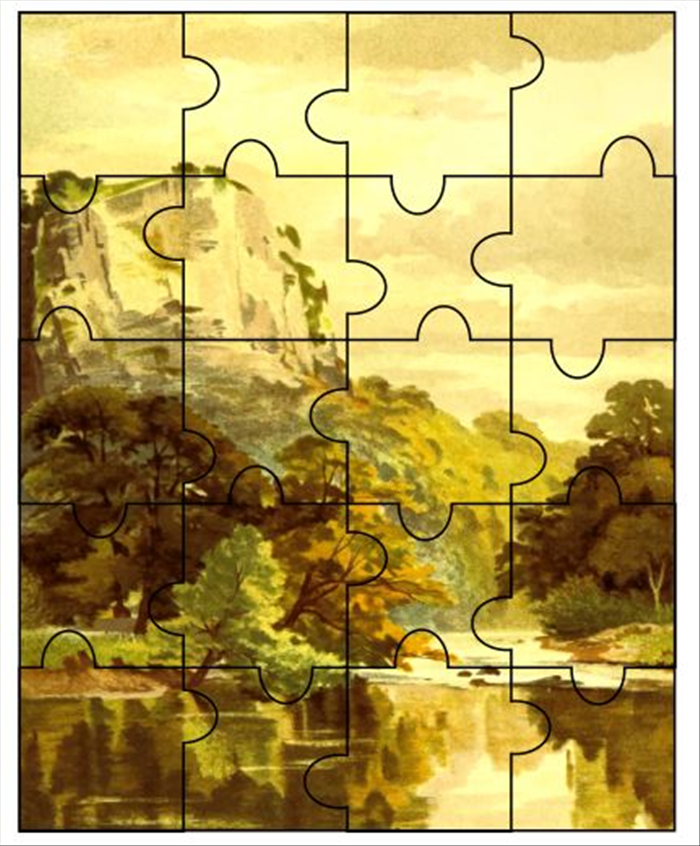
Your unique puzzle is ready.
You can print it, glue it to cardboard or wood and cut along the lines.
Enjoy!