How to make a maze with Inkscape
It is easy to create mazes with Inkscape. This guide will show you how to make a maze with different colored maze paths, for easy reference.
What You'll Need
- Inkscape
- maze
- new layer
- delete layer
- select layer
- guide lines
- create guide lines
- object to path
- path union
- guides creator extension
- SVG
Steps
- 1
Step 1
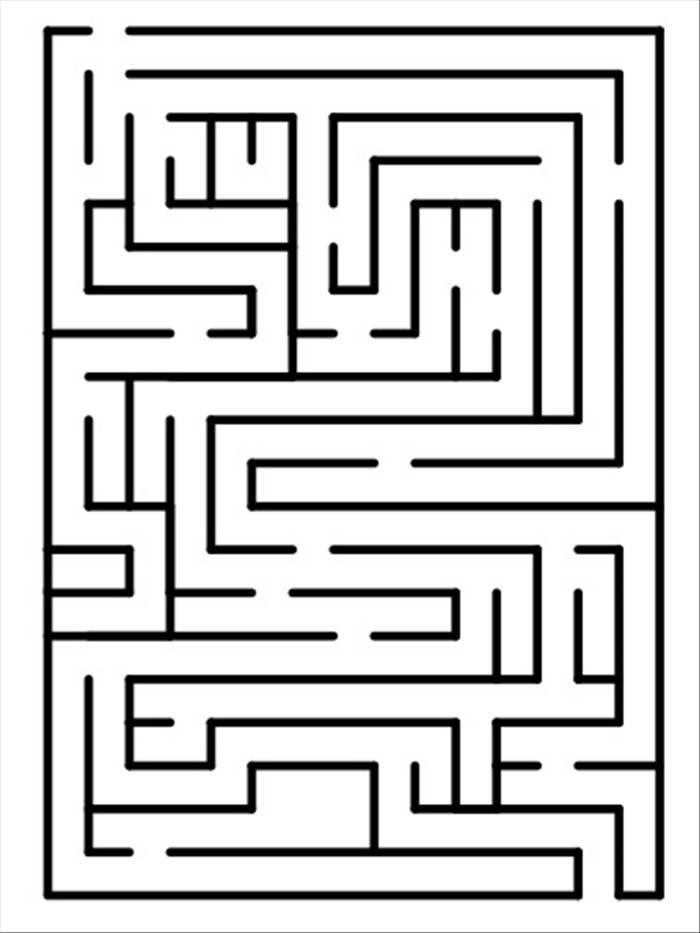
1. This example was made on a 15 X 20 grid, made with the guide creator extension.
You can change the number of columns and rows of the grid and make the maze as simple or complicated as you like.
- 2
Step 2
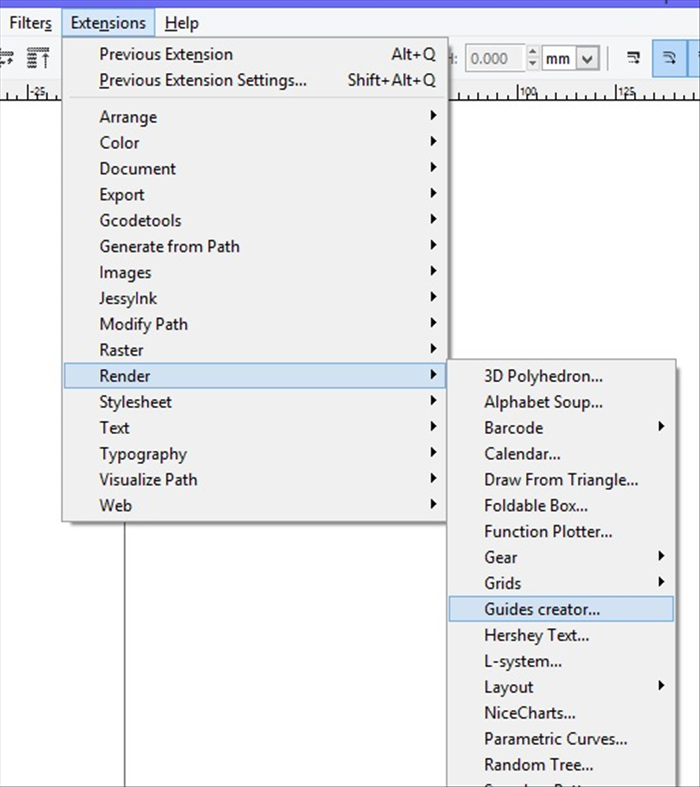
2. Open Inkscape Click on Extensions - Render - Guides creator
-
- 3
Step 3
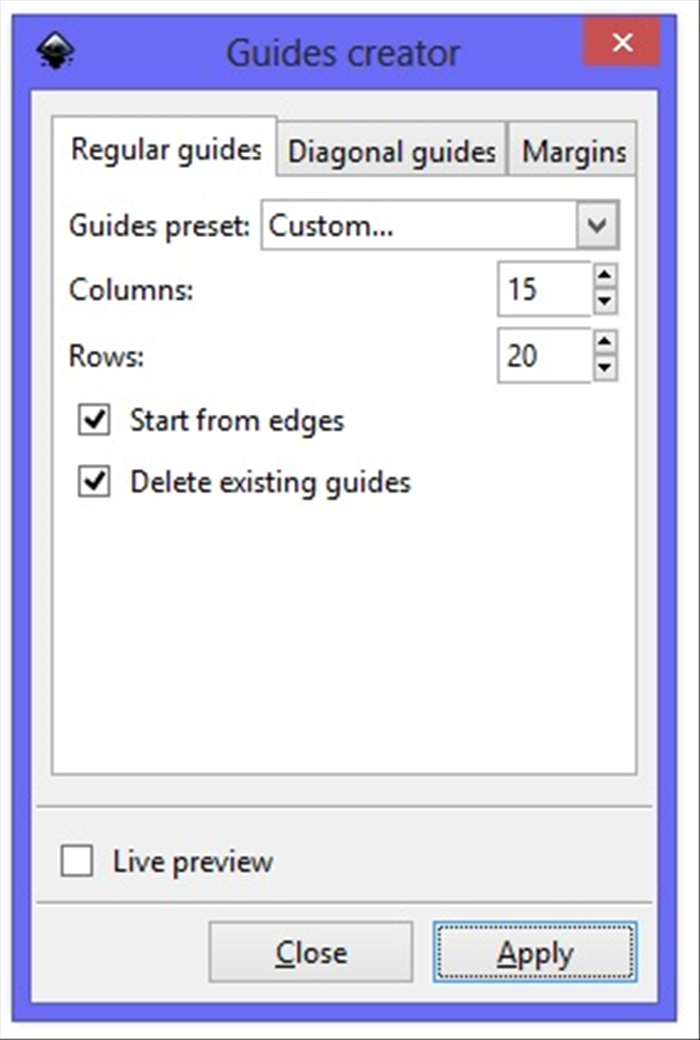
3. Make Columns: 15 and Rows: 20
and check marks next to Start from edges and Delete existing guides.
Click Apply
- 4
Step 4
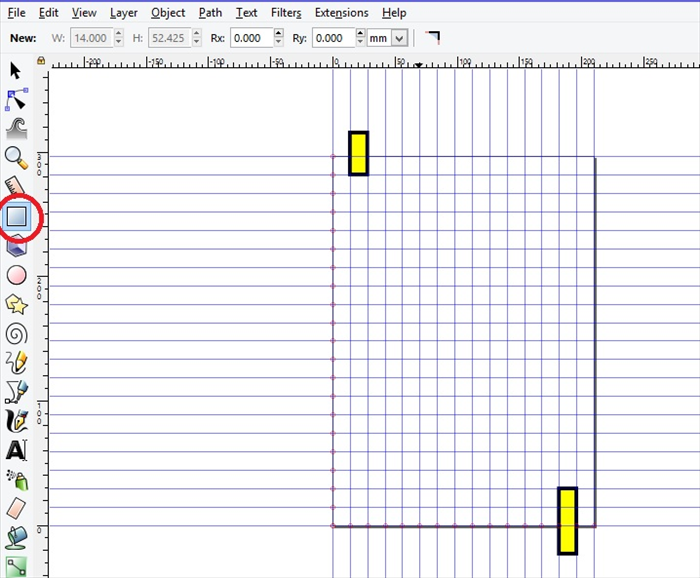
4. Click on the Create Rectangles and squares icon.
Make a yellow rectangle slightly above the start of the maze and another slightly below the finish of the maze.
- 5
Step 5
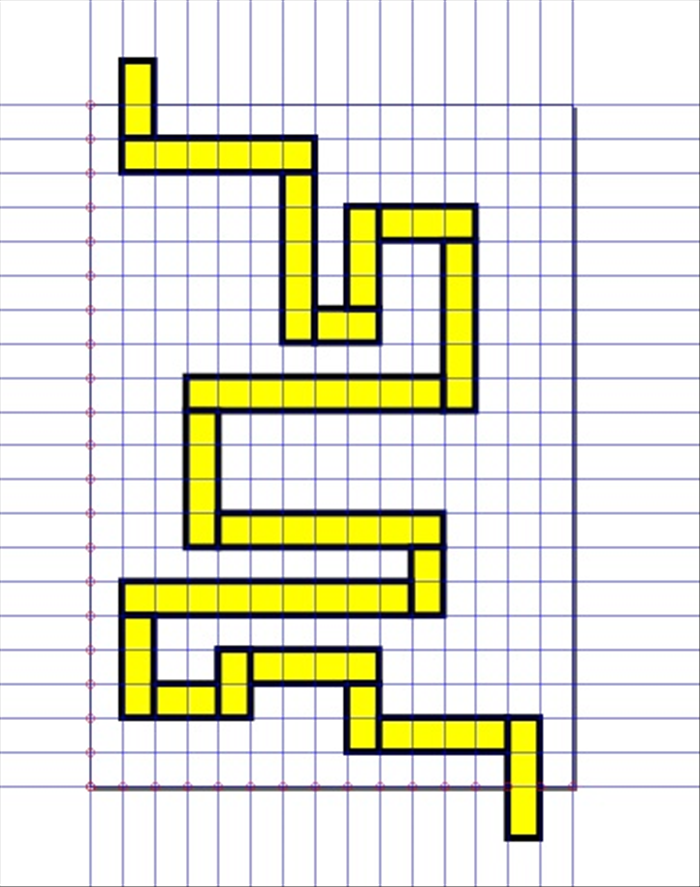
5. Add rectangles to create at path from the start to the finish.
- 6
Step 6
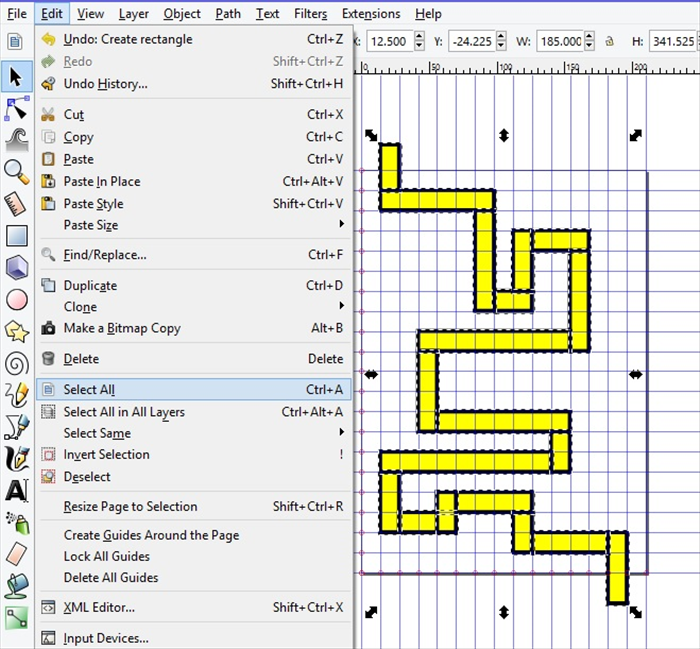
6. Click - Edit - select all
- 7
Step 7
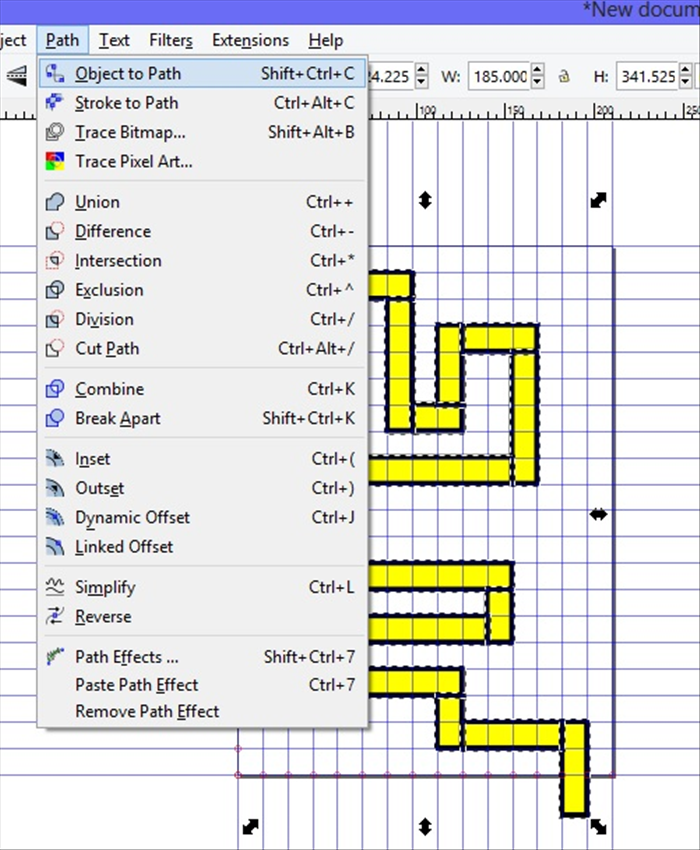
7. Click Path - Object to Path
- 8
Step 8
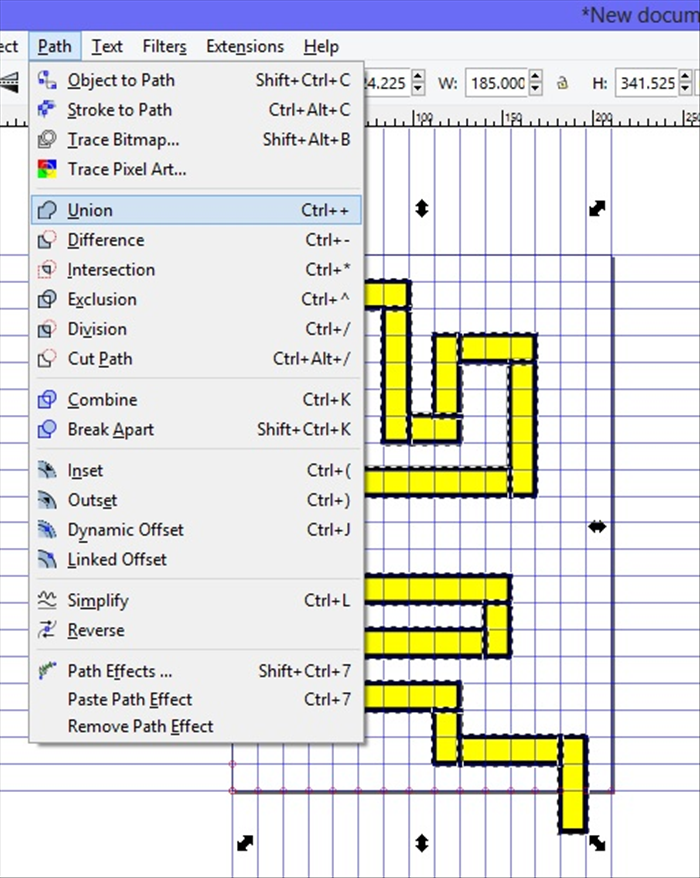
8. Click Path - Union
- 9
Step 9
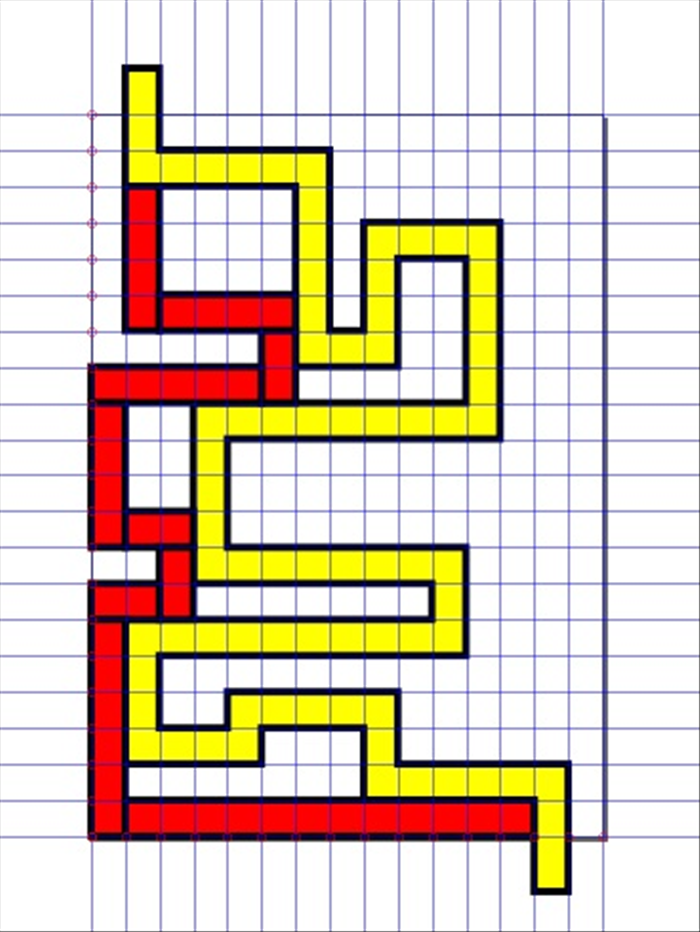
9. Make a new rectangle,
change the fill color to red and create another path with the start and end next to the yellow path .
- 10
Step 10
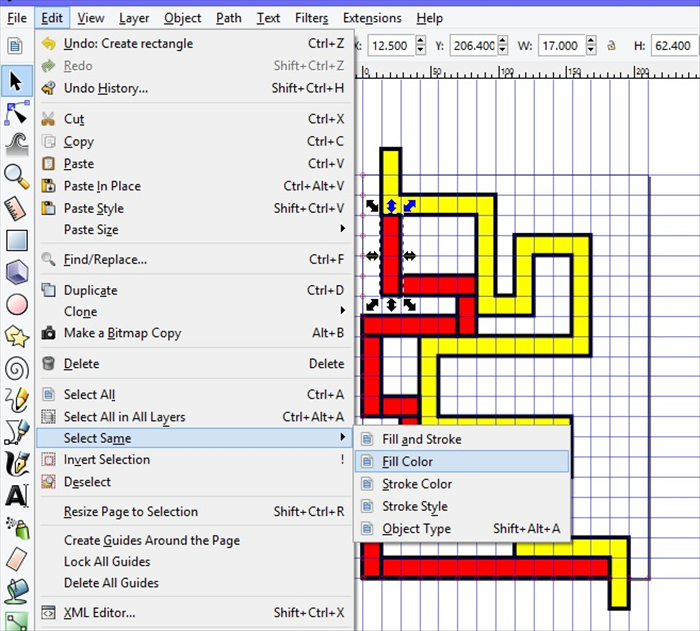
10 Click on one of the red rectangles.
Click Edit - Select Same - Fill color
- 11
Step 11
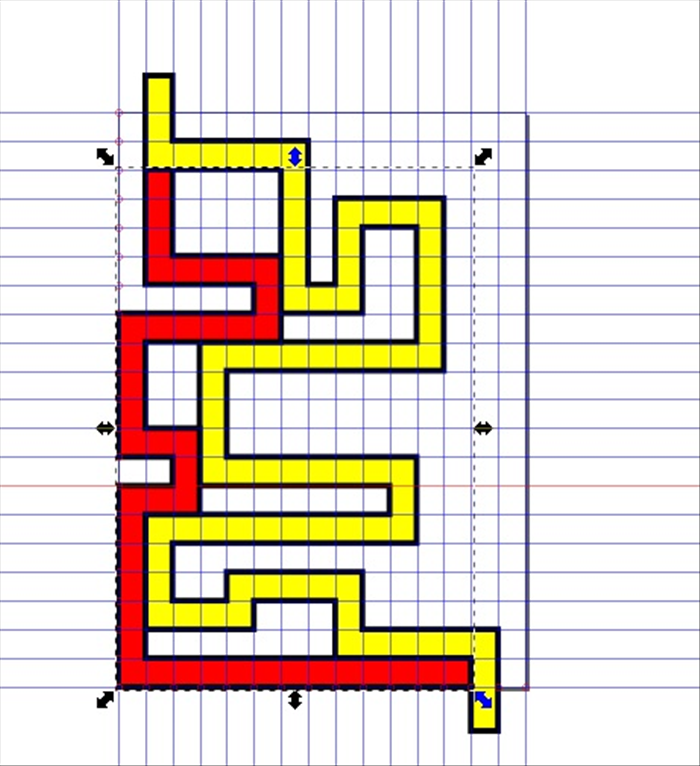
11. Click Path - Object to Path and then Path - Union
- 12
Step 12
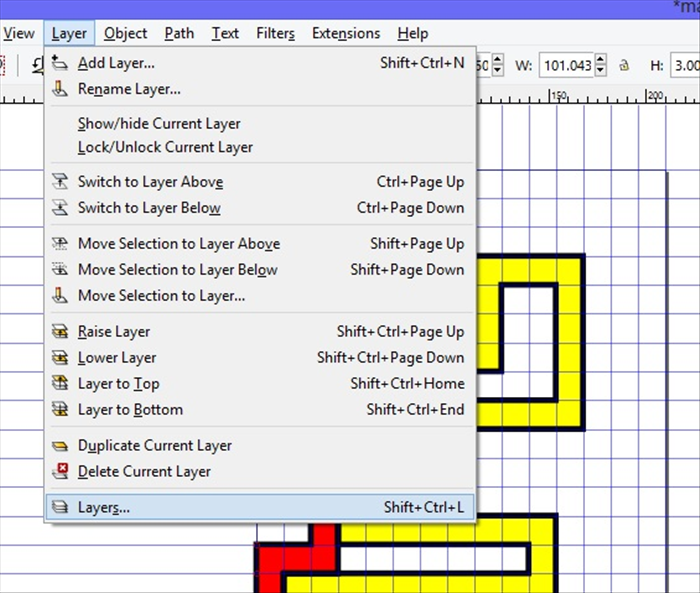
12. Click on Layer - Layers
- 13
Step 13
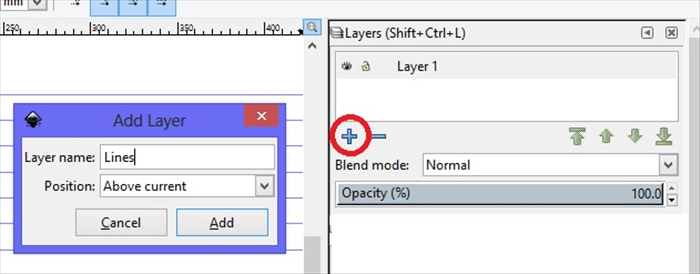
13 Click on the plus sign -circled in red.
The Add Layer ,menu will appear.
Make the Layer name - Lines
Click Add
- 14
Step 14
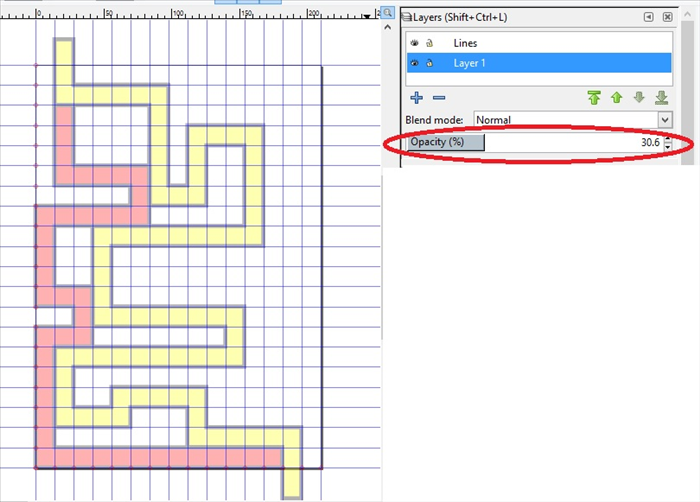
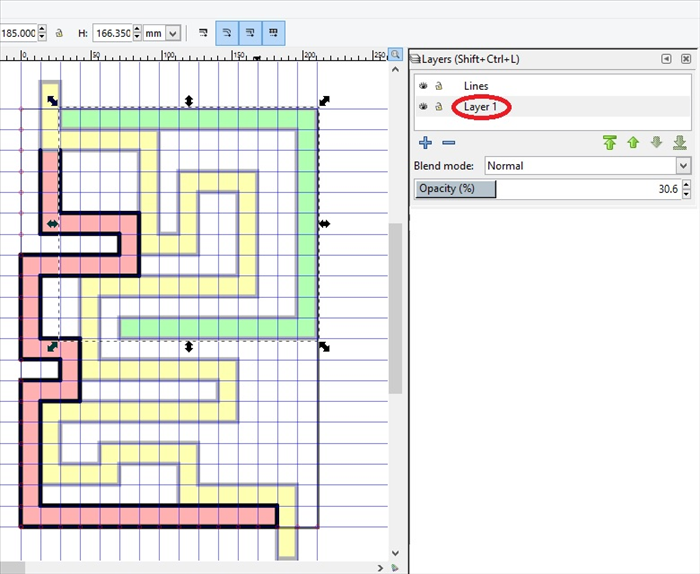
14. Click on Layer 1. It should turn blue.
Change the Opacity to about 30 percent. - Circled in red.
- 15
Step 15
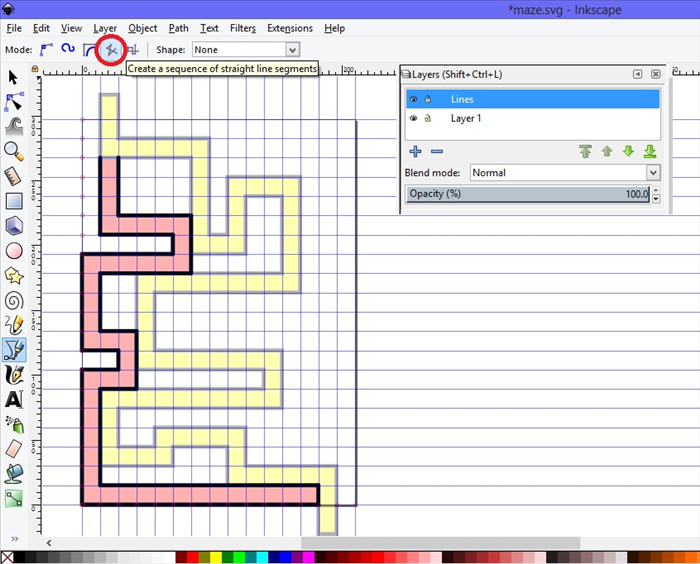
15. Click on the lines layer - It should turn blue. ***It will turn light gray while you are working on the layer.
Click on the bezier tool and click on - Create a sequence of straight line segments - circled in red.
Make lines along the border of the red maze path.
***Notice that the top of the red maze path has no horizontal line at the top. That is the entrance to the red maze path.
- 16
Step 16
16. Click on Layer 1
Make a new maze path with green rectangles, the same way you made the yellow and red maze paths:
Click on one of the green rectangles.
Click Edit - Select Same - Fill color
Click Path - Object to Path and then Path - Union
- 17
Step 17
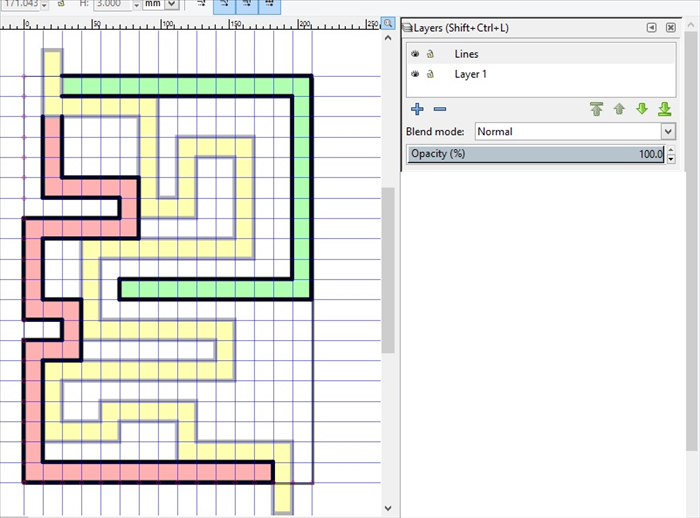
17. Click on the Lines layer
Start from the entrance to the green path and make lines along the outlines of the green path.
- 18
Step 18
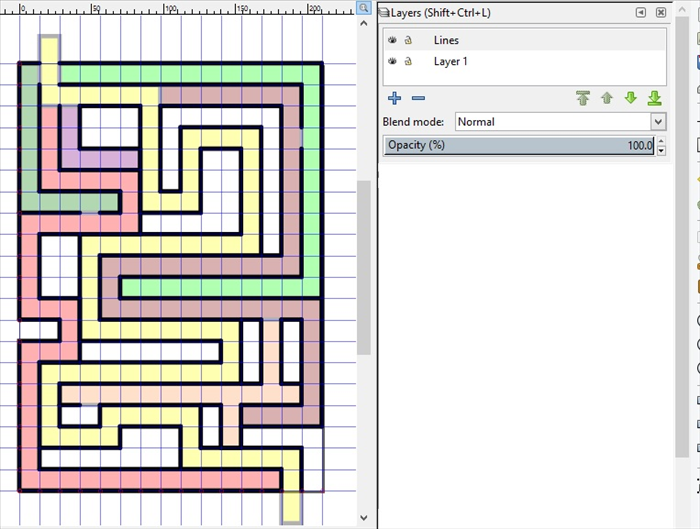
18. Repeat step 16 and 17 for different colored rectangle maze paths
****Pay attention that layer 1 is highlighted in grey when you make the colored rectangles and the Lines layer is highlighted in grey when you make the lines.
On the Lines Layer make lines along the yellow maze path.
*Do not cover the entrances to the other maze paths at the top of the maze.
If you want to add an entrance from one maze path to another, Click on the Lines layer.
Click on the line covering the entrance and shorten it to the entrance point. Then create another line starting from the space you want to make.
- 19
Step 19
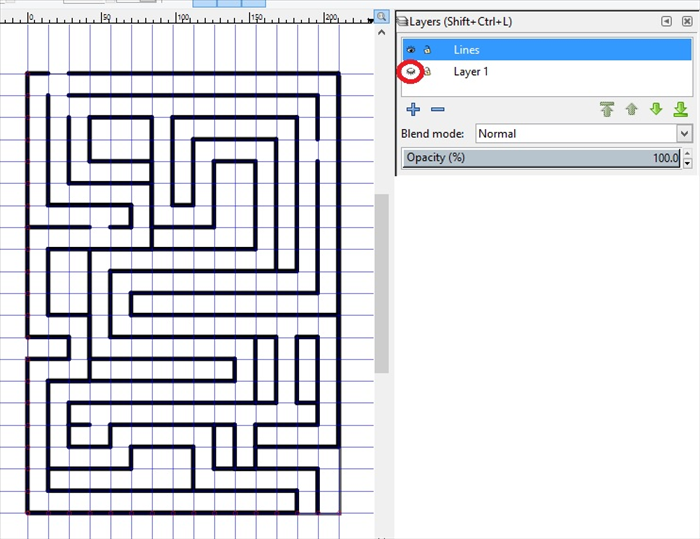
19. To see what the maze looks like click on the Lines layer to highlight it and then click only on the eye icon of Layer 1, circled in red.
***The Lines layer should still be highlighted.
You can add lines and make new entrances, if you want.
- 20
Step 20
20. Click on View - Guides, to hide or show the page guide lines.
You can click on File - Save As - Inkscape SVG file and make changes later.
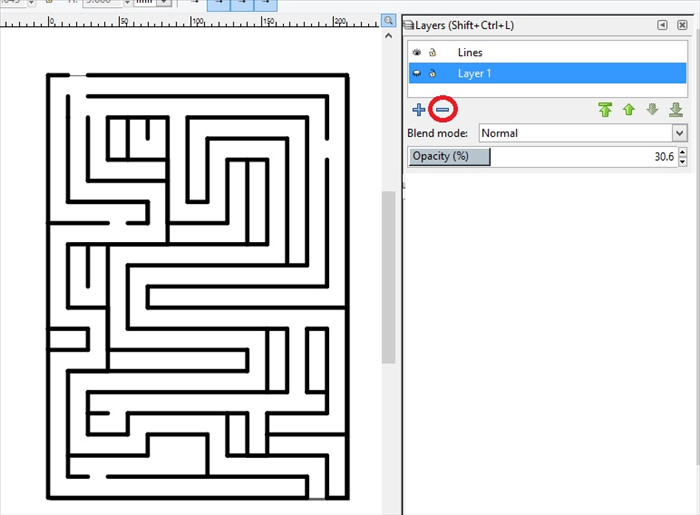
** When you are finished making the maze, the easiest way to print only the lines is to
Click on Layer1 and click on the minus sign to delete the colored maze.
Have fun making simple and complicated mazes and experimenting with a different number of rows and columns!