How to Make Digital Numbers with Paper Strips (Easy DIY Craft Tutorial)
Learn how to easily craft cool digital-style numbers using simple paper strips. This fun DIY project is perfect for kids and beginners, offering endless creative possibilities for decorations and gifts.
What You'll Need
- Colored paper or cardstock (various colors if desired)
- Ruler
- Pencil
- Scissors or craft knife (with a cutting mat if using a knife)
- Glue stick or craft glue
- Cutting mat (optional, recommended for craft knife use)
- Magnets (optional, for making refrigerator numbers)
- Double-sided adhesive or tape (optional, for alternative fastening)
Ever wondered how to make those cool, retro digital-style numbers you see on clocks and displays? With just some paper strips and a little creativity, you can craft your own! This easy DIY craft tutorial will guide you through creating custom digital numbers that are perfect for decorations, educational tools, or unique gifts. Whether you're a beginner or crafting with kids, you'll find this project fun, engaging, and incredibly versatile.
For numbers that hold their shape well, opt for slightly thicker paper or cardstock (65-80 lb or 175-220 gsm). Brighter colors will make your digital numbers pop!
Prepare Your Paper Strips
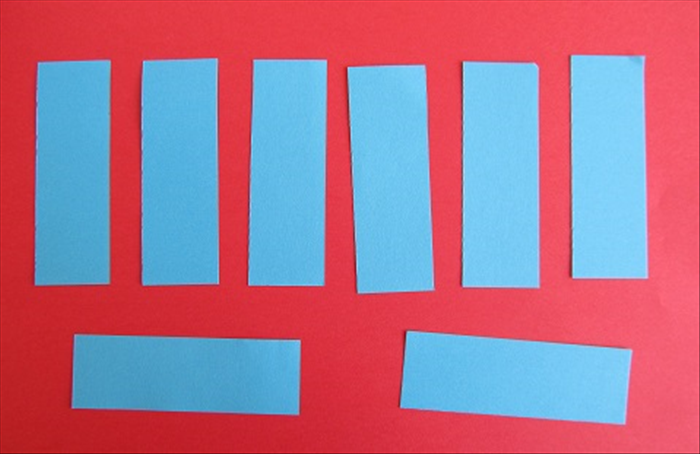
The foundation of perfect digital numbers lies in precise paper strips. Start by deciding the overall size of your numbers. A good starting point for strip width is 0.5 to 1 inch (1.25 to 2.5 cm). Using your ruler and pencil, mark out strips of your chosen width on your paper or cardstock. The length will vary, but aim for strips long enough to form the segments of your numbers (e.g., 6-8 inches or 15-20 cm). Carefully cut along your pencil lines using scissors or a craft knife, ensuring straight and uniform strips. Uniformity is key for clean-looking digital numbers, so take your time with this step.
Create the Seven-Segment Display Elements
Digital numbers are based on a seven-segment display. Each number (0-9) is formed by activating a combination of these seven straight segments. You'll need two types of segments: straight pieces and L-shaped corner pieces. For straight segments, simply cut your prepared strips to the desired length (e.g., 3-4 inches or 7.5-10 cm). For the L-shaped corner pieces, take a strip and fold it carefully at a right angle. Trim the ends if necessary to form a clean 'L' shape. Secure the fold with a tiny dab of glue if it doesn't hold naturally. You'll need several of these for each number.
For crisp folds, lightly score the paper with a dull knife or the back of a ruler before folding. This helps prevent jagged edges and ensures a sharper angle for your L-shaped segments.
Assemble Your Digital Numbers (0-9)

Now comes the fun part: assembling your digital numbers! Lay out your segments on a flat surface to visualize the number before gluing. This helps ensure correct placement and alignment. Refer to the standard seven-segment display pattern to guide you. Apply a thin, even layer of glue to the edges that will connect, then press them together firmly and hold for a few seconds until the glue sets. Work slowly, building each number segment by segment. For example:
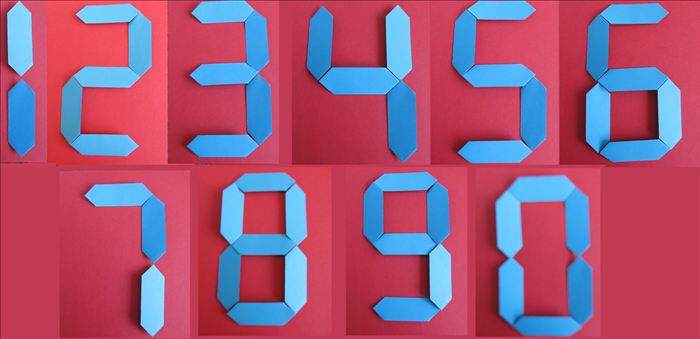
- Number 0: Requires 6 segments arranged in an oval-like shape.
- Number 1: Uses 2 vertical segments on the right.
- Number 2: Needs 5 segments to form its distinctive shape (top, top-right, middle, bottom-left, bottom).
- Number 3: Uses 5 segments (top, top-right, middle, bottom-right, bottom).
- Number 4: Comprises 4 segments (top-left, middle, top-right, bottom-right).
- Number 5: Formed with 5 segments (top, top-left, middle, bottom-right, bottom).
- Number 6: Uses 6 segments, resembling an 'O' with a missing top-right corner.
- Number 7: Requires 3 segments (top, top-right, bottom-right).
- Number 8: All 7 segments are used.
- Number 9: Uses 6 segments, an 'O' with a missing bottom-left corner.
Ensure all segments are aligned to create a neat and sturdy digital number. Allow ample drying time before handling.
Customize and Explore Creative Uses

Your DIY paper numbers are ready for customization! Experiment with different paper colors, patterns, and textures to create unique effects. You can also vary the size of your strips to make larger or smaller numbers. Here are some creative ideas:
- Magnets: Glue small magnets to the back of your numbers to create fun refrigerator magnets for learning or display.
- Banners & Garlands: String multiple numbers together for birthday banners, anniversary decorations, or holiday greetings.
- Educational Tools: Use them to teach kids numbers, counting, or simple math.
- Greeting Cards: Adhere them to handmade cards for a personalized touch.
- Wall Decor: Create a set of numbers to display important dates or a countdown.
Let your imagination run wild with these versatile paper strip creations!
To make your numbers more durable, especially if they'll be handled frequently, consider laminating them or applying a clear sealant spray once the glue has fully dried.
When using a craft knife, always do so on a self-healing cutting mat and exercise extreme caution. Adult supervision is recommended for children using sharp tools. Avoid applying too much glue, as it can warp the paper or leave visible residue.
You've successfully mastered the art of making digital numbers with paper strips! This easy paper craft not only results in a visually striking product but also hones your precision and creativity. From simple decorations to educational aids, these geometric paper numbers offer endless possibilities. So grab more paper, and continue exploring the wonderful world of DIY paper art. Happy crafting!