How to make a connect the dots picture in Inkscape
This guide will show the basics of creating a connect the dots picture using Inkscape. Inkscape is a free professional vector graphics editor that works on Windows, Linux and macOS. You can download it from https://inkscape.org/
What You'll Need
- Inkscape
- connect the dots
- home schooling
- children
- kids
Steps
- 1
Step 1
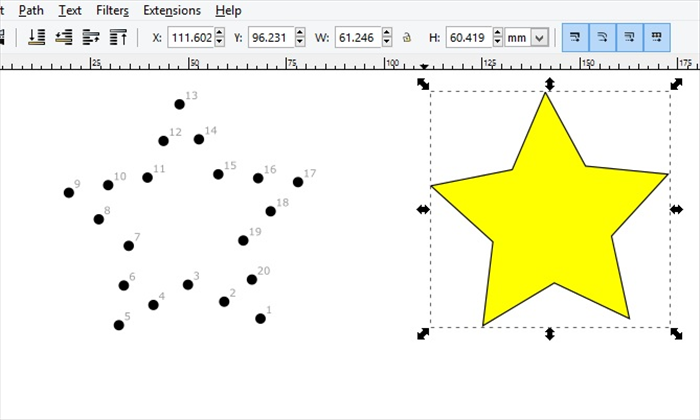
This guide will show you the basics for creating a connect the dots picture with Inkscape using a star as an example.
- 2
Step 2
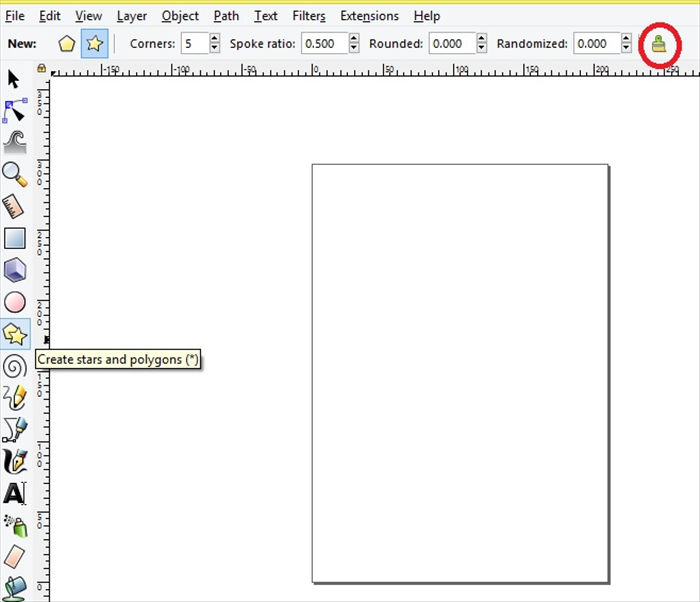
Select the Create stars and polygons tool.
Click on the brush icon to set it to default
Create a star
-
- 3
Step 3
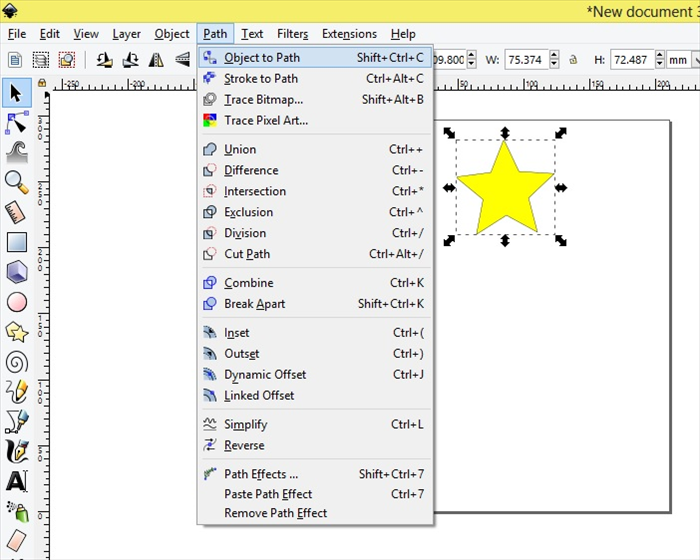
Select the star - Click on Path - Object to Path
- 4
Step 4
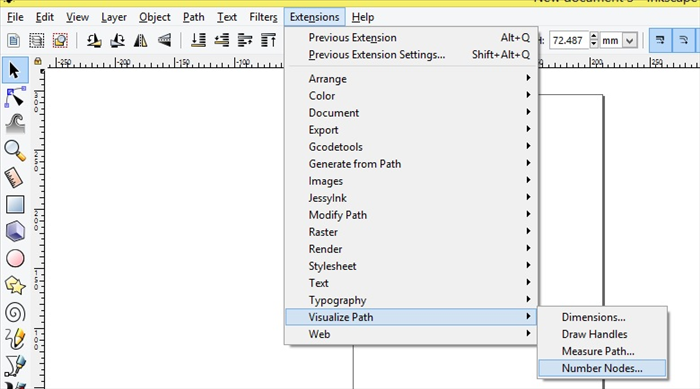
Click on Extensions - Visualize Path - Number Nodes
- 5
Step 5
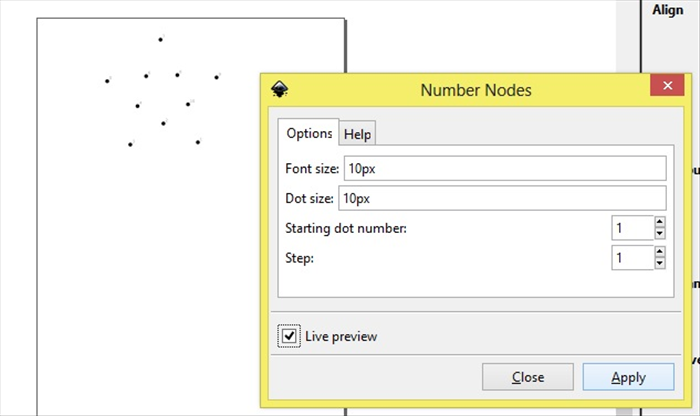
The Number Nodes menu will appear. Copy the setting and click Apply
- 6
Step 6
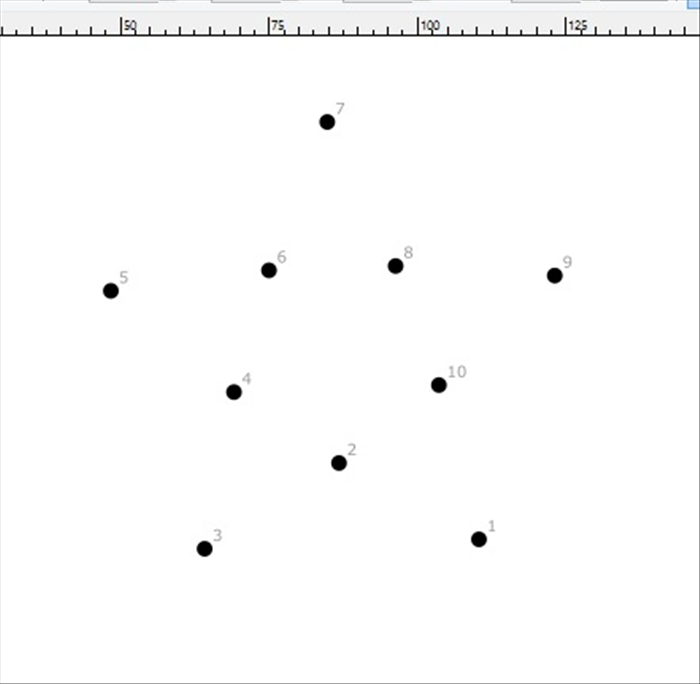
Result
- 7
Step 7
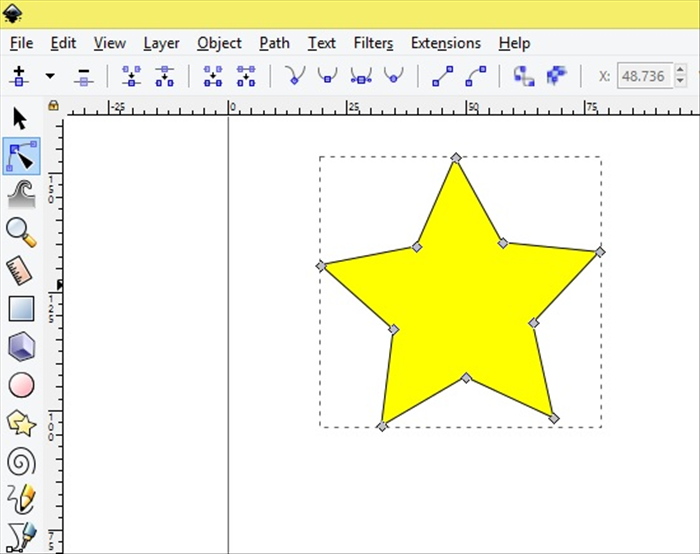
After step 3 when you have selected the star - object to path
you can use the select the node icon to add more nodes to be connected as number dots.
- 8
Step 8
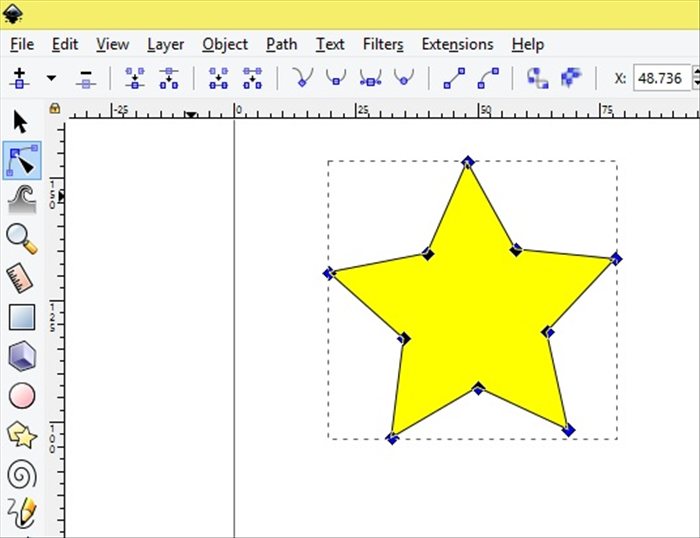
Drag the node select box around the star. All the node should turn blue.
*You can select each node while holding down the shift key on your keyboard.
- 9
Step 9
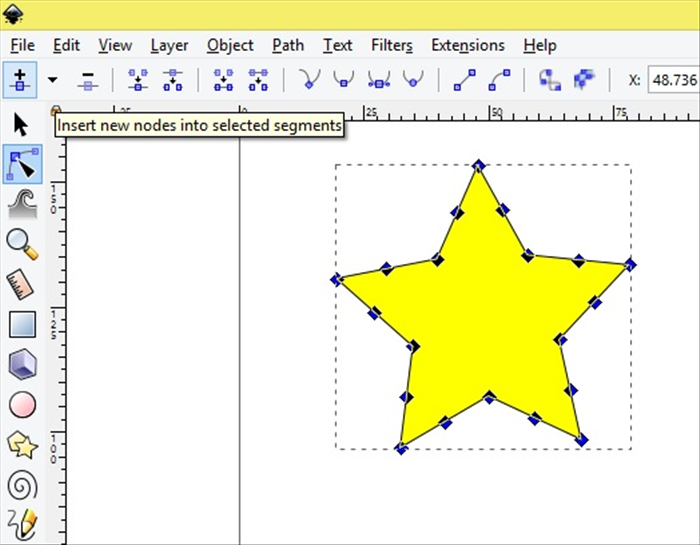
Click once on the Insert new nodes into selected segments.
*If you click too many times by mistake do not click on remove selected segments. It will delete the whole star.
Click on Edit - Undo or ctrl -Z on your keyboard.
- 10
Step 10
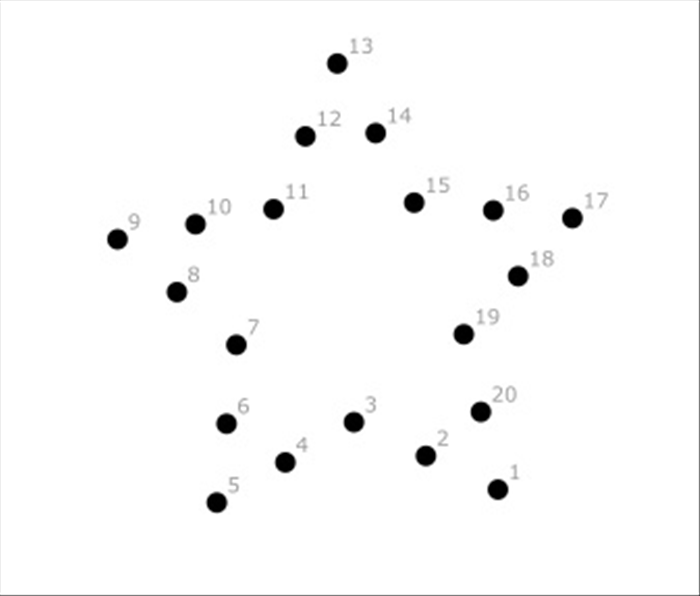
Click on Extensions - Visualize Path - Number Nodes and click apply in the Number Nodes menu.
- 11
Step 11
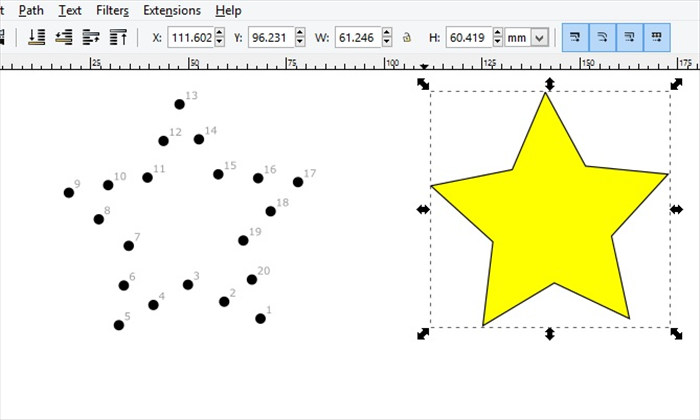
Enjoy experimenting with different shapes.