How to make a flipbook with Inkscape
This guide will show you how use Inkscape to create a template for each page of your flipbook and then use it for creating animations with Inkscape or printed out for hand drawing .
What You'll Need
- flipbook
- flip book
- Inkscape
- template
- animation
Steps
- 1
Step 1

An animated flipbook is created with slight changes in each page. They can have slight position, stretching, color change, and other slight changes in the drawings.
- 2
Step 2
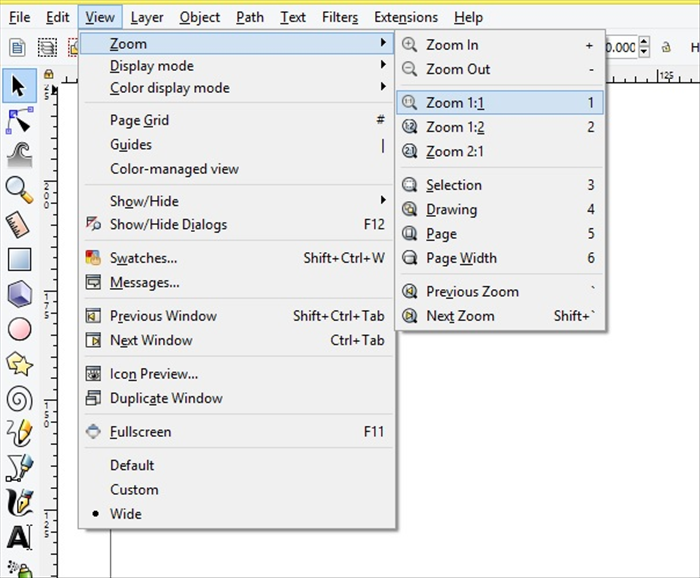
2. Open Inkscape Click on View - Zoom - 1-1
-
- 3
Step 3
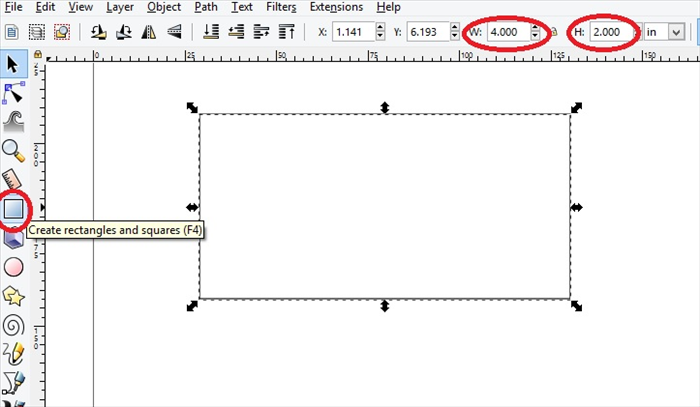
3. Click on the create rectangle icon.
Create a rectangle.
Select the rectangle.
Change the width to double the height
- 4
Step 4
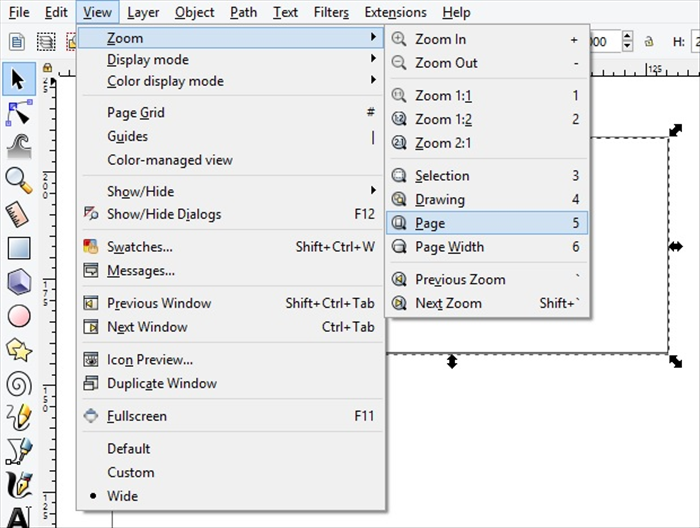
4. Click View - Zoom - to page
- 5
Step 5
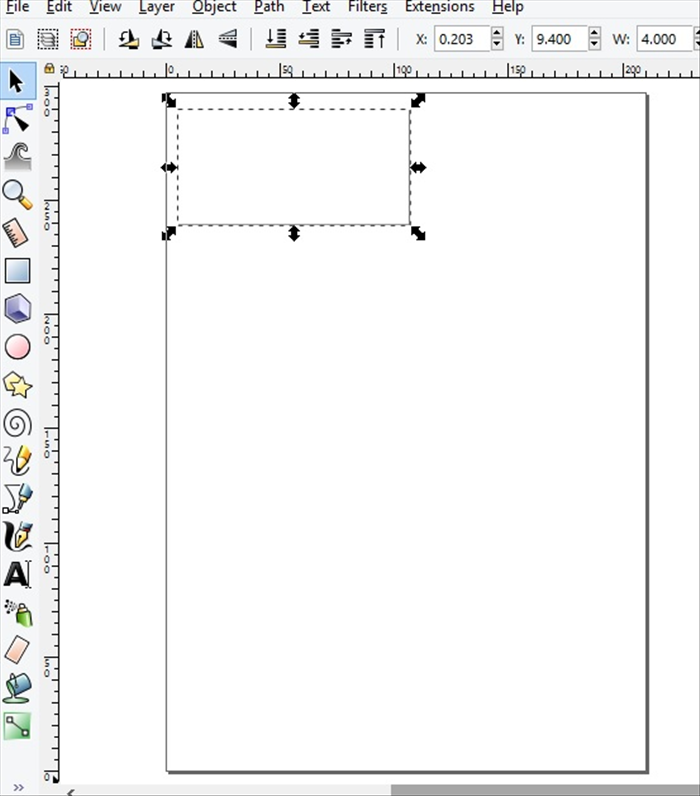
5. Select the rectangle and drag it to the top corner of the page
- 6
Step 6
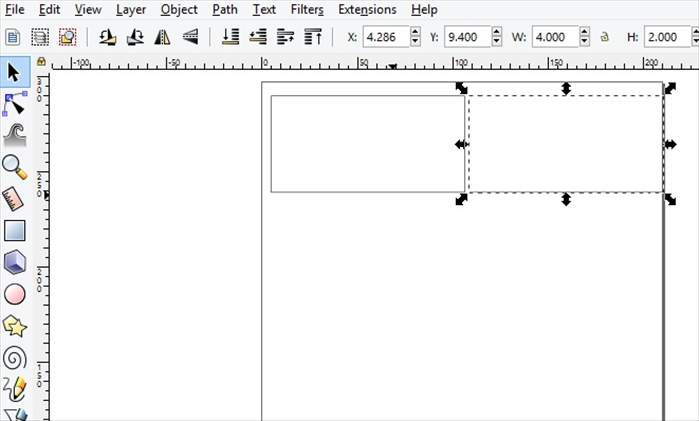
6. Select the rectangle.
Press Ctrl and D on your keyboard to make a copy.
Drag the copy next to the first rectangle.
Leave a little space to make it easier to cut out after printing the finished page
- 7
Step 7
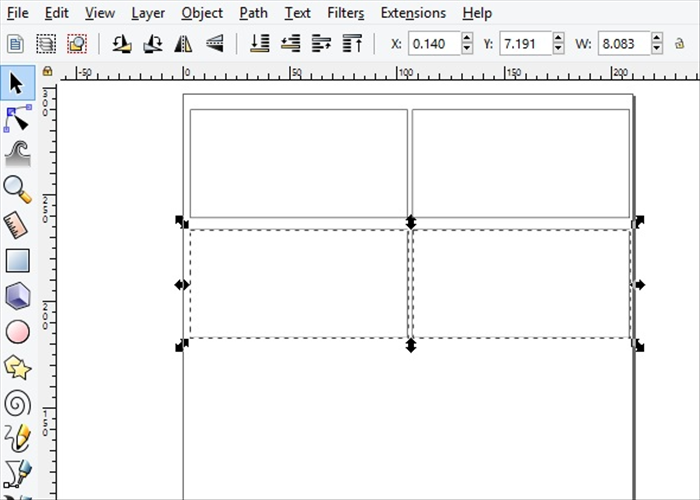
7. Select both rectangles..*You can use the arrow key on your keyboard to center them.
Press Ctrl and D to copy them in place.
Drag the copy below the first set of rectangles.
You can Press arrow key on your keyboard to move them downward
- 8
Step 8
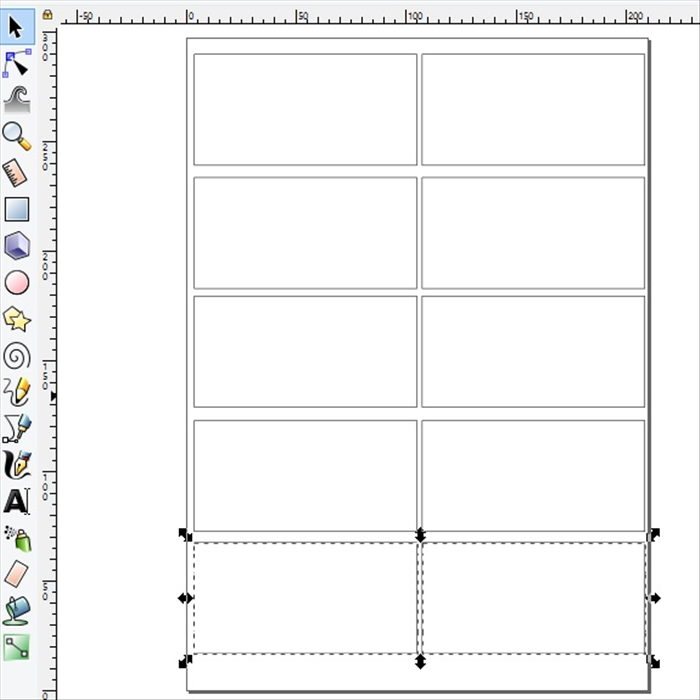
8. Select the new set.
Ctrl and D to copy.
Drag the copy down.
Repeat until the page is filled
- 9
Step 9
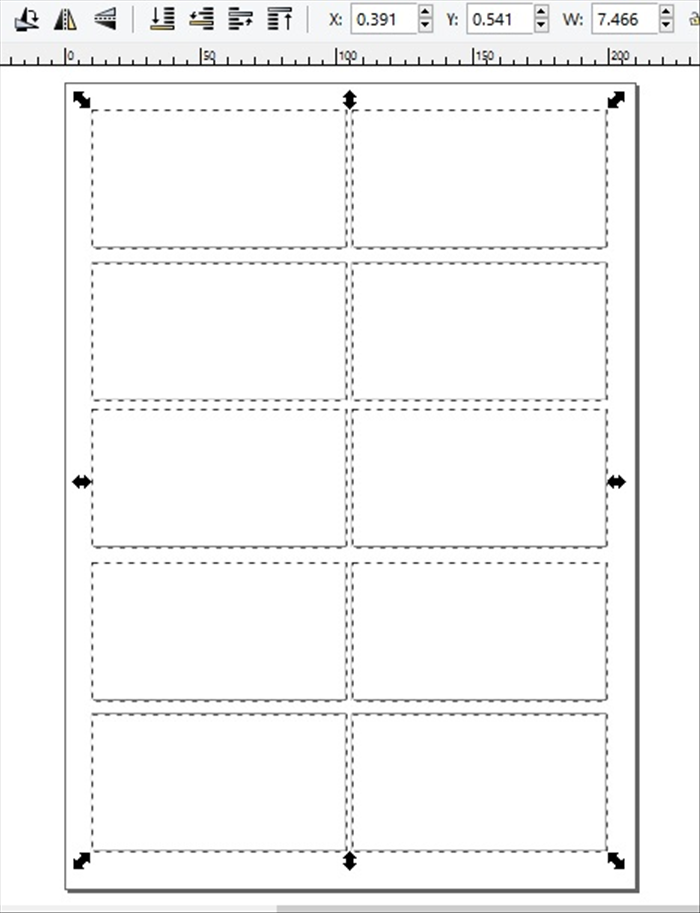
9. Save this file. If you want to draw your flipbook by hand you can print out this page as many times as needed or use it to create the animation drawings with Inkscape.
* Keep in mind the printer setting for no margings. * If you want the page to print with margins, Select all the rectangles and ajust their size so that there is a margin around the top, bottom and sides of the page.
- 10
Step 10
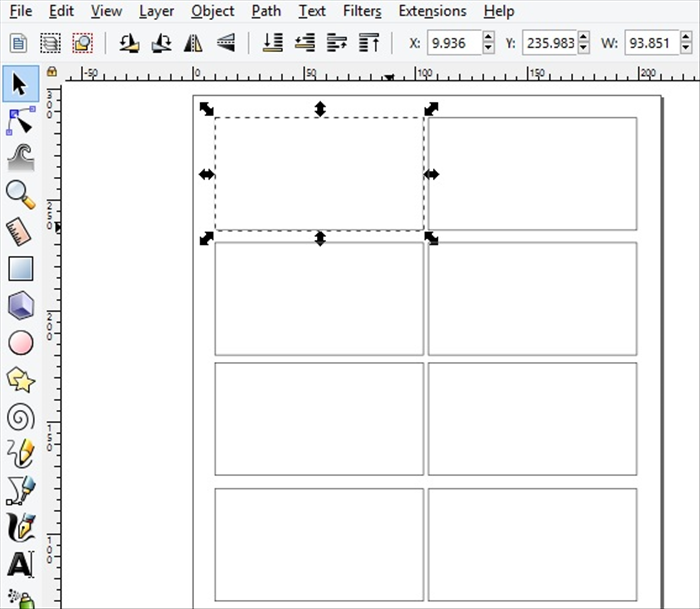
10. Select the top left rectangle Click Ctrl and D on your keyboard
- 11
Step 11
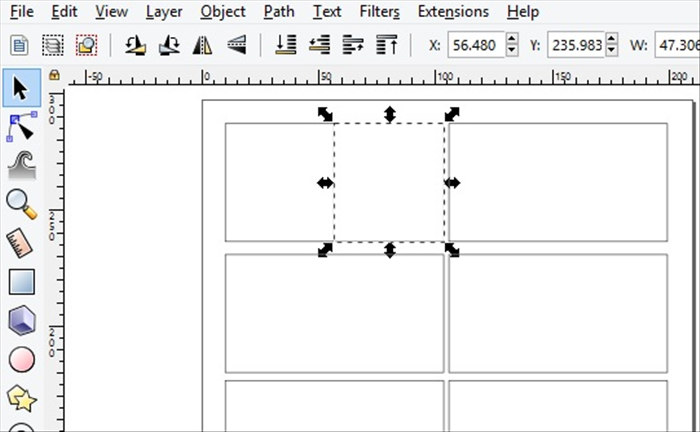
11. Select the copy.
Drag the middle arrow on the left side to the right, to make it into a square.
Select the square - Ctrl and D and drag the copy over to the right side of the next rectangle.
- 12
Step 12
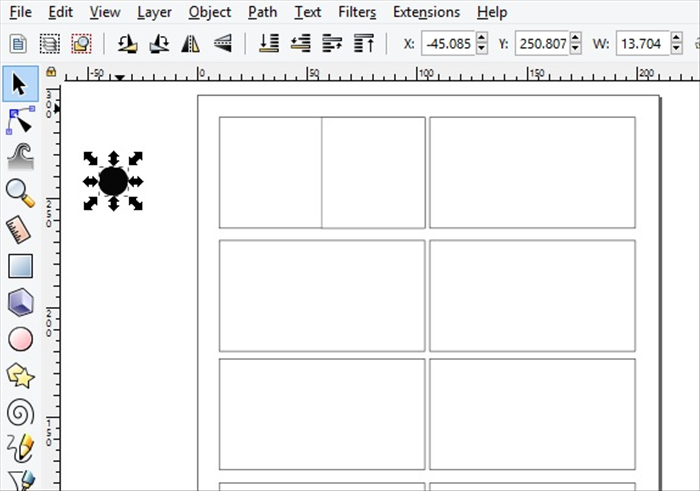
12. Create your drawing.
*In this case a simple circle was used for demo purposes. You can use any drawing.
- 13
Step 13
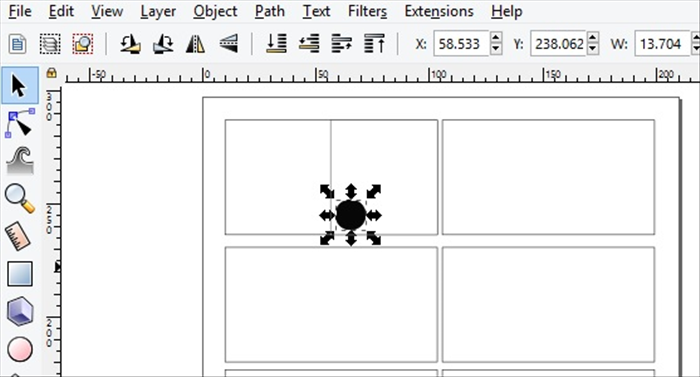
13. Drag the drawing onto a place in the square where you want the animation to begin
- 14
Step 14
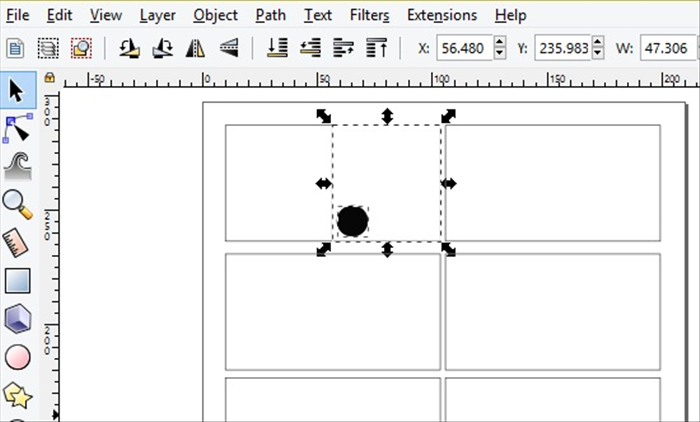
14. Select the square and the circle.
* It is easier to select the square then press the shift key on your keyboard and select the circle too.
Press ctrl and D to make a copy
- 15
Step 15
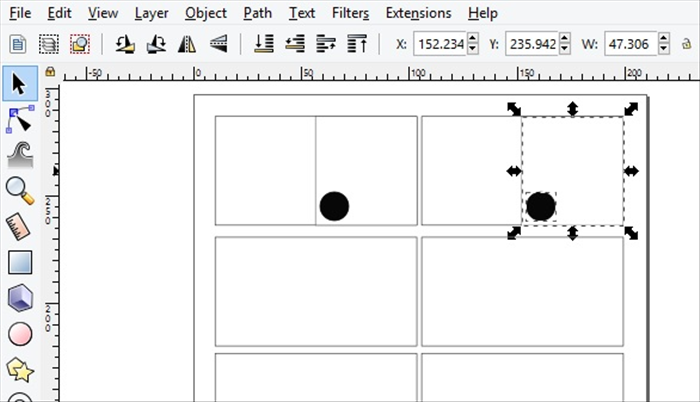
15. Drag the copy to the right side of the next rectangle
- 16
Step 16
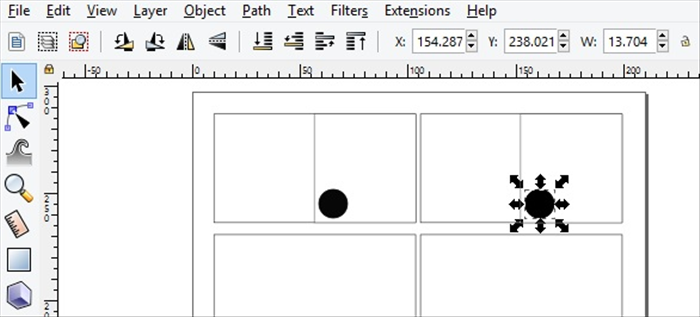
16. Select the drawing.
- 17
Step 17
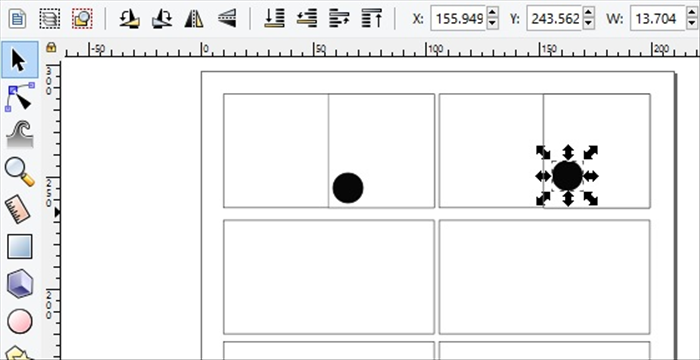
17. Move it slightly. *or any other slight change.
- 18
Step 18
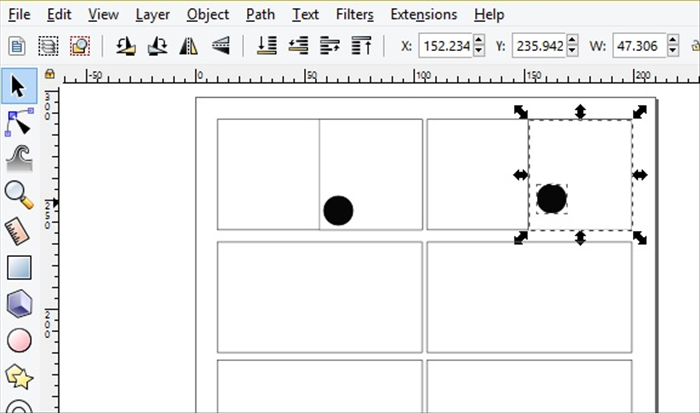
18. Select the square and the drawing.
Ctrl and D to copy
- 19
Step 19
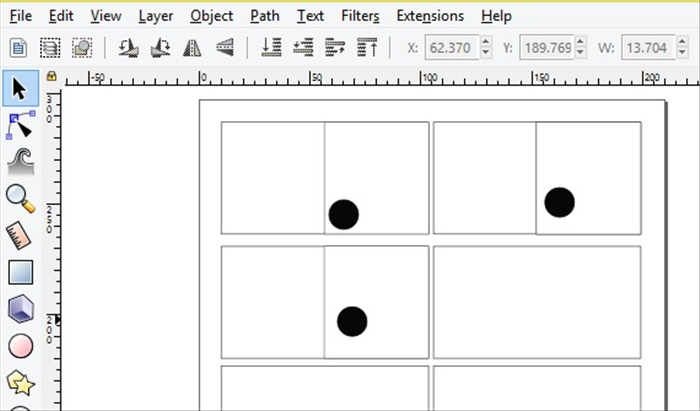
19. Move the copy to the next rectangle.
Move the drawing slightly
- 20
Step 20
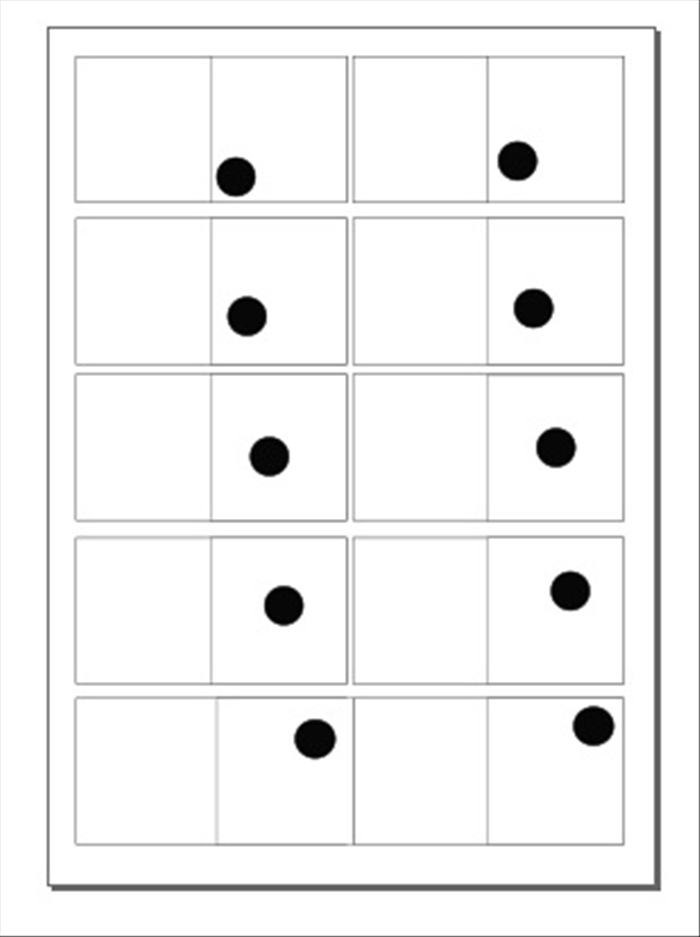
20 Repeat - copy the square and drawing, select the drawing and move it slightly for each page of your animation.
In this case there are 10 pages. Save this file as Page 1 to 10 . for easy reference.
Copy the last square and it's drawing.
Open the the blank template you saved in Step 9.
Paste it into the first square, make the slight change in the drawing to continue where you left off creating more pages of your flipbook.
In this case it would be saved as a new file named Page 11 to 20
Repeat creating and saving as many files as you need to complete your flipbbok. Have fun experimenting!