How to make cardboard butterfly wings for a kids' costume
Cut butterfly wings from a cardboard box, paint and decorate them, and add string arm loops so kids can wear them.
What You'll Need
- Large cardboard box
- White glue
- Paint (acrylic or poster paint)
- Colored paper
- String
- Pencil
- Scissors
- Craft knife (adult use only)
- Screw or other sharp, pointed object
- Paintbrush
These butterfly wings are cut from a cardboard box, painted and decorated with paper shapes. String loops hold them on like a backpack. Kids can paint and decorate, and an adult handles the cutting.
Gather your materials
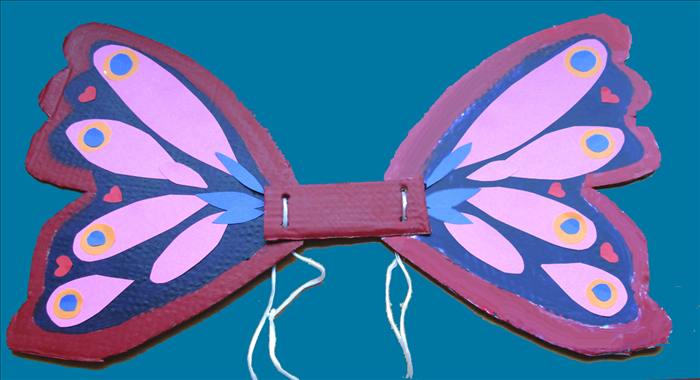
Find a large, clean cardboard box. A flattened soda case works well. Get the rest of the materials and tools listed above ready. The photo shows the finished wings.
Draw the wing outline
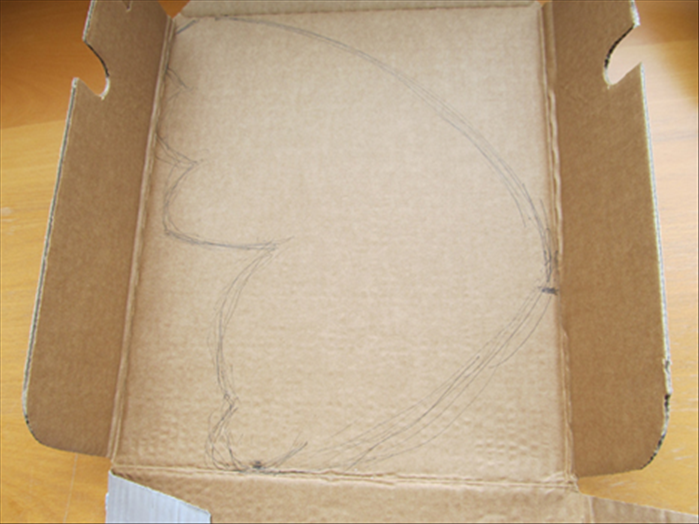
Open the box out flat. On the plain inside, draw one wing in pencil. Make it a little taller than the child's back so the wings stick out past the shoulders.
Cut out the wings
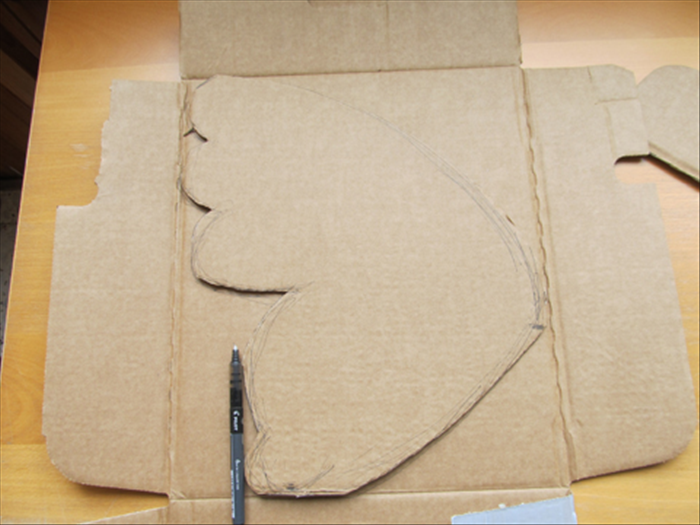
Cut along the pencil line. Lay the first wing on the remaining cardboard, trace around it and cut out a second wing so the pair matches. An adult should do any cutting with a craft knife.
Join the wings
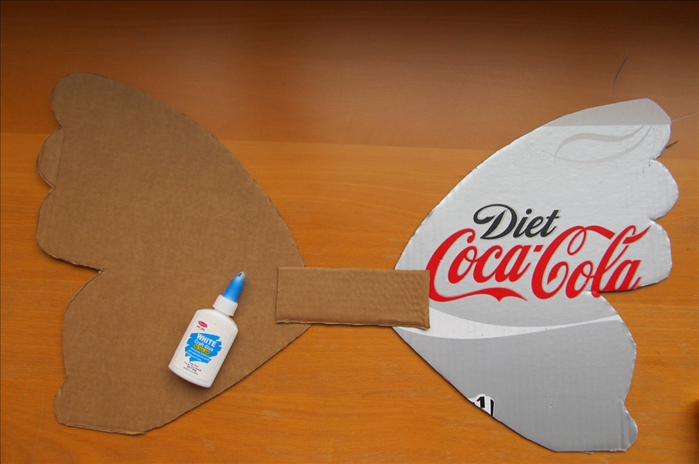
Lay the two wings side by side with a small gap between them. Glue a strip of cardboard across the gap with white glue to hold them together. Let the glue dry completely.
Mark the string holes

Mark four dots on the center strip, two near each end, as in the photo. The string for the arm loops goes through these holes later.
Pierce the holes

Push a screw or other sharp, pointed object through each dot. Make each hole big enough for the string to pass through.
Next, paint and decorate the wings. The wings in step 1 have an outline painted around the edges and on the center strip, and the rest painted in a second color. Paint both sides so the printed side of the box doesn't show, and let the front dry before you turn the wings over. Then cut paper shapes such as teardrops, circles and hearts in pairs and glue one of each pair on each wing, so the two wings match.
When the paint and glue are dry, thread a length of string in through the two holes at one end of the strip and tie it into a loop big enough for the child's arm. Do the same at the other end. Slip the loops over the shoulders like a backpack.
Safety
An adult should do all cutting with a craft knife and pierce the holes with the screw. Keep the string loops loose and never tie string around a child's neck.