DIY Magnetic Shopping List with Pen Holder | Easy Fridge Memo Pad Craft
Create a handy magnetic shopping list or memo pad for your fridge using recycled materials. Includes a clever pen holder for easy access.
Tired of misplaced shopping lists and pens? This DIY project transforms everyday recycled materials into a super convenient magnetic shopping list or memo pad for your refrigerator. Not only is it an eco-friendly way to repurpose junk mail and cardboard, but it also features a clever pen holder, ensuring you always have what you need to jot down groceries or reminders right when inspiration strikes. It's a simple, rewarding craft perfect for anyone looking to add a touch of organization and sustainability to their kitchen!
- Junk mail or scrap paper: Old flyers, printer paper scraps, or even pages from expired notebooks work perfectly for your notepad.
- Cardboard: A sturdy piece from an old cereal box, packaging, or similar for the backing and pen holder.
- Recycled magnets: Look for these on old magnetic advertisements, takeout menus, or use craft magnets if you have them.
- Craft glue or hot glue gun with glue sticks: For strong adhesion. Hot glue is faster, craft glue offers more working time.
- Pen or pencil: The one you'll be using for the holder, to ensure a perfect fit.
- Scissors or paper cutter: For precise cutting of paper and cardboard.
- Ruler: Essential for accurate measurements and straight cuts.
- Pencil: For marking measurements and cutting lines.
Step 1: Prepare Your Paper Pad
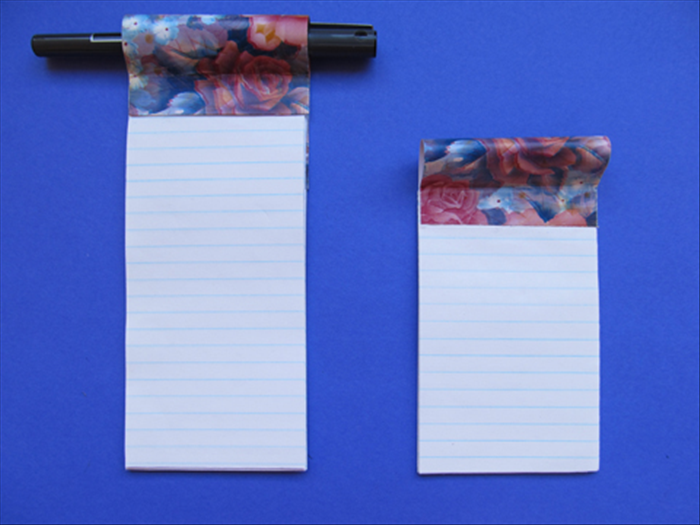
The foundation of your magnetic memo pad is the paper itself. You'll turn your stack of recycled paper into a neat, tear-off pad.
1. Cut Your Paper: Using your ruler and pencil, measure and cut your junk mail or scrap paper into uniform rectangles. A standard size like 3x5 inches or 4x6 inches works well, but feel free to customize. Aim for about 50-100 sheets for a decent-sized pad.
2. Stack and Align: Carefully stack all your cut paper sheets. Tap them gently on a flat surface to ensure all edges are perfectly aligned. Use a couple of binder clips or clothespins to hold the stack firmly together on the sides.
3. Apply Glue to One Edge: With the stack held tightly, apply a thin, even line of craft glue along one of the short edges. This will be the top edge of your notepad. Ensure the glue covers the entire edge from corner to corner. If using a hot glue gun, apply quickly but carefully.
4. Dry Thoroughly: Allow the glue to dry completely. For best results, place a heavy book on top of the glued edge while it dries to help the pages bond firmly and stay flat. This might take a few hours or overnight depending on the glue.
For a really clean, professional look and easier tearing, consider using a paper cutter instead of scissors. Also, bookbinding glue can provide a more flexible and durable bond for your paper pad.
Step 2: Craft the Pen Holder

This clever addition keeps your pen right where you need it, preventing endless searching.
1. Measure and Cut Cardboard Strip: Take your chosen pen and a piece of cardboard. Cut a strip of cardboard that is approximately 1 inch wide and long enough to wrap comfortably around your pen, plus an extra inch or two for gluing (e.g., 4-5 inches depending on your pen's thickness).
2. Form the Loop: Wrap the cardboard strip tightly around the body of your pen. Mark where the cardboard overlaps to form a snug loop. Remove the pen.
3. Score and Glue: Score the cardboard at your marked points with a ruler and the back of your scissors (don't cut through!) to create crisp folds. Bend the cardboard into a loop shape. Apply craft glue or hot glue to the overlapping end and secure it, creating a sturdy holder. Make sure the loop is just large enough for your pen to slide in and out easily without being too loose or too tight.
4. Allow to Dry: Let the pen holder dry completely to ensure it's strong and stable.
Step 3: Attach the Magnetic Backing

Now, let's make your memo pad magnetic so it can proudly hang on your fridge!
1. Cut the Backing: Cut a piece of cardboard that is slightly smaller than your paper pad, ensuring it won't show from the front but will provide a solid surface for the magnets.
2. Attach Magnets: Glue your recycled magnets to one side of this cardboard backing. Depending on the strength of your magnets and the size of your pad, you might need one, two, or even three magnets. Position them to distribute the weight evenly.
3. Attach to Paper Pad: Apply craft glue or hot glue to the *other side* of the magnetic cardboard backing (the non-magnetic side). Carefully align and press this backing onto the *back* of your prepared paper pad. Ensure it's centered and straight.
4. Press and Dry: Apply pressure and allow the glue to dry completely. If using craft glue, place a heavy object on top for better adhesion.
Ensure the magnets you choose are strong enough to hold the weight of both the paper pad and a pen. If they're too weak, your beautiful new memo pad might slide down or fall off the fridge.
Step 4: Final Assembly

It's time to bring all the pieces together for a fully functional magnetic memo pad!
1. Position the Pen Holder: Decide where you want your pen holder to be. Typically, it's glued to the magnetic cardboard backing, either alongside the paper pad or slightly below it. Make sure it doesn't obstruct the tearing of pages or make the pad unbalanced.
2. Glue Pen Holder: Apply craft glue or hot glue to the bottom surface of your crafted pen holder loop. Firmly press it onto the magnetic cardboard backing in your desired position.
3. Final Drying: This is a crucial step for durability. Allow all glued areas to dry thoroughly and cure according to your glue's instructions. This might mean leaving it untouched for several hours or even overnight. Don't rush it!
Step 5: Customize and Decorate Your Pad

Now for the fun part! Make your magnetic shopping list uniquely yours.
- Decorative Touches: Use stickers, Washi tape, decorative paper, fabric scraps, paint, or markers to embellish the cardboard backing or the pen holder. Get creative with patterns, colors, or inspiring quotes!
- Different Shapes & Sizes: Experiment with cutting your paper and backing into different shapes (e.g., a cloud, a house) or varying the size for different purposes (a small pad for quick notes, a larger one for extensive shopping trips).
- Stronger Magnets: If you find your pad is a bit heavy or slides easily, you can always add more magnets or replace them with stronger, neodymium magnets (ensure proper handling, especially around children and electronics).
- Refillable Design: Instead of permanently gluing the paper pad to the backing, you could create a small pocket or use Velcro dots to attach new paper pads when the old one runs out.
Step 6: Troubleshooting and Advanced Tips

Encountering an issue or just want to make your craft even better? Here are some solutions and tips.
- Weak Magnets / Pad Falling Off: If your pad isn't holding firm, try adding more magnets, or upgrade to stronger, self-adhesive craft magnets. Ensure the glue holding the magnets to the cardboard is secure.
- Paper Pad Falling Apart: This usually indicates insufficient glue or drying time. Reapply a thin, even layer of craft glue along the edge, ensuring it penetrates slightly between the sheets, and let it dry under pressure for a full 24 hours.
- Pen Holder Too Loose/Tight: If your pen holder is too loose, you can glue a small strip of felt or fabric inside the loop to make it snugger. If it's too tight, carefully trim a tiny bit off the width of the cardboard strip or create a new one slightly larger.
- Uneven Paper Edges: For the cleanest edges, always use a sharp pair of scissors or invest in a paper cutter. Stacking your paper perfectly before cutting also helps ensure uniformity.
- Making it Refillable: Design the main backing with a designated area where new paper pads can be attached with a small amount of removable adhesive (like rubber cement) or even small, reusable sticky tabs.
And there you have it! A practical, personalized, and eco-friendly magnetic shopping list or memo pad, complete with its own pen holder. This project is not just about crafting; it's about smart organization and reducing waste, one piece of junk mail at a time. Hang it on your fridge, filing cabinet, or any magnetic surface, and enjoy the convenience it brings to your daily life. Happy crafting!