How to Print Envelopes in Word: Mail Merge Names and Addresses
Learn how to use Microsoft Word's Mail Merge feature to create a mailing list and print multiple envelopes with names and addresses for cards, invitations, and more.
What You'll Need
- print envelopes in Word
- mail merge envelopes
- Microsoft Word envelope printing
- how to print addresses on envelopes
- print multiple envelopes Word
- create mailing list Word
- envelope printing template
- print invitations envelopes
- DIY envelope printing
- names and addresses on envelopes
- mail merge step by step
- print return address on envelopes
- easy way to print envelopes
- list of addresses on envelopes
- greeting cards
Sending out a large batch of mail, like holiday cards, wedding invitations, or business announcements, can be a daunting task, especially when it comes to addressing each envelope by hand. Fortunately, Microsoft Word's powerful Mail Merge feature offers a professional, efficient, and time-saving solution. This guide will walk you through the step-by-step process of creating a mailing list and seamlessly printing personalized names and addresses onto multiple envelopes, ensuring a polished look for all your correspondence.
Prepare Your Mailing List (Data Source)
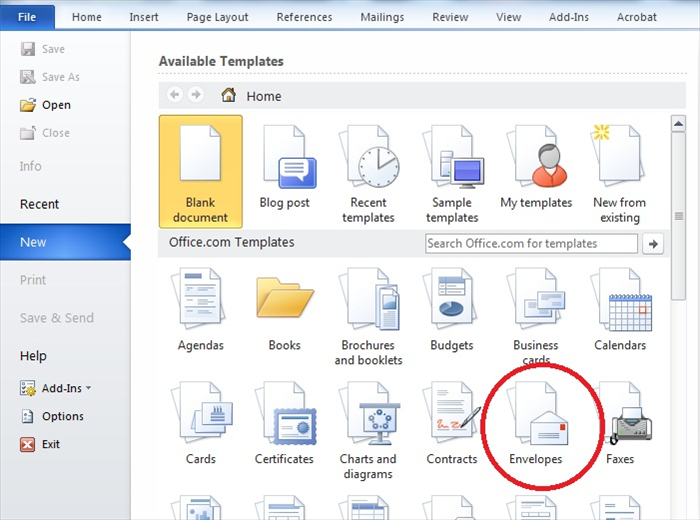
The first crucial step is to organize your recipient data into a format that Word can understand. An Excel spreadsheet is the most common and flexible choice, but you can also use Outlook Contacts or even create a new list directly within Word. Ensure your data is clean, accurate, and consistently formatted.
If using Excel, use clear column headers like 'First Name', 'Last Name', 'Address Line 1', 'Address Line 2', 'City', 'State', 'Zip Code', and 'Country'. This makes mapping fields in Word much easier. Verify that there are no blank rows or columns interrupting your data set.
Set Up Your Envelope in Microsoft Word
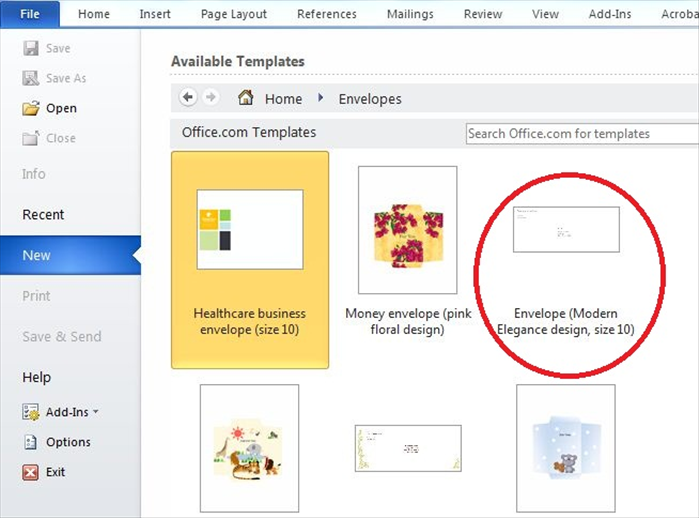
Before you begin the mail merge, you need to tell Word what kind of document you're creating – an envelope! Open a blank Word document to start.
1. Go to the 'Mailings' tab on the Ribbon.
2. In the 'Create' group, click on 'Envelopes'.
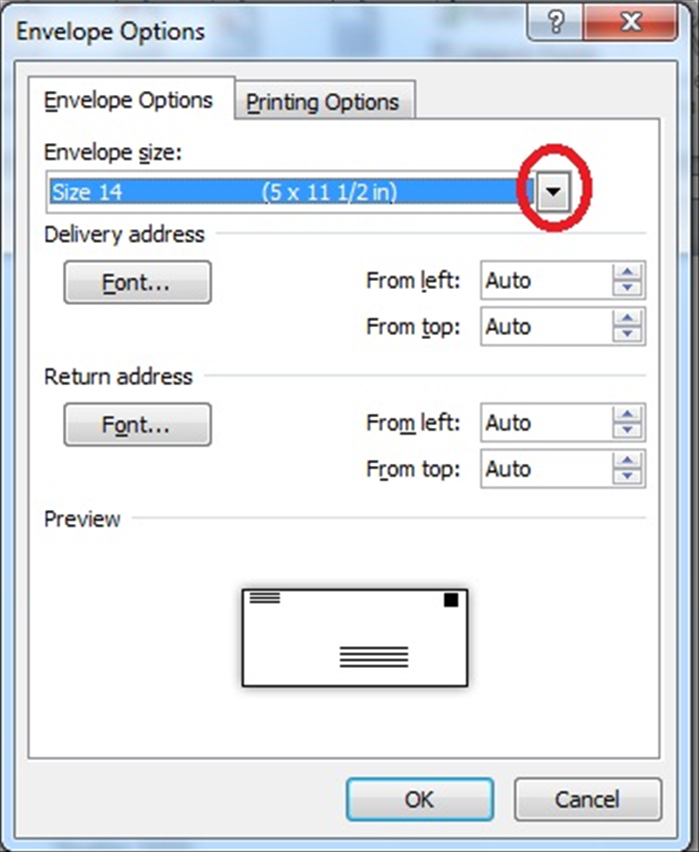
3. An 'Envelope Options' dialog box will appear. Select the 'Envelope Options' tab.
4. From the 'Envelope size' dropdown, choose the standard size that matches your envelopes (e.g., Size 10 for business, A7 for invitations). If your size isn't listed, choose 'Custom size' and enter the dimensions.
5. (Optional) In the 'Delivery address' section, if you want to include a return address, make sure it's correct. Word often auto-populates this from your user information.
6. Click 'Add to Document'. Word will create a new document formatted as an envelope, showing your return address if you included one.
Do not delete the blank space where the delivery address will go. This is where your merge fields will be inserted.
Initiate the Mail Merge Wizard for Envelopes
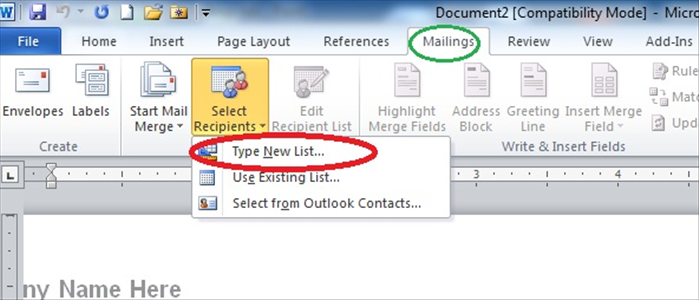
Now that your envelope document is ready, it's time to start the Mail Merge process.
1. With your envelope document still open, go back to the 'Mailings' tab.
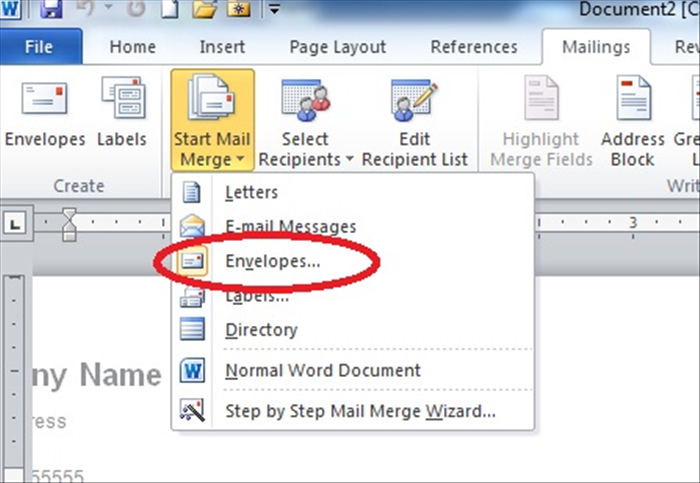
2. In the 'Start Mail Merge' group, click 'Start Mail Merge'.
3. From the dropdown menu, select 'Envelopes'. (Even though you set it up in the previous step, this officially initiates the merge process for envelopes).
Connect to Your Recipient List
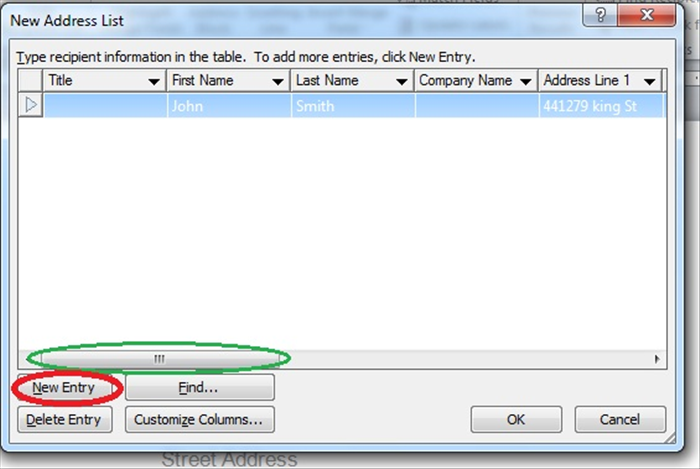
This step links your envelope document to your data source, telling Word where to pull the address information from.
1. In the 'Mailings' tab, in the 'Start Mail Merge' group, click 'Select Recipients'.
2. You'll typically choose 'Use an Existing List...'. Browse to and select your Excel file (or other data source) and click 'Open'.
3. If prompted to select a table, choose the worksheet that contains your mailing list and ensure 'First row of data contains column headers' is checked, then click 'OK'.
4. If you chose 'Type a New List', a 'New Address List' dialog box will appear. Fill in your recipient details directly. You can customize columns if needed.
5. The 'Mail Merge Recipients' dialog box will appear. Here, you can sort, filter, or deselect specific recipients if you don't want to print envelopes for everyone on your list. Click 'OK' when done.
Design Your Envelope Layout
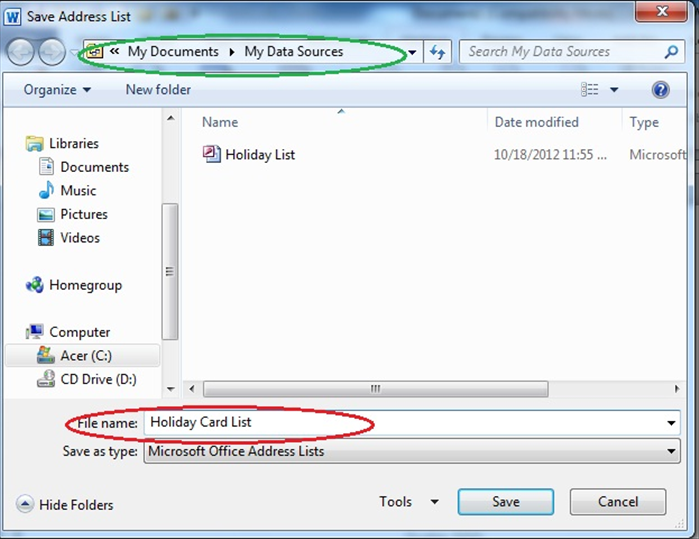
Now you need to tell Word exactly where each piece of address information should appear on the envelope.
1. Click into the empty space on your envelope document where the delivery address should go.
2. In the 'Mailings' tab, in the 'Write & Insert Fields' group, click 'Address Block'.
3. The 'Insert Address Block' dialog box will appear. Here you can choose the format for the recipient's name and address. Preview the options to see how it will look. You can choose to include or exclude the company name, insert postal address, etc.
4. Click 'OK'. Word will insert an '«AddressBlock»' placeholder onto your envelope.
5. You can manually adjust the position of this placeholder by dragging it to ensure it's centered and positioned correctly on the envelope (usually a few inches from the top and left edges).
If you need more granular control, instead of 'Address Block', you can use 'Insert Merge Field' for each individual field (e.g., «First_Name» «Last_Name», «Address_Line_1», «City», «State» «Zip_Code»). This allows for custom spacing and formatting.
Preview and Refine Envelopes
It's essential to check your work before you print a whole batch. Previewing allows you to catch any layout issues or data errors.
1. In the 'Mailings' tab, in the 'Preview Results' group, click 'Preview Results'.
2. Word will replace the merge field placeholders with data from your first recipient. Use the left and right arrow buttons next to 'Preview Results' to scroll through each recipient's envelope.
3. Carefully check the alignment, font size, and overall appearance. Ensure all address lines are present and correctly formatted.
4. If you notice any issues with the layout, return to the previous step to adjust the position of the «AddressBlock» or individual merge fields. If there are data errors, you'll need to correct them in your original data source (e.g., Excel file) and then refresh the merge.
Complete the Mail Merge and Print
Once you're satisfied with the preview, it's time to print your envelopes!
1. In the 'Mailings' tab, in the 'Finish' group, click 'Finish & Merge'.
2. Select 'Print Documents...'.
3. The 'Merge to Printer' dialog box will appear. You can choose to print 'All' records, the 'Current record' (for testing a single envelope), or a specific 'From... To...' range.
4. Click 'OK'.
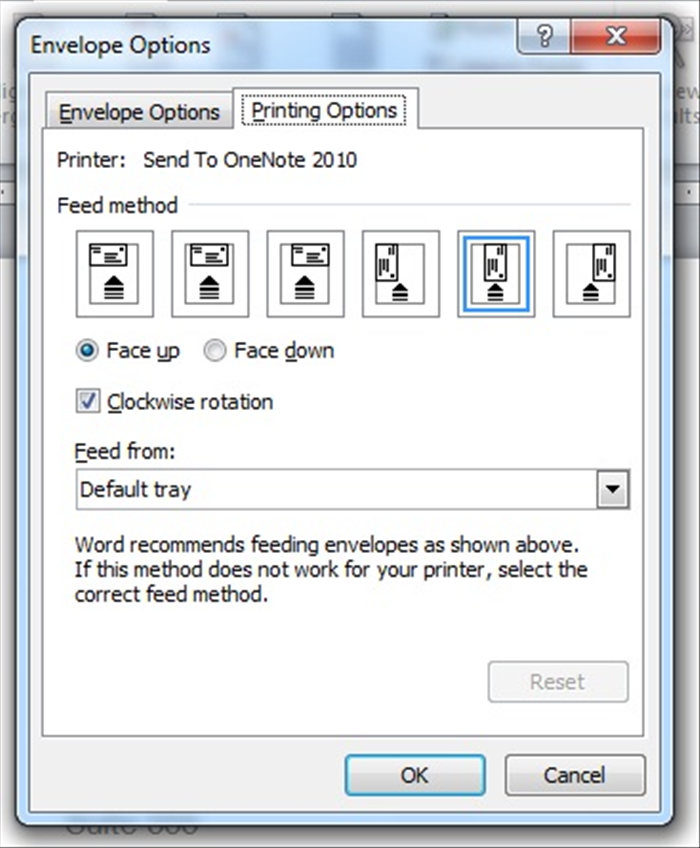
5. The standard 'Print' dialog box will open. Select your printer and check printer-specific settings, especially the paper source (many printers have a manual feed tray for envelopes) and orientation. Ensure you load your envelopes correctly into your printer's manual feed tray (check your printer's manual for specific instructions on face up/down and flap position).
6. Click 'Print'.
Troubleshooting Common Printing Issues
Envelope printing can sometimes be tricky. Here are solutions to common problems:
- Envelope Feeder/Orientation: The most common issue. Printers vary widely. Always ensure envelopes are loaded correctly (e.g., face up or down, flap leading or trailing, centered or edge-aligned) in the manual feed tray. Consult your printer's manual.
- Alignment Issues: If the address prints too high, too low, or off-center, double-check your envelope size settings in Word. You might need to experiment with custom margin settings within the 'Envelope Options' dialog, or adjust the position of your «AddressBlock» field on the document.
- Blank Envelopes: This usually means the data source isn't correctly linked, or the merge fields weren't inserted into the document. Go back to Steps 4 and 5 to verify your connections and field insertions.
- Test Print: Always print a single envelope first! Before printing your entire batch, use the 'From 1 to 1' option in the 'Merge to Printer' dialog to print just one envelope. This allows you to verify all settings without wasting many envelopes. If it prints incorrectly (e.g., on the wrong side), adjust your printer loading or Word settings accordingly before proceeding with the full print run.
Conclusion: Efficient Envelope Printing Achieved
By following these steps, you've successfully leveraged Microsoft Word's Mail Merge feature to efficiently print personalized addresses on multiple envelopes. This powerful tool not only saves you significant time and effort but also ensures a professional and consistent look for all your mailing projects. Keep your mailing lists organized and updated, and you'll be ready for any future occasion that calls for a polished presentation!